The As Is alignment rule is used when you have artwork outside every edge of the 12 field size, such as a Safety Paint edge.
To properly export your background and re-import it so that it fits precisely into your scene, you have to provide utransform with the exact resolution that you want the file to be, since you are passing from a vector based image to a bitmap image.
There are a few rules that will help you understand the calculation that you must perform:
| • | 1 field width equals one inch. |
| • | A 12 field chart has a twelve inch width. |
| • | If you scale your drawing down to fit in the 12 field, you will have to enlarge the output resolution so that the final image has the same size as the original drawing (which is not problematic since the source is vector-based). |
| • | When you re-import your painted background, the bitmap file will be fitted in the 12 field size. You will have increased the field size so that it fits the original image size. |
To find the scale and DPI that you will need to export your image, you will need the following information:
| • | The field size of the drawing. |
| • | The scene resolution. |
To export a .tvg file to bitmap using the As Is alignment:
- In the Timeline or Xsheet view, select the cell that contains the drawing that you want to export.

- In the Tools toolbar, choose the Select
tool. The default keyboard shortcut is [Alt]+[V].
- In the Drawing view, select all of your drawing strokes. Select Edit > Select All. TheCtrl + A (Windows/Linux) or ⌘ + A (macOS).
- In the Drawing view, place your mouse cursor over the top, right corner.
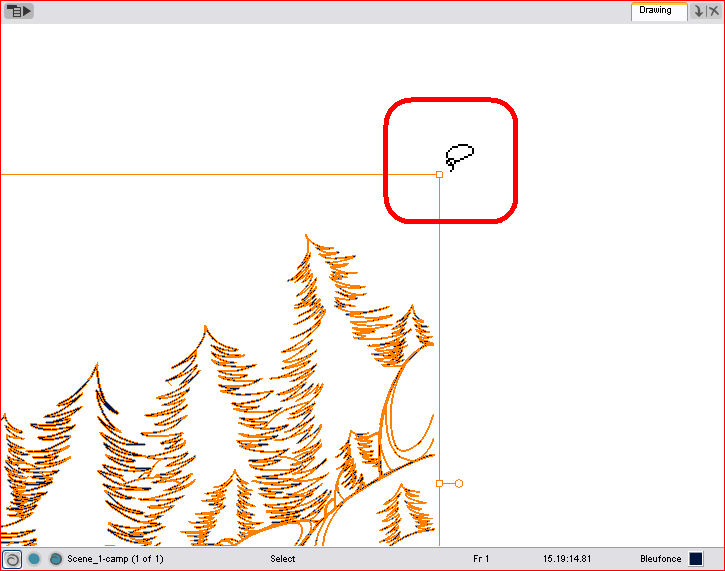
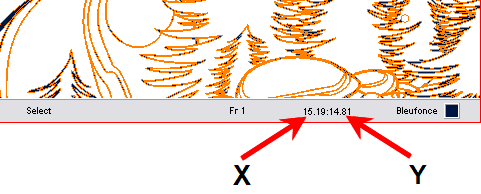
- From the Drawing view’s bottom toolbar, note the X and Y field chart information.
- Repeat steps 4 and 5 for the bottom, left corner.
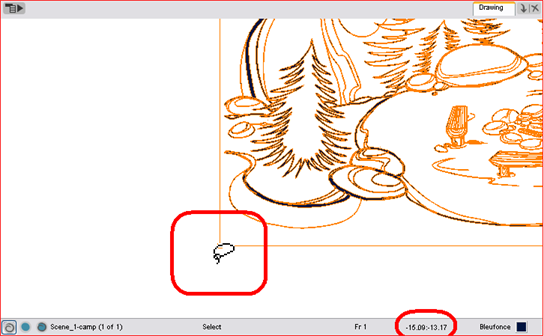
- Once you have all of your field information, select the greatest X and Y values. These will give you the total field size of your drawing. This also tells you the width of your drawing, in inches (1 field width is equal to one inch).

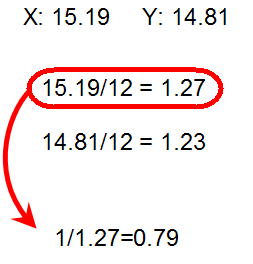
- Divide the X and Y field values by 12 to know how much to scale the image to fit it in the 12 field.
X/12 = how much bigger your drawing is than the 12 field
Y/12 = How much bigger your drawing is than the 12 field
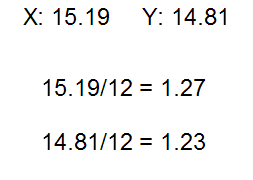
- Once you have both scaling values, calculate your official scaling value by dividing 1 by the greater of the two values. This will give you the official scaling value to enter into your utransform command line.
1/(X/12) or 1/(Y/12) = Scaling Value
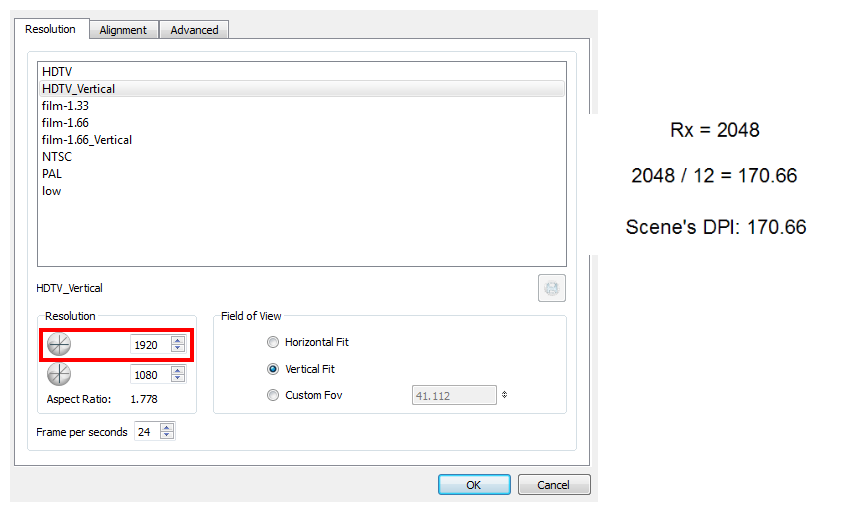
- To enlarge the output resolution, you will have to give a precise amount of DPI. In this case, divide your scene resolution width (Rx) by 12 (fields) to know how many pixels per inch you have.
Rx/12 = Pixels per inch.
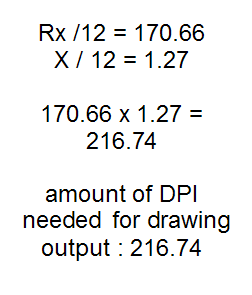
- Once you have your scene’s DPI, you need to enlarge it to re-scale your output to the correct size, since we scaled down the drawing strokes. To do so, multiply the scene’s DPI by how much larger the drawing is than the 12 field (X/12) or (Y/12).
(Rx/12) x (X/12) or (Y/12) = Amount of DPI needed for the drawing output
- Once the values are calculated, open the command prompt to launch utransform.

- In the Command Prompt, go to the scene’s element directory that contains the *.tvg drawing that you want to convert.

| ‣ | Use the cd command to go back up one directory. |
| ‣ | Use the cd \directory name command to enter a new directory. |
| ‣ | Use the dir command to see the directories available. |
- Once in your scene’s element directory, type:
| ‣ | For Windows/Linux: utransform -outformat file_format_you_need -scale scale_value -dpi dpi_value -bgalpha 0 file_name.tvg |

| ‣ | For macOS: ./utransform -outformat file_format_you_need -scale scale_value -dpi dpi_value -bgalpha 0 file_name.tvg |
Here is an example of what your command line should look like:
| ‣ | For Windows/Linux: utransform -outformat PNG4 -scale 0.75 -dpi 227.55 -bgalpha 0 bg-1.tvg |
| ‣ | For macOS: ./utransform -outformat PNG4 -scale 0.75 -dpi 227.55 -bgalpha 0 bg-1.tvg |
- In the operating system, browse to the scene’s element folder and open the new bitmap file to paint in third-party software.
To import a utransform bitmap background back in Toon Boom Harmony Premium:
- Open the Toon Boom Harmony Premium scene where the background needs to be imported.
- To import a bitmap:
| ‣ | In the top menu, select File > Import > Images. |
The Import Drawings dialog box opens.
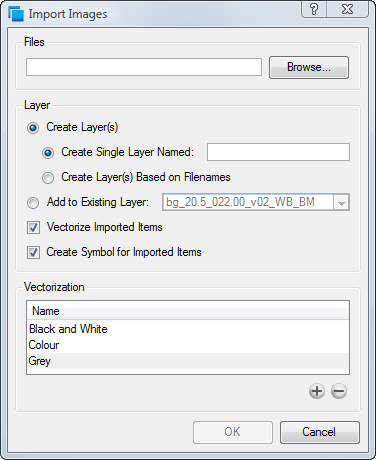
- Click on the Browse button and select your bitmap background file.
- Click on the Open button.
- You can import the image into an existing element or create a new element.
| ‣ | To import the image into an existing layer, select Add to Existing Layer and select the appropriate element from the list. |
| ‣ | To import the image into a new element, select |
Create Layer(s) > Create Single Layer Named and type a name for the element in the Name field.
- Disable the Vectorize Imported Items option.
- Click on the OK button.
- Open the background’s layer properties:

| ‣ | In the Timeline view, double-click on the background’s node. |
| ‣ | In the Network view, click on the background node’s yellow square. |
The Layer Properties dialog box opens.
- In the Advanced tab, set the alignment rule to As Is.
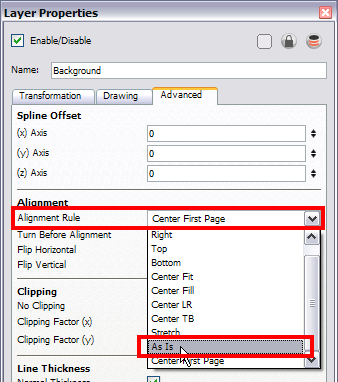
- Click on the OK button.
- Open the column editor:
| ‣ | In the Timeline view, select the background’s layer, right-click and select Column Properties. |
| ‣ | In the Xsheet view, double-click on the background column’s header |

- Take your previous (X/12) or (Y/12) value and multiply it by the scene’s field to find the correct field size. Enter this into the Field Chart field.
| ‣ | (X/12) or (Y/12) x Scene’s field |
| ‣ | To see the Field Chart field, you must enable the Advanced Element Mode preference found in the Advanced section of the Preferences panel. |
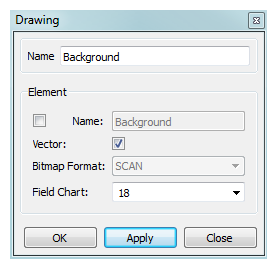
Here is an example of what it should look like: 1.5 x 12 = 18
- Click on the OK button.