Generating a Lip-sync Detection
- In the Timeline or Xsheet view, select the sound layer.
The options for that layer will appear in the Layer Properties view.
- In the Layer Properties, click Detect.
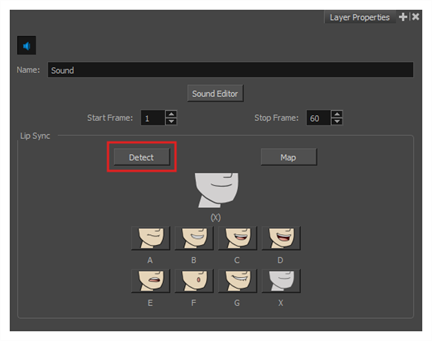
Harmony analyzes the selected sound clips and assigns a lip-sync letter to each sound cell.
- Click the Map button to open the Lip-Sync Mapping dialog box.
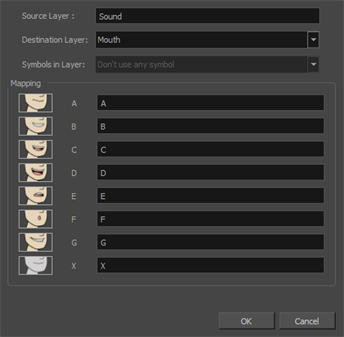
- From the Destination Layer menu, select the layer that contains the mouth positions for the character's voice track.
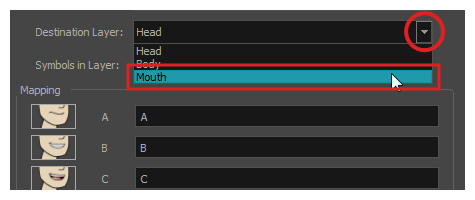
- In the Mapping section, type the drawing name or Symbol frames in the field to the right of the phoneme it represents. If your drawings are already named with the phoneme letters, you can skip this step.
- Click OK.
- In the Playback toolbar, enable the
Enable Sound option.
- Press the
Play button in the Playback toolbar to see and hear the results in the Camera view
- Do one of the following:
- In the Xsheet or Timeline view, right-click on the sound layer's cells and select Lip-Sync > Auto Lip-Sync Detection.
- From the top menu, select Animation > Lip-Sync > Auto Lip-Sync Detection.
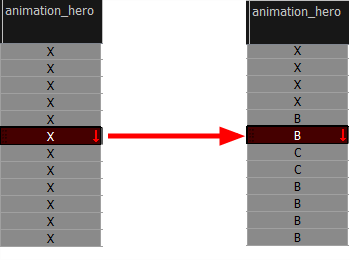
Harmony analyzes the selected sound clips and assigns a lip-sync letter to each frame.
- Do one of the following:
- In the Timeline view, double-click on the sound layer.
- In the Xsheet view, double-click on the sound column header.
The Sound Element editor opens.
- In Sound Element section, select the waveform for which you want to generate a mouth chart.
- Right-click on the sound file and select Auto Lip-Sync Detection.
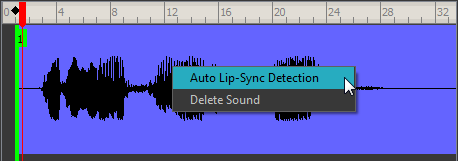
A progress bar appears while Harmony analyzes the selected sound clips and assigns a lip-sync letter to each sound cell.