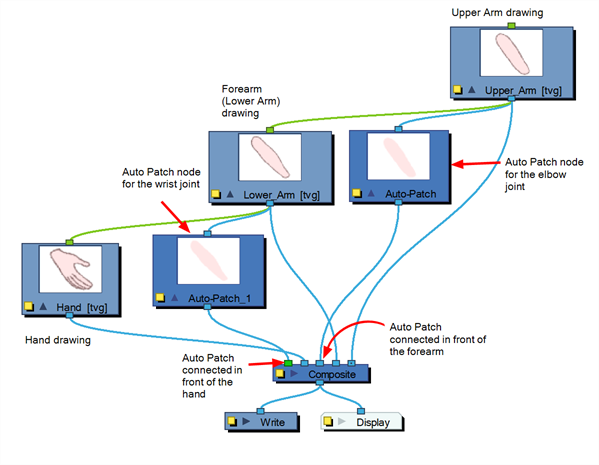
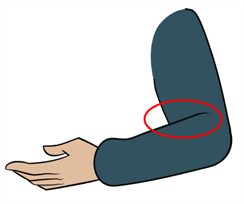
Harmony has a very efficient node to automatically patch an articulation without you having to do any line adjustment or colour overlapping. You can draw your two pieces with their complete lines overlapping each other in semicircles and the Auto-patch node will create a perfect articulation from it.
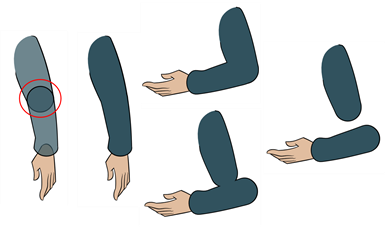
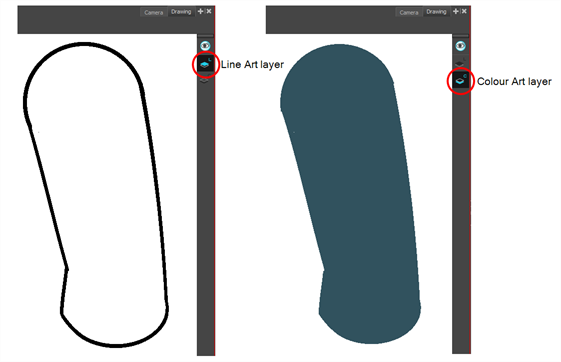
In order for the Auto-patch to work on your puppet, you must draw the outline with the Pencil tool (pencil lines) on the Line Art layer of your drawing, and then paint the colour on the Colour Art layer.
You can use this technique in even more efficiently by adding extra lines in the Overlay layer of your drawing to create a fold illusion for a bent elbow.
About the Auto Patch Node
The Auto Patch node is used mainly when creating joint patches for cut-out puppets drawn with pencil lines and painted in the Colour Art layer. Instead of removing a portion of the outline to attempt to create a seamless joint, you can draw complete pieces, and with the Auto Patch node, automatically create a perfect articulation.

The requirements for this effect to work are:
- Drawing outlines must be drawn in pencil lines
- Drawing outlines must be drawn in the Line Art layer
- Drawing fill colours must be painted in the Colour Art layer
Pencil lines are central vector lines. The vector is located along the centre of the line. This means that when you paint a zone delimited by a pencil line, the colour fill will expand to the centre of the pencil line.
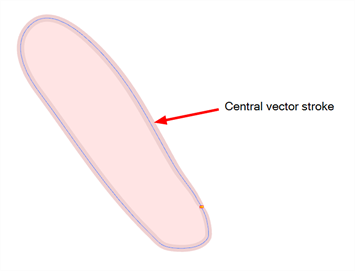
When using the regular patch technique, recommended for the brush line, the result with pencil lines is very odd looking because the colour fill zone is bigger than the pencil line inner contour.
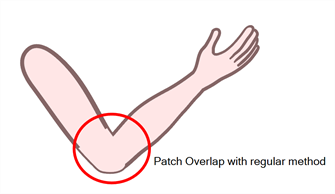
Instead of using the regular patch method, you can use the Auto Patch node. It will automatically extract the Colour Art and clip it to the right size. Then, you can connect it in front of the piece to be covered.
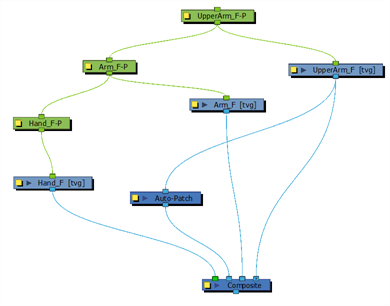
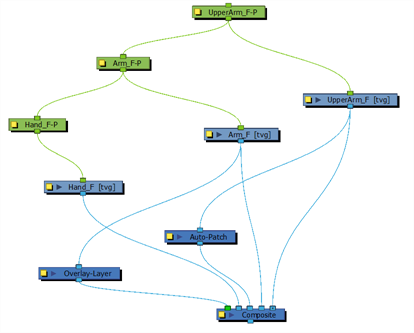
The node connection for the Auto Patch is quite simple. Once your basic character rigging is done, add the Auto Patch node to the joints you want to cover. There is no need to set any parameters.
Refer to the following example to connect this effect:
