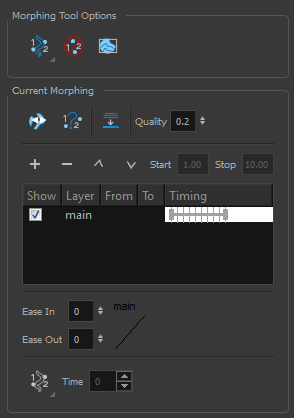
As you create and adjust your morphing sequences, you will often use the Tool Properties view. Using this view allows you to do things such as toggle between your key drawings, adjust the easing or select a hint type.
| Icon | Tool Name | Description |
|
|
Hint Type |
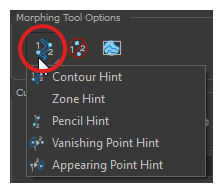
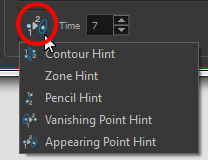
The Hint Type drop-down menu allows you to select the correct hint to remedy any problem areas in your drawing
You can have more than one hint type in your drawings. You can mix all of the hint types in your morphing sequence. |
|
|
Do not Pick Transparency |
The Hide Hints button temporarily Temporarily hides the hint points from the key drawings. Use this option when you have a series of hint points hiding some lines you would like to see.
|
|
|
Show Morphing in Place |
The Show Morphing In Place option is used with morphing layers. Enabling this option prevents the currently selected morphing layer from being shown on top of the others and maintains the correct layer ordering |
|
|
Suggest Hints |
The Suggest Hints option is used to automatically set Automatically sets hint points on key drawings as a help tool. If you're not sure where to set hints, you can use this option. It will set the main hints which you can then fine tune. |
|
|
Switch Between Drawings |
The Switch Between Drawings button is used to toggle Toggles between the two key drawings in your morphing sequence. This option is useful while setting hints. You can use the default keyboard shortcut F4 to toggle between your drawings. |
|
|
Flatten |
The Flatten option is used when you have to morph a sequence with a semi-transparent or transparent colour in it |
| Quality |
The Quality setting is used to make the lines of the morphed drawings smoother. Adjust this parameter when you are doing an extreme close up of your animation
|
|
| Morphing Layers |
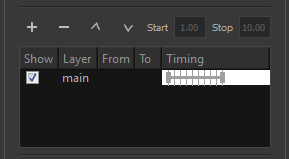
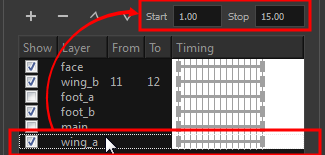
The Morphing Layers option is used when working with morphing layers. You can add, remove and manage your different morphing layers in this space
To create new drawings, double-click on the blank area under the From section to create the source drawing and the To section for the destination drawing and type a different value than the ones used for the main layer. |
|
|
|
Add Layer | Adds a new Morphing layer. |
|
|
Delete Layer | Deletes the selected Morphing layer. |
|
|
Move Up | Moves the new layer up in the stack. |
|
|
Move Down | Moves the new lower up in the stack. |
| Start |
Indicates the start frame of the selected Morphing layer.
|
|
| Stop | Indicates the end frame of the selected Morphing layer. | |
| Ease in and Ease out |
The Easing option is used to adjust the starting and ending velocity of your morphing sequence so that the motion is smooth and not mechanical. You can adjust the Ease In and Ease Out value by dragging your cursor up and down or typing a new value. The values go from -1.0 to 1.0
|
|
|
|
Convert Hints |
The Convert Hints option is used to switch the type of the selected hint points. This option is useful when you position hints and then realize they are not the right type. You can select them and convert them to the correct type instead of deleting them and setting new ones.
Use the Morphing tool to select the hints and then convert them by going to the Tool Properties view and selecting the new hint type from the Convert Hints drop-down menu. |
| Time |
The Time field is used to set the timing on Appearing Point and Vanishing Point hints. These hints are used to set the trajectory of appearing and vanishing objects, With the Time field, select your Appearing Point or Vanishing Point hint and type the frame number on which the object will start its appearing or vanishing animation.
|
