The Shape Curve node is part of the Height Shape suite of nodes. It is used to define a curved region of a height map and it is rendered with the Shape Render node.
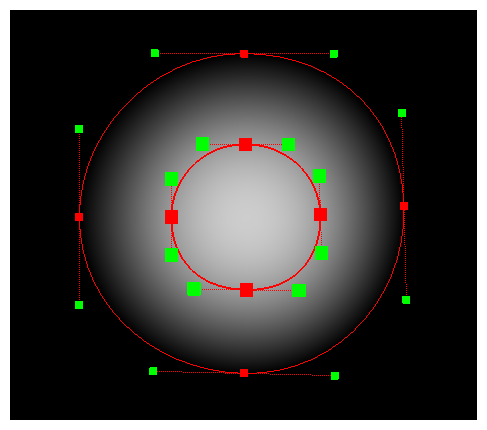
Shape Curve nodes help to define bezier segments on a height map that can be used for the Height Map port of a Volume Object node. Each Shape Curve node creates a control point to define the height shape. When Shape Curve and Shape Line nodes are chained together and connected to a Shape Render node, it generates a whole height shape.
Layer Properties
| Parameter | Description |
|---|---|
| Name | The name of the node as it appears in the Node View and the Timeline view. Each node must have a name that is unique to its containing group. |
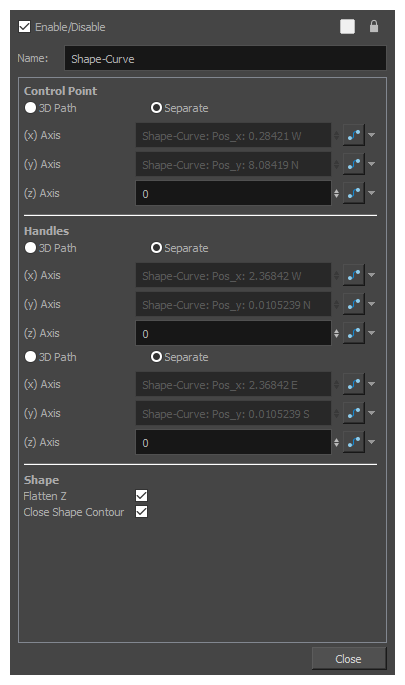
| Control Point |
The position of the control point for this node in the stage. Just like the position of a drawing layer or a peg, the point can be positioned with a single 3D Path function or separate functions for the x, y and z axes. The position of the point can be animated so as to animate the whole height shape. TIPS
|
| Handles |
The position of the Bezier handles on each side of the control point. These handles affect the curve of the contour on each side of the control point. The position of these handles can also be defined with either a 3D Path or with separate functions, and they can be animated as well. TIPS
|
| Flatten Z |
This nullifies the camera’s parallax effect when the point is moved back and forth on the z-axis. In other words, when enabled, moving the point on the z-axis will not change its apparent horizontal and vertical position. It will make the point higher on the height map without affecting how the shape is rendered. |
| Close Shape Contour |
This option is useful for the last point in a chain of Shape Line or Shape Curve nodes. The nodes that are chained together are automatically linked by a contour, but the first and last nodes are not linked by a contour by default. Enable this option on the last point in the chain to create and contour between the first and last point in the chain and make a closed shape. |