Use the Contrast effect to increase or decrease the level of contrast in an image. This is done by changing the contrast in the dark and bright pixels and setting the transition point between dark and bright.
You can enter static values in the dialog box fields or you can attach these values to function curves to change over time.
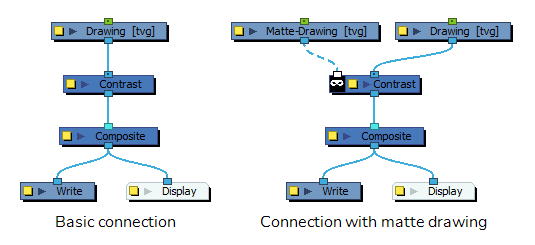
Refer to the following example to connect this effect:
Properties

| Parameter | Description |
|---|---|
| Name | The name of the node as it appears in the Node View and the Timeline view. Each node must have a name that is unique to its containing group. |
| Mid Point |
The value that separates dark from bright colours. The midpoint is a value between 0 and 1 that represents the percentage of the 0 to 255 RGB channel range.
|
|
Dark Pixel Adjustment Bright Pixel Adjustment |
The amount of contrast to be applied to pixels that fall on either side of the Mid Point value.
|
| Invert Matte |
Inverts the matte used to generate the effect. By default, the effect is applied to the opaque areas of the matte drawing. When this option is enabled, the effect is applied to the transparent areas of the matte instead. |