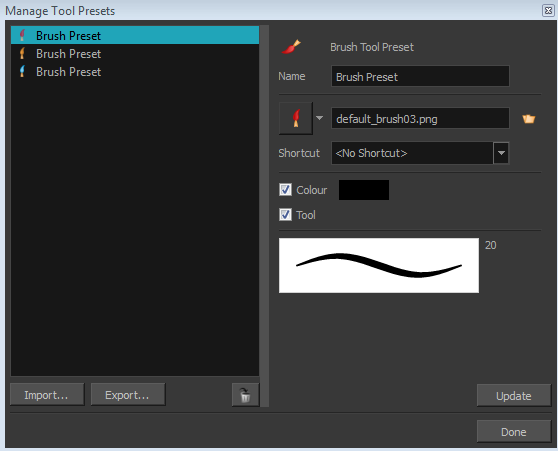
The Tool Presets window lets you create new tool presets and manage them.

For more information on working with this window, see About Tool Presets.
- Do one of the following:
- From the top menu, select Windows > Toolbars > Tool Presets.
- Right-click an empty area below the top menu and select Tool Presets.

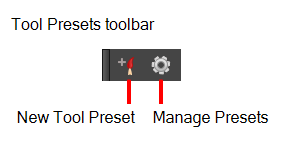
- In the Tool Presets toolbar, click the Manage Presets button.
| Parameter | Description |
|
Icon |
Lets you select a preset to manage. |
|
Import |
Lets you import an existing preset. |
|
Export |
Lets you export a preset for use in other projects. |
|
Delete |
Removes the preset from the list of tool presets. |
|
Name |
Lets you change the name of the preset. |
|
Icon list |
Lets you select an icon for the preset. |
|
Folder icon |
Lets you select an image for the preset. |
|
Shortcut |
Lets you assign a keyboard shortcut to the new preset. |
|
Colour |
Saves the current colour into the tool preset. |
|
Tool |
If you disable this option, only the colour will be associated. You could, for example, set three different colours with shortcuts not associated with any tool. The colour preset would then work on any selected tool. Selecting the brush tool was only a vehicle to get into the New Tool Preset dialog box. |
|
Update |
After adjusting the settings for a preset, the current properties are applied to the presets, as well as any other changes you made in the Manage Tool Presets window. |