Using Toon Boom Harmony Premium will be significantly easier if you first become familiar with its user interface. The following chapter gives you a basic introduction to the most important elements of the user interface. As you go through the ensuing chapters, you will learn more detailed information about each of these elements.
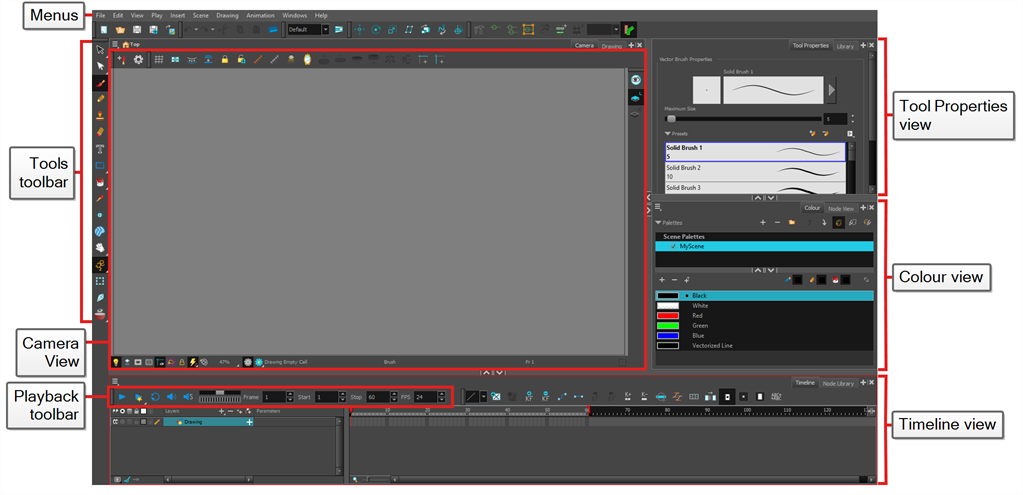
When you start Toon Boom Harmony Premium for the first time, the default workspace is displayed. The workspace is divided in rectangular user interfaces which are referred to as views, each of which has its own specific purpose. The top and left side of the user interface, as well as some views, also contain toolbars, each with specific functions.
Views
Views are small user interfaces that each have a specific purposes. They can be added to the main application window, in which case they are “docked”, or can be opened as separate windows.
Each views has a tab on top of it which contains its name. Not only this can be used to identify the views you’re working with, tabs also allow you to stack several views in the same area of the user interface. For example, in the default workspace, most of the area is occupied by the Camera view. At the top of the camera view are two tabs, one that says Camera and the other that says Drawing. This is because the Drawing view is stacked with the Camera view, and you can quickly switch between both by clicking on either tab.
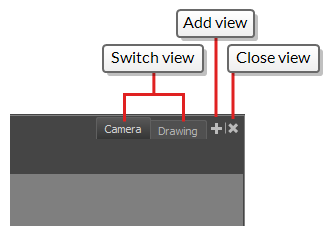
Right of the tabs of each division in your workspace are the ![]() Add View and
Add View and ![]() Close View buttons, which allow you to stack more views or to remove the currently selected view from this area of the workspace.
Close View buttons, which allow you to stack more views or to remove the currently selected view from this area of the workspace.
Adding a View
You can add, remove, move and stack views all over your workspace to optimize your workflow.
- In the top-right corner of an existing view, click the
 Add View button
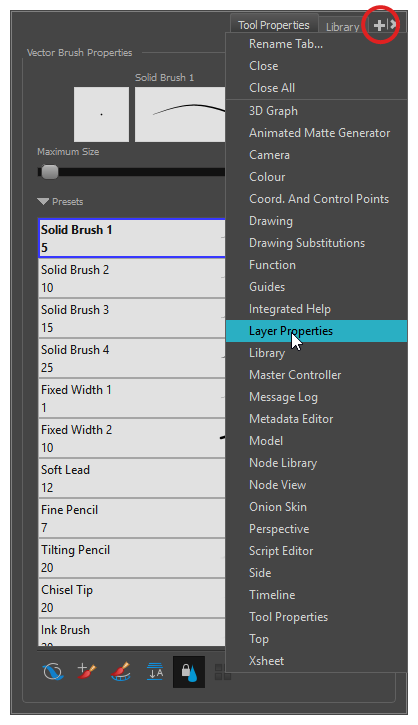
- Select the desired view from the list.
The view appears as a new tab, in the section of your workspace where you added it.

- Open the Windows menu.
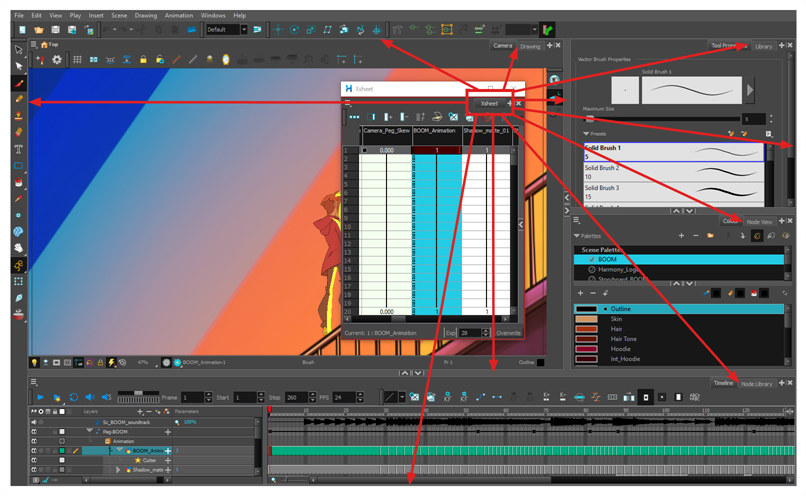
- In the Windows menu, select the view you wish to add.
The view will appear as a new window over Harmony's main application window.
- Click and drag the floating view by its tab and do one of the following:
- Drop the window over another tab to add it to that set of tabs.
- Drop the window above, below or beside an existing view. When you get close to the edge of a view, a cyan rectangle appears, indicating where the view will be docked.
Here is a short introduction to each of the most commonly used views in Harmony.
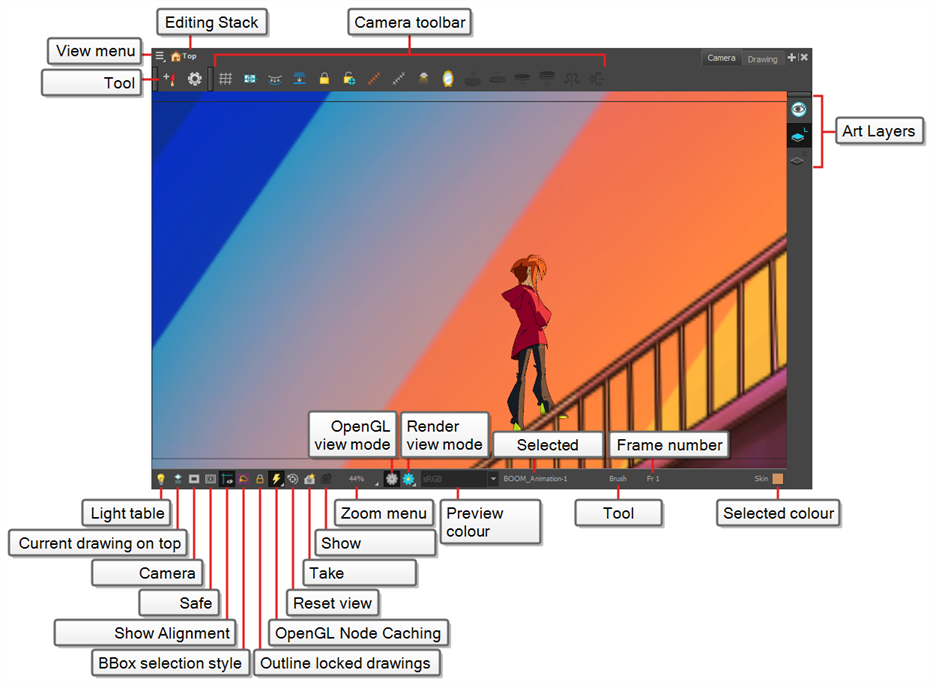
Camera view
The Camera view is the centre of operations in Harmony. In this view, you can draw, paint, animate, set up your scene, manipulate objects, open symbols and preview your animation.
The Camera view also has a top and bottom toolbar that you can use to navigate in the view, change the display mode or go up your symbol hierarchy.
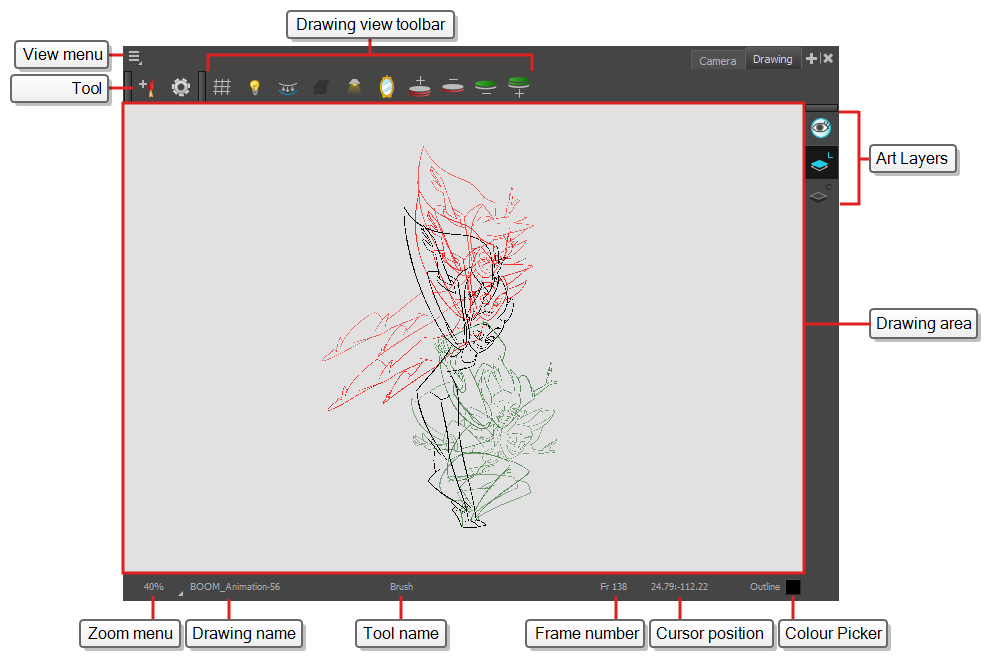
Drawing view
In Harmony, you can draw in both the Drawing or Camera views. Although the two views are similar, there are some differences when it comes to drawing.
Only the selected drawing is displayed by default in the Drawing view. You can use features, such as the light table to display the current drawing of all the enabled layers of your scene in washed-out colours, or the Onion Skin to display the previous and next drawings of the currently selected drawing layer.
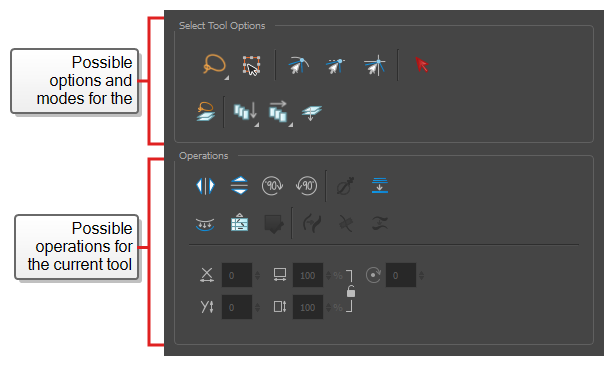
Tool Properties view
The Tool Properties view contains the most common options and operations related to the currently selected tool. When you select a tool from the Tools toolbar, the Tool Properties view updates.
For example, if you choose the Select tool, the Tool Properties view will display the options and operations related to it, such as Snap to Contour, Apply to All Drawings, Flip Horizontal, and Flatten.
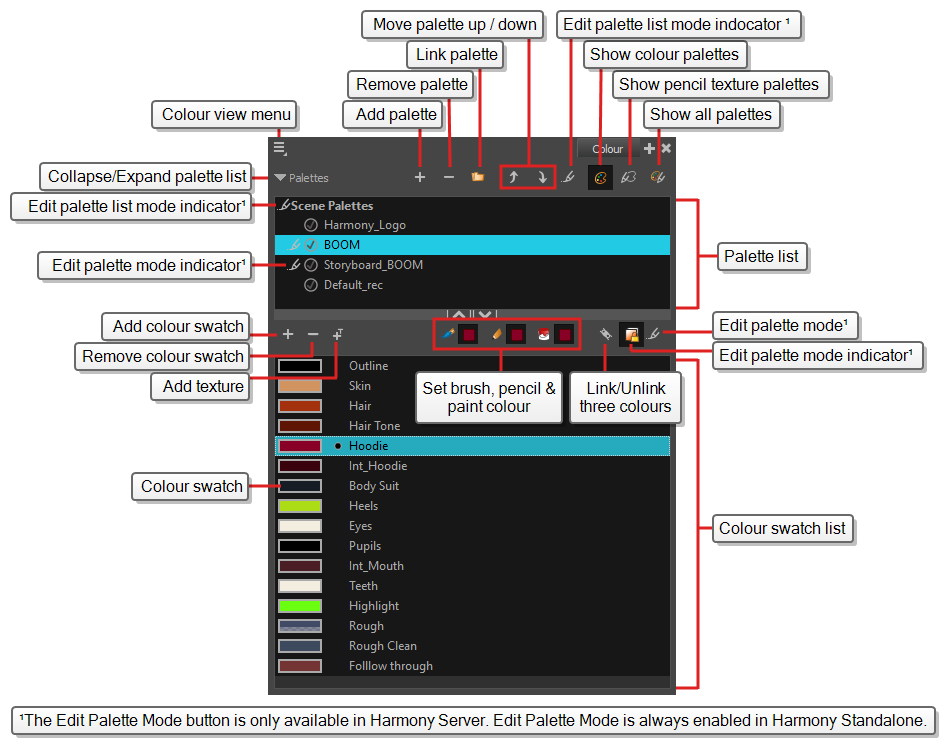
Colour view
The Colour view is where you create colours and palettes and import existing palettes into your project. The Colour view is also necessary for drawing, painting and creating colour styling.
Timeline view
To set your animation timing, you will mostly work with the Timeline and Xsheet views. It's extremely useful to become familiar with the Timeline view, how it works, and its interface.
The Timeline view is the main view used when adjusting the timing of drawings, adding keyframes and ordering layers. The Timeline view displays layers, effects, sounds, keyframe values, scene length, layer names, drawings, keyframes, timing, and frames.
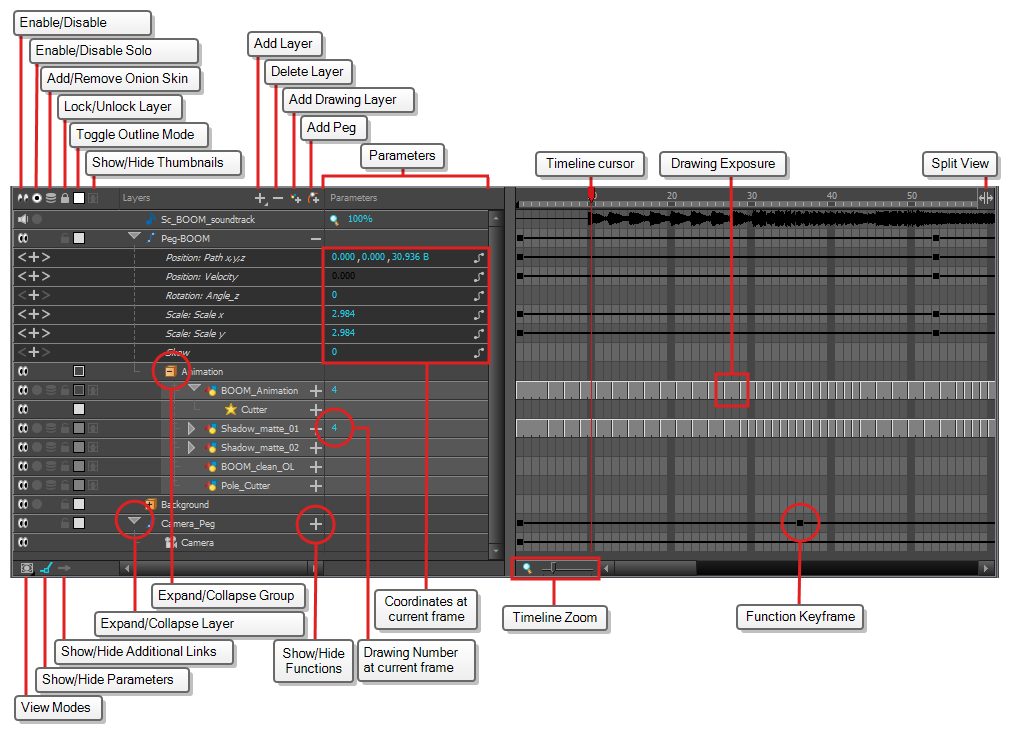
The Timeline view allows you to read your timing from left to right. It represents the scene’s elements in their simplest form. You can also see the layers and their names, as well as the drawing’s exposure. The drawing name is displayed when you place your pointer over the drawing’s exposure.

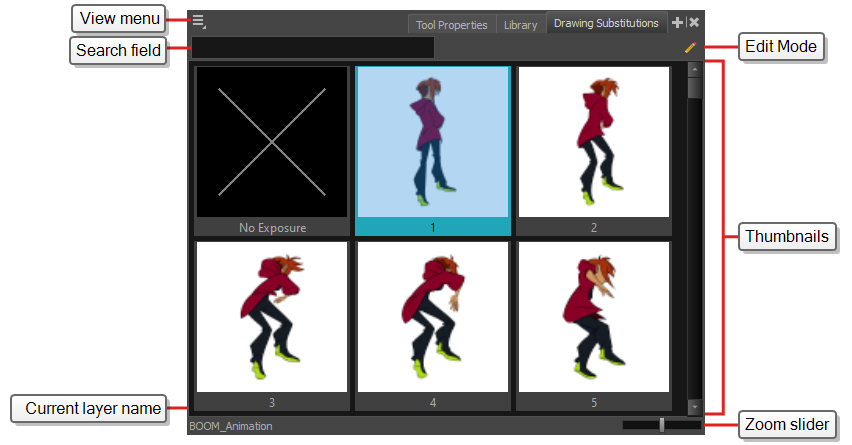
Drawing Substitutions View
The Drawing Substitutions view allows you to view all the drawings in the selected layer in a list of thumbnails, as well as to quickly select which drawing should be exposed at the current frame.
Xsheet view
The Xsheet view lets you read the timing vertically by displaying it in a grid, with each drawing layer represented by a column, each frame of your scene represented by a row, and each exposed drawing displayed by its name in the cells. It is meant to work like a traditional animation exposure sheet.
Using the functions panel, you can also view the functions and keyframes of the motion paths for the selected column, with the value of those functions for each frame listed in the cells.
Contrary to the Timeline view, the Xsheet view does not display pegs, effects or layer hierarchy. Hence, it is optimized for traditional and paperless animation, whereas the Timeline view is optimized for digital or cut-out animation.

Library view
The Library view is used to store elements such as animation, drawings, backgrounds and character models so as to reuse in different scenes and projects. You can also use the Library view to create and store symbols, as well as to store and import images
To reuse elements from a scene in other scenes, you must create a template so that you can import it into different scenes. Templates can contain anything from a single drawing to a whole scene structure. You can create a template by creating it in a scene, then copying the elements you want in your template into a library. The resulting template is structured like a mini-scene that contains only the elements you copied into it. A template does not have any dependencies on the scene it was originally created in. Hence, it can safely be imported in any other scene.
Additionally, the Library view's Drawing Substitutions panel allows you to quickly change the current frame's exposure to one of the existing drawings in a layer. This is especially useful for animating a cut-out character's mouths, hands, eyelids and other such body parts which typically contain several drawings to choose from.

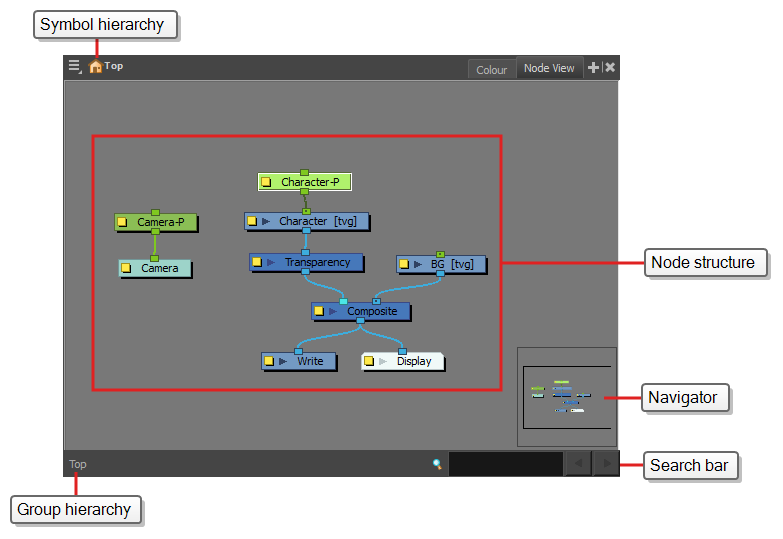
Node view
In the Node view, you can connect effects and compositing nodes to form a network, also known as a node system. This view is very useful for rigging puppets, creating advanced effects and having a clear view of complex scenes. The organization and order of the nodes determines the flow of data during the compositing process and how your animation elements will be composited.
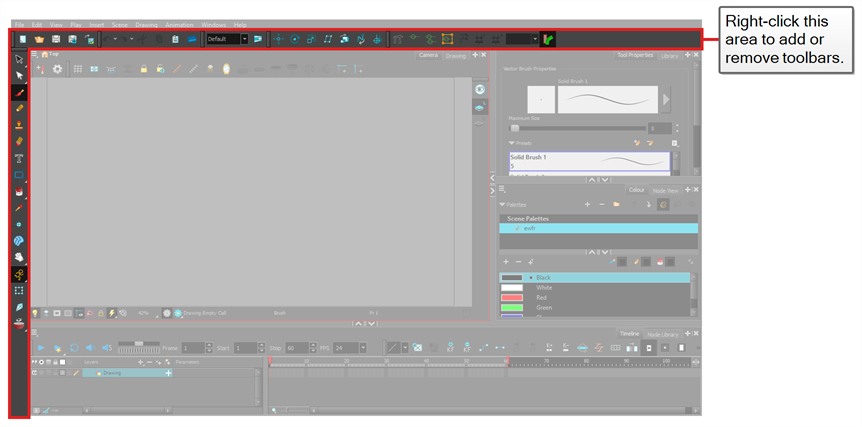
Toolbars
The Harmony interface contains toolbars that quicky give you you access many useful tools. You can add, move and remove toolbars in your workspace.
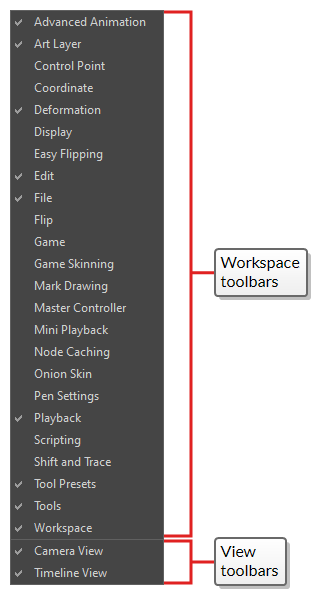
Toolbars are separated in two main categories:
- Workspace toolbars are toolbars that have a general purpose. For example,
-
View toolbars are toolbars that are useful for a specific view. For example, the Camera view has a Camera toolbar at its top. View toolbars can only be displayed inside their respective view. They can be placed at the top, bottom, left or right edge of their view.
Adding Toolbars
- Do one of the following:
- In the top menu, select Windows > Toolbars and in the sub-menu, select the toolbar you want to add.
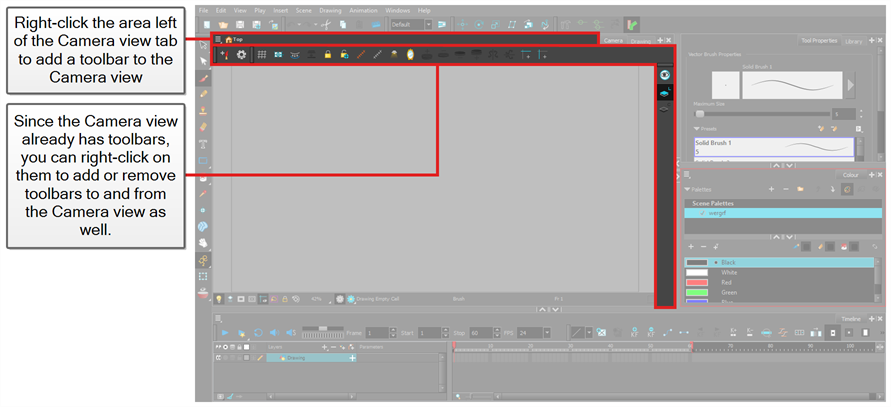
Right-click on any toolbar that is at the top or side of the workspace, or in the empty space next to these toolbars, and select the toolbar you want to add in the contextual menu.
- Do one of the following:
Click on the tab of the view for which you want to add a toolbar to set the focus on it. Then, in the top menu, select Windows > Toolbars and select the toolbar you want to add.
NOTEIn the list of toolbars in the top menu and in the contextual menu of the workspace, the toolbars listed above the separator are workspace toolbars, and the ones below the separator are view toolbars.
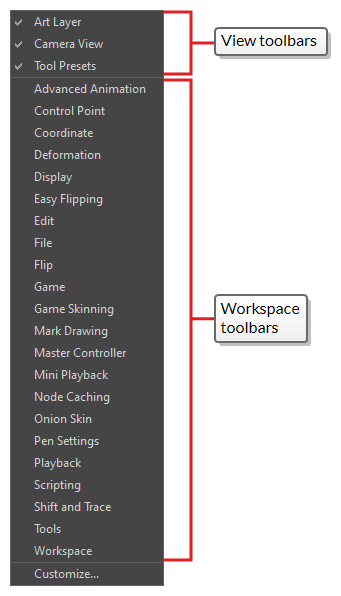
In the top area of the view to which you want to add a toolbar, to the left of its tab, right-click and select the toolbar you want to add in the contextual menu.
 NOTES
NOTESIn the list of toolbars in the contextual menu of a view, the toolbars listed above the separator are workspace toolbars, and the ones below the separator are view toolbars.
- If you select a workspace toolbar in the contextual menu of a view, this workspace toolbar will be added to the view. If it was already present in your workspace, it will be removed from its previous location.
- When a workspace toolbar is added to a view that is stacked with other views, that toolbar is visible in every view that is stacked in the same area. For example, if you add the Advanced Animation toolbar to the Camera view, it will also be visible in the Drawing view.
-
Click and hold the handle at the left of the toolbar you want to move.

- Do one of the following:
If the toolbar is horizontal, move it up or down to make it pop out of its row.

If the toolbar is vertical, move it left or right to make it pop out of its column.
-
Do one of the following:
-
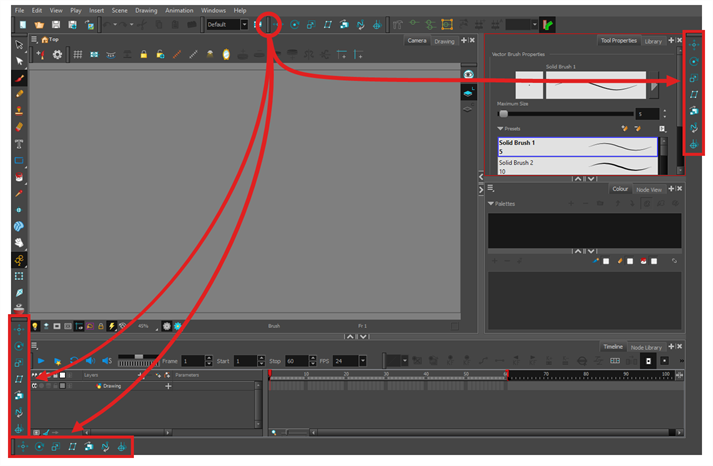
To reorder toolbars, drag the toolbar where you want it to be located and drop it.

The toolbar will move to its new position. Toolbars to the right (or to the bottom, if the toolbar is vertical) will be offset to make space for it.

-
To move the toolbar to a new row or to a new column, simply move the toolbar where the new row or column should be created. For example, to create a new row of toolbars at the top of the user interface, move it just below the existing toolbars at the top of the user interface. A new row or column will appear, highlighted in cyan.

When you drop the toolbar, the new row will be created and the toolbar will be placed at the left end of the row.

Likewise, to create a new column at the left of the user interface, move the toolbar just right of the existing toolbars at the left of the user interface.
-
To move the toolbar to another edge of the user interface, drag it all the way to that edge of the user interface.
-
- Make sure both toolbars are in the same row or column. If they are not, move both toolbars to the same row or column using the method previously described.
If the toolbars are horizontal, click and hold the handle at the left of the rightmost toolbar. Then, without going outside of the toolbar’s row, slide the toolbar towards the left.

- If the toolbars are vertical, click and hold the handle at the top of the bottom toolbar. Then, without going outside of the toolbar’s column, slide the toolbar up.
As you slide the toolbar over the other toolbar, the other toolbar’s buttons become hidden and a pop-up menu button appear.
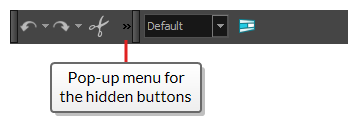
- To separate the toolbars again, simply slide the same toolbar in the opposite direction.
-
To expand a toolbar that is overlapped by another toolbar, click on the expand button at the right of the overlapped toolbar.

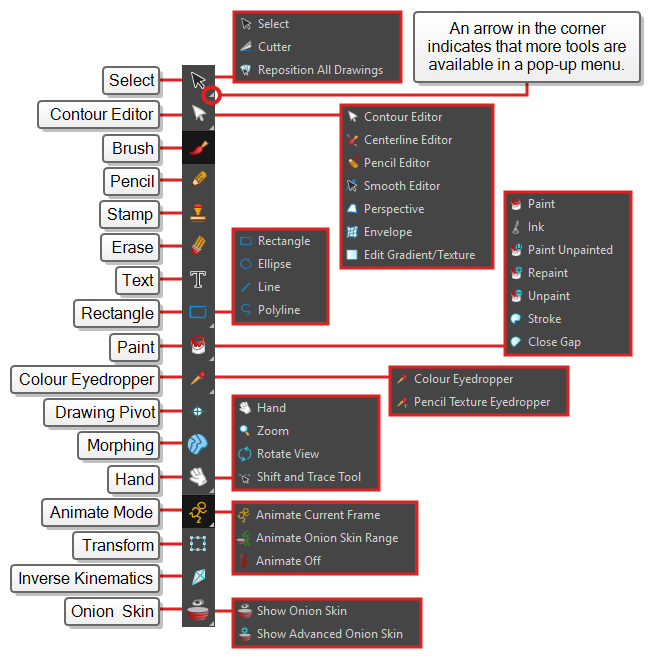
Tools Toolbar
The Tools toolbar contains the main tools you need to work in Harmony. In the default workspace, this toolbar located on the left edge of the application window.
Some of the buttons in the Tools toolbar have a triangle in their bottom-right corner. This is to indicate that several tools are stacked on this button. To access these tools, either click and hold on the tool button, or select the tool then click on it again.
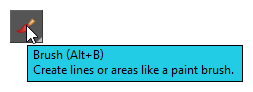
Many toolbar buttons have a keyboard shortcut associated to them. You can check which keyboard shortcut is associated to a button by leaving your mouse cursor over the button for a second. If the button has a keyboard shortcut, it will be indicated in the tooltip that appears.
File Toolbar
The File toolbar contains buttons for common file operations such as New, Save and Open. These commands can also be found in the File top menu.

Edit Toolbar
The Edit toolbar contains common operations such as Undo, Redo, Cut, Copy and Paste. These commands can also be found in the Edit top menu.

Playback Toolbar
The Playback toolbar allows you to play your animation as well as to set some playback options such as looping, audio playback, playback range and playback speed.

Interface Navigation
With the help of menu commands and keyboard shortcuts, some views let you navigate their content by zooming in, zooming out, panning and rotating them. You can also reset the zoom level, pan and rotation angle of these views as needed.
The navigation commands in the table below can be used in the following views, with some exceptions:
- Camera
- Drawing
- Perspective
- Timeline
- Xsheet
- Node View
- Function
- Side and Top
- Model
Keyboard shortcuts can be customized. You can view, search for and change keyboard shortcuts for Harmony in the Keyboard Shortcuts dialog. To access the Keyboard shortcuts dialog:
- Windows
- macOS: In the top menu, select Harmony Premium > Keyboard Shortcuts.
Touch Interface
If you are working with a touch screen, a trackpad or a tablet that supports touch input, you can also use standard two-finger gestures to zoom, rotate and pan the Camera and Drawing Views. To be able to do this, you must first enable the Support Gestures preference.
- From the top menu, go to Edit > Preferences (Windows/Linux) or Harmony > Preferences (Mac OS X).
- Open the General tab.
- In the Touch Interface section, check the Support Gestures check box.
- Click on OK.
- Restart Harmony.
You can now manipulate the Camera and Drawing views by dragging two fingers on your touch interface.
- In the Camera or Drawing view, press two fingers a short distance from each other.
- Do one of the following:
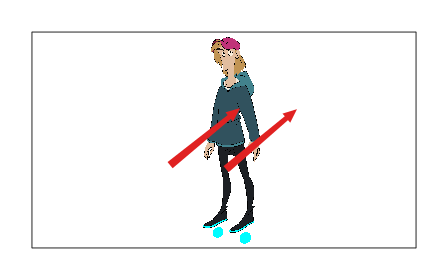
- To pan the view, drag your two fingers in any direction, keeping both fingers at the same distance from each other.
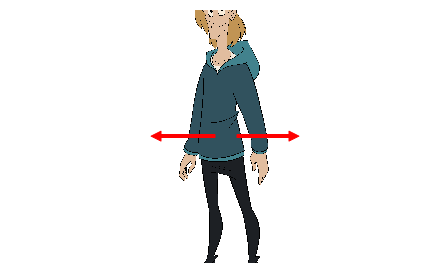
- To zoom in, drag your two fingers away from each other.
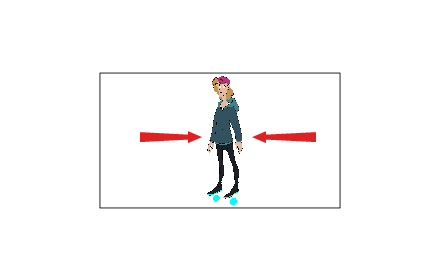
- To zoom out, drag your two fingers closer to each other.
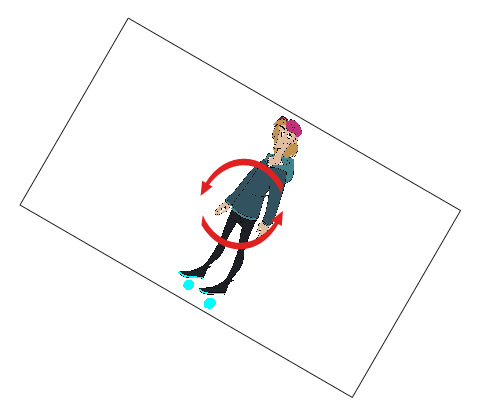
- To rotate, drag your two fingers in a curve so that they revolve in the same direction.