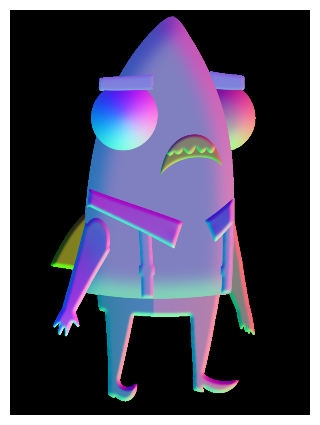
Unlike the Light Shading effect, the Surface Shading effect uses the field units of the scene for its parameters. This allows the system to light drawings and cast shadows relative to their positions in the scene and in relation to the surrounding drawings. Although it requires some extra configuration, this system allows for more customization, such as rounded surfaces, custom height-maps, and cast shadows.
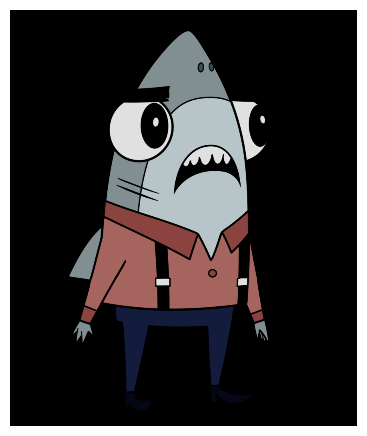
The Surface Shading effects blends the different light and shadow effects in your rig. A flat-character rig is created with the same Volume Object nodes as the Light Shading nodes to define the relative heights and surface modeling.
The Surface Shading nodes include:
- Volume Object
- Surface Map
- Surface Normal
- Cast Shadow
- Ambient Occlusion
- Height Shape Nodes
- Light & Tone Shaders
Volume Object
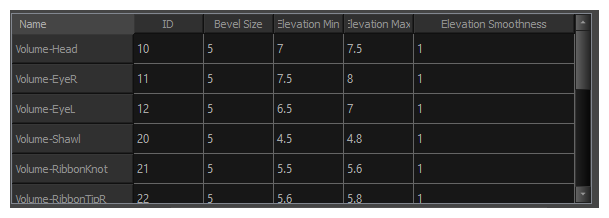
The Volume Object node allows you to define which parts of your rig constitute a single volume to which shading should be applied. For example, if you need the arm, forearm and hand of your character to be shaded together, you can connected all the nodes that constitute these body parts to the same Volume Object node, and the shading will be applied to these parts of your rig as if they were a single object.
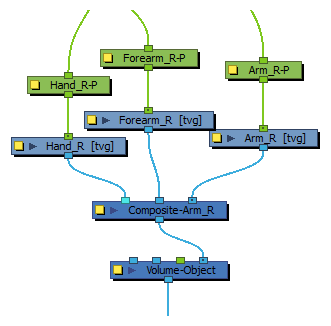
- Even if you want to apply shading separately to a single drawing, you must connect a Volume Object node under that drawing.
- If you create separate Volume Object nodes for parts of your rig that are attached together, you may see bumps in the shading where the joints overlap.
Surface Map
The Surface Map behaves similarly to the Normal Map, but instead of defining the surface orientation, it is used to define the overall surface height and modeling in the scene. This node accumulates all drawings, Volume Objects, height maps and height mattes attached to the Pass-Through composites above. These individual layers are combined into a single Surface Mapping which is then used as a guide for further Light and Shading nodes.
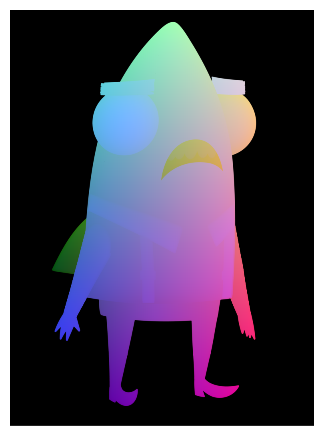
The Surface Map uses a lot of the same parameters as the Normal Map, but also requires that you set the height ranges of each volume object relative to each other. By doing this, a surface is constructed that can be used to cast shadows relative to each other.
Surface Normal
The Surface Normal node converts the output of the Surface Map into a normal image similar to the output of the original Normal Map. Once converted, this output is compatible with the original Light and Tone Shader and allows these nodes to use new surface shading options.
Cast Shadow
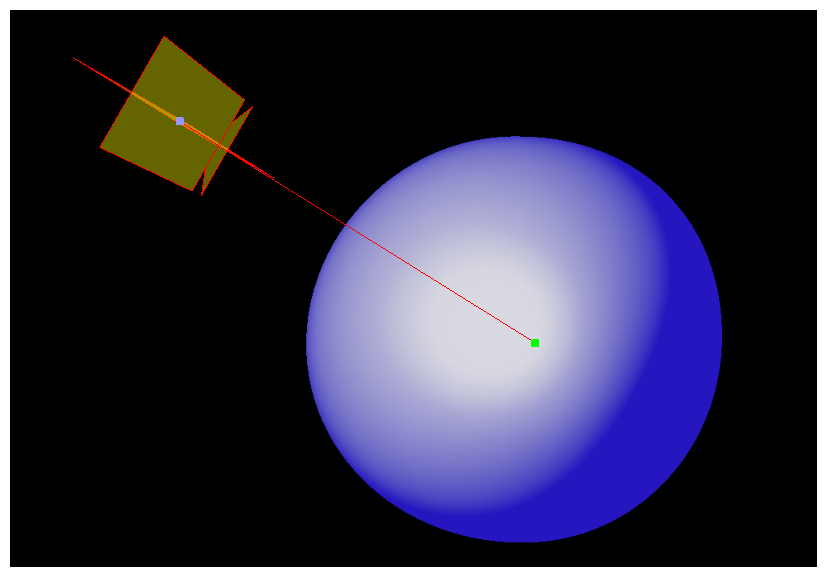
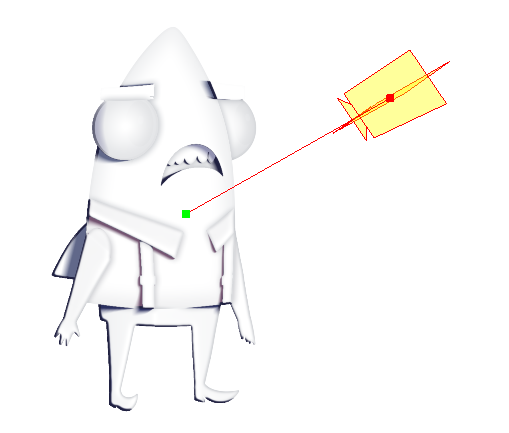
The Cast Shadow node samples the Surface Map and calculates the shadow that each surface should receive based on that surface’s elevation, the surrounding elevations and the current position of the Light Position node. A shadow is rendered when a surface does not receive any light due to a surface blocking the path of the light source.
Ambient Occlusion
The ambient occlusion node creates a shadow that helps to emphasize the depth and roundness of a character. This node shades the areas on a surface that would be difficult for any ambient light to reach—areas with deep holes, crevices or overlapping surfaces. The darkness of this shadow is relative to the difference in depth between a given pixel and the surrounding pixels within a range. This shadow does not use any light position, but instead behaves as an ambient shadow in the scene.
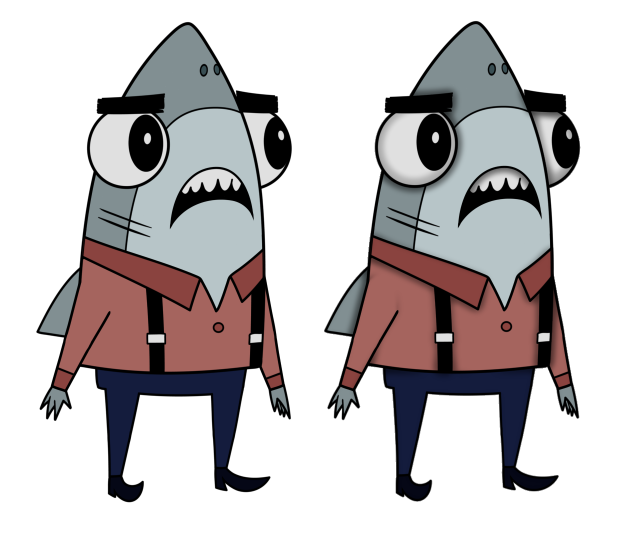
The Ambient Occlusion Node can be used to add volume to a flat character, even without a direct light source.
Height Shape Nodes
The addition of the Height Map port on the Volume Object node allows for the customization of any surface defined in the Surface Map. The Height Shape series of nodes provides a way to create an animatable height that works well with the Volume Object -- this can be used to create custom surfaces and animated heights over the course of a scene.
Light & Tone Shaders
The Light Shader and Tone Shader use the surface and depth information provided by the Surface Normal node to generate diffuse light, specular highlight and light fall-off.