About Manipulating and Animating 3D Object Subnodes
A 3D model can be rigged so that different parts of it, referred to as subnodes, can be subjected to their own geometric transformations.
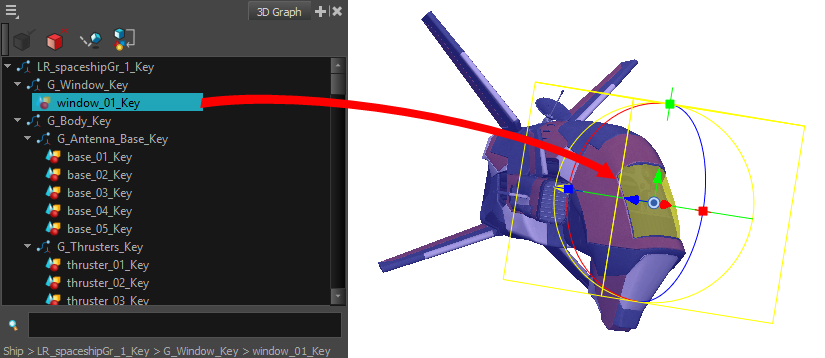
Using the 3D Graph view, you can see the list of subnodes available for the selected 3D model. Each subnode represents a part of the 3D model that can be transformed and animated independently, or even hidden. Like with peg hierarchies, subnodes that are children of other subnodes will be transformed along with their parents. If you select a subnode in the 3D Graph view, it will be highlighted in the Camera view, and the Transform tool will be set to manipulate that subnode rather than the whole 3D model.

You can also visually select a subnode in a 3D model by holding Ctrl (Windows/Linux) or ⌘ (macOS) and clicking on a part of the model in the Camera view. The corresponding subnode will be selected.
When a subnode is selected, you can transform it using the Transform tool the exact same way you would transform the whole 3D object—see About 3D Object Manipulation & Animation.
If you make a transformation on a 3D model subnode directly, this transformation will be static. In order to animate a 3D model subnode, you must connect the 3D object's node to a Subnode Animation node, which will store the animation information for each of the model's subnodes that you animate. In both cases, the transformations and animations done on 3D model subnodes will appear in the final render, even if the model is rendered through Autodesk Maya.
It is also possible to rig an element in the scene to follow the animation of one of the subnodes of a 3D model.