T-HFND-010-009B
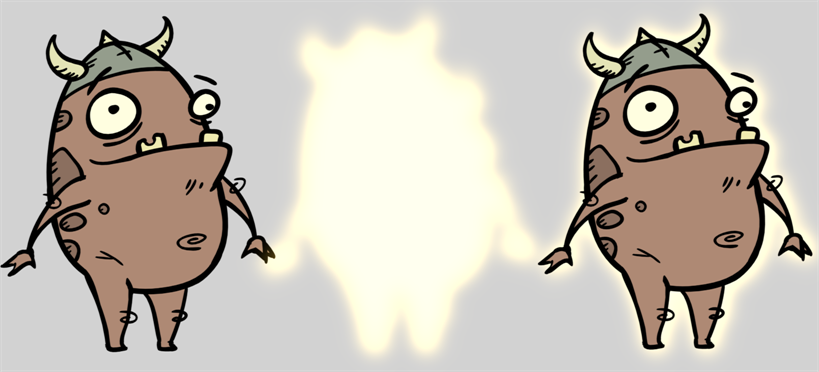
The Glow effect turns your image into a glow area with a bright soft-edged light or diffuse light region around an image. The Glow effect is useful for creating a shining rim around objects, such as the sun or stars. Clone your layer to display the original image on top of the glow.
Author
Christina Halstead
2D Animator and Character Designer
shadowbrushcreations.com
Refer to the following example to connect this effect:

Properties
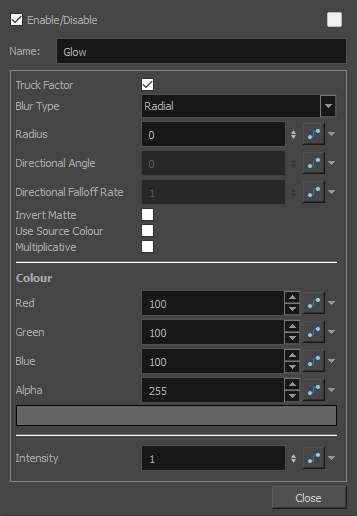
| Parameter | Description |
|---|---|
| Enable/Disable |
Allows you to enable or disable the layer. When disabled, a layer has no visible effect on the rendered image, nor on the preview in the Camera, |
| Colour Swatch |
Sets the colour of the layer in the Timeline view. |
| Name | The name of the node as it appears in the Node View and the Timeline view. Each node must have a name that is unique to its containing group. |
| Truck Factor |
Activated by default, this option readjusts the blur when the elements undergo a change of depth or scale. When disabled, the effect's values will remain unchanged regardless of depth or scale changes. It is recommended that this option be disabled when multiple drawings are composited and attached this effect. |
| Blur Type |
Allows you to choose between the following blur types for the effect:
|
| Radius |
Enter a value for the size of the blur. The larger the value, the greater the blur effect. The blur radius is affected by the drawing scale and camera position. |
| Directional Angle |
If you set the Blur Type to Directional, this sets the angle of the blur. The value goes from 0 to 360, with 0 meaning west, and angles going counterclockwise. For example:
|
| Directional Falloff Rate |
The distance where the blur fades from the edge of the image. Select a decimal value between 0 and 1. For example:
|
| Invert Matte |
Inverts the matte used to generate the effect. By default, the effect is applied to opaque areas of the drawing. When this option is enabled, the effect is applied to transparent or empty areas of the drawing. |
| Use Source Colour |
Instead of using the colour in the Colour parameters, this uses the colours in the source drawing to generate the effect. NOTE The effect of this parameter is only visible in Render View
|
| Multiplicative |
Multiplies the colours of the effect with the colours of the background. This intensifies the effect. |
| Colour | |
| Red |
The amount of red to add to the colour in the background image. |
| Green |
The amount of green to add to the colour in the background image. |
| Blue |
The amount of blue to add to the colour in the background image. |
| Alpha | The alpha value of the effect. |
| Colour Swatch |
Opens the Colour Picker dialog, in which you can visually select a colour for the effect. |
| Intensity |
Allows you to set the factor by which to multiply the intensity of the effect. This parameter can take a decimal value between 0 and 1. At 1, the effect is fully applied. At 0, the effect is not visible. |