Renders the entire character to a plane. This renders your character to texture data. If you animate the transparency of the plane, then the transparency of the rendered output is animated; you won't see the transparencies of the overlapping elements. However, you will have one static bounding box the size of the plane that you render to.
Use this option when you want to animate the transparency of a character in a scene. Also, you can write your own custom shaders. Simply set the Render Target to eRenderTarget. You can see an example of this in the sample project DemoRenderTarget.
- Select GameObject > Create Other > Plane.
- Select Add Component > Scripts > Harmony Renderer.
- Set Size to 1 and Element to 0 on the clip name as per previous instructions.
- Set Render Target to eRender Texture.
- Render Texture Viewport:
- X: To reposition the animation correctly; it should be -½ the width of your Harmony project.
- Y: To reposition the animation correctly; it should be -½ the height of your Harmony project.
- W: Width of your Harmony project
- H: Height of your Harmony project.
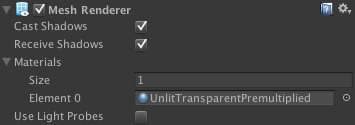
- Use the custom Shader created by Toon Boom to have a transparent background with premultiplied alpha channel. This is what produces nice, antialiased drawings in your output.
- With the Plane selected in the Inspector, go to Mesh Renderer > Materials. Under Element 0, select UnlitTransparentPremultiplied.
- If you're starting with the Toon Boom demo project, this renderer should already be loaded in your list.
You can also write your own custom shaders and use them here.
- You must also add the animation component. Select the Plane. In the inspector, click Add Component > Scripts > Harmony Animation.
Once your Harmony GameObject is imported, you should be able to see your character both in the Scene and the Hierarchy views. From here you can attach one or several props to an anchor.