You may need to animate some effects to obtain the expected results. For example, you may want the radius of a Glow effect to slowly increase and decrease to make it pulsate throughout a scene, or you may want the transparency of a Transparency effect to increase from 0% to 100% to make a drawing vanish.
Almost all numerical parameters in an effect can be attached to a function. A function allows you to set a parameter to different values at different points in the scene by adding keyframes to it, and setting each keyframes to a specific value. Between keyframes, the value of the parameter will progress from the value of the previous keyframe to the value of the next keyframe. Drawing layers are animated by having their coordinates associated to functions. Likewise, effects can be animated by associating their parameters to functions.
Some effect parameters can be animated directly in the Timeline view, but not all. When you expand an effect's parameters in the Timeline view, some of its parameters may be hidden to avoid cluttering the Timeline view. You can animate those parameters from the Layer Properties view or the Layer Properties dialog, which display all of a layer's parameters.
-
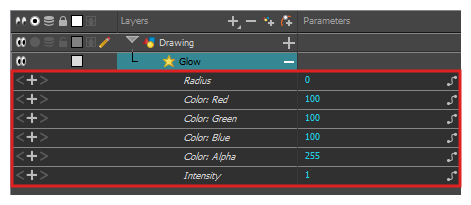
In the Timeline view, locate the effect you want to animate, and click on the
Expand button right of its name.

The list of parameters that effect's paramaters that are available in the Timeline view appears.
-
In the right area of the Timeline view, in the same row as the parameter you want to animate, select the frame where you want to create the first animation keyframe for the effect.

-
Create a keyframe by doing one of the following:
- In the Timeline toolbar, click the
Add Keyframe button.
- Right-click and select Add Keyframe.
- Press F6.

- In the Timeline toolbar, click the
- In the left area of the Timeline view, under the Parameters column, adjust the value of the parameter for this keyframe by doing one of the following:
Click and hold on the value of the parameter, then drag it towards the left to reduce its value, or towards the right to increase its value.

Click on the value of the parameter. A text field will appear. Type in the new value of the parameter, then press Enter.

-
In the right area of the Timeline view, click on the frame where you want to create the second animation keyframe for the effect.

-
Create the second keyframe for your effect's animation by doing one of the following:
- In the Timeline toolbar, click the
Add Keyframe button.
- Right-click and select Add Keyframe.
- Press F6.

- In the Timeline toolbar, click the
- In the Parameters column, adjust the value of the parameter at the current keyframe.
- Repeat the steps to create as many animation keyframe for your effect as needed.
- To adjust the timing between the keyframes of your animation, select the first keyframe.
-
In the Timeline toolbar, click on the
Set Ease for Multiple Parameters button.
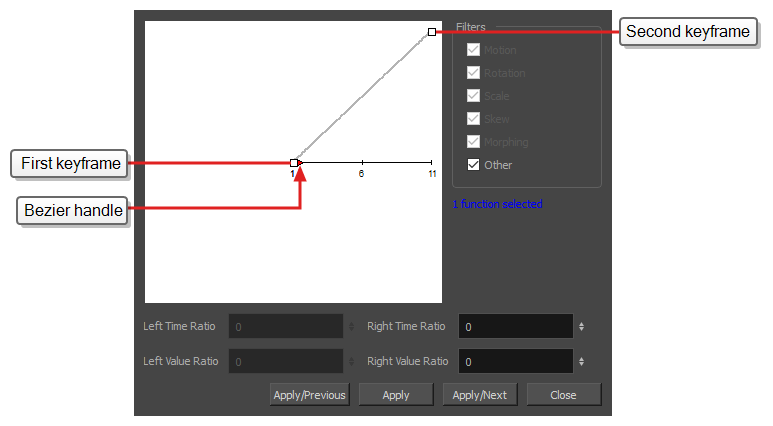
The Set Ease for Multiple Parameters dialog appear. The function graph in this dialog will be focused on the first
 keyframe in your animation, which should have a
  Bezier handle right next to it, pointing to the right.
-
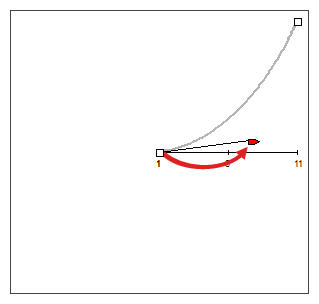
Click on the
 Bezier handle and drag it towards the right, at any angle, to adjust the ease-in of the animation.
-
Click on Apply/Next.
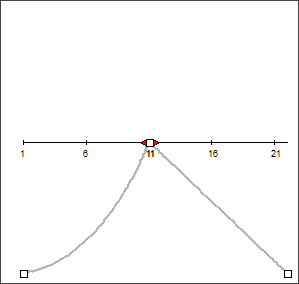
The Set Ease for Multiple Parameters dialog will focus on the second keyframe. If this is the last keyframe in the animation, it will only have one Bezier handle, pointing towards the left. If there are more animation keyframes after this one, it will have two Bezier handles, one pointing in each direction.
-
Click on the left
 Bezier handle and drag it towards the left, at any angle, to adjust the ease-out of the animation between the previous keyframe and the current keyframe.
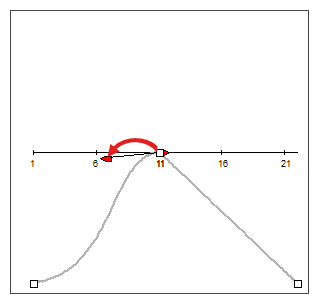
-
If there is a
 Bezier handle pointing towards the right, click on it and drag it towards the right, at any angle, to adjust the ease-in of the animation between the current keyframe and the next keyframe.
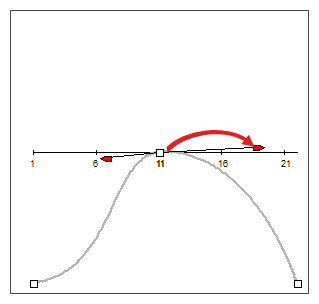
- Repeat the previous steps until the timing for your animation is adjusted throughout the entire scene.
- Open the effect's Layer Properties by doing one of the following:
- Add the Layer Properties view to your workspace, then select the effect in the Timeline view.
- In the Timeline view, double-click on the effect layer, but not on its name.
-
In the effect's layer properties, locate the parameter that you want to animate and click on the
Function button to its right.
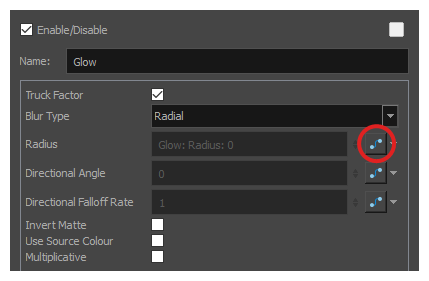
The parameter's input field will be greyed out. This is because you cannot directly edit a parameter once it is attached to a function. The field will indicate the name of the function that was created for it, in this format:
Name of layer: Name of function: Value at current frame
-
Click on the parameter's Function button again.
The Bezier Editor dialog opens.
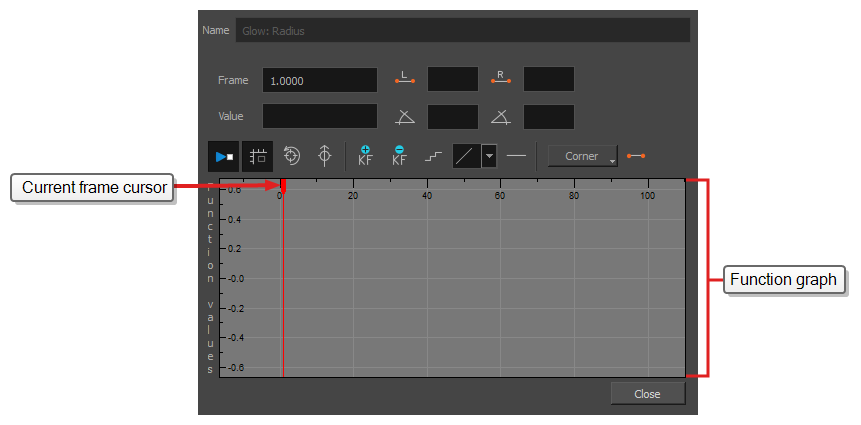
This dialog will allow you to animate the function. The function graph at the bottom is made to represent the values of the function throughout each frame in the scene.
-
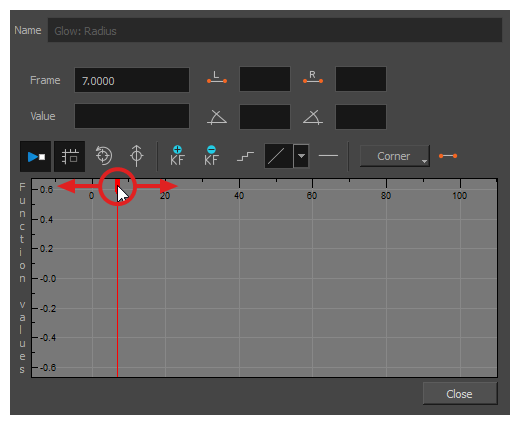
In the function graph, click and drag on the red cursor
 to move it to the frame where you want to create your first animation keyframe.
-
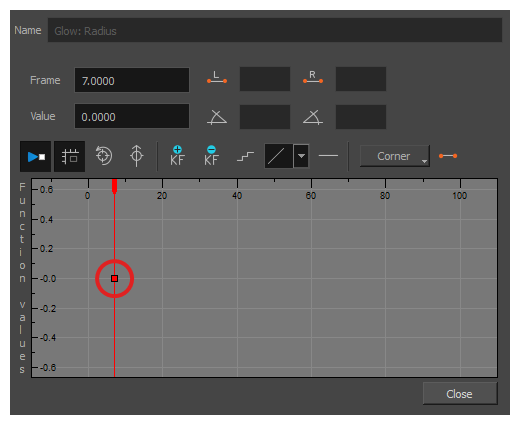
Click on the
Add Keyframe button to create the first animation keyframe for the effect.
A keyframe
 is created and should be visible in the function graph. If you do not see it, that is because the function graph is not positioned to include the keyframe within its frame. To move the function graph to view the function's keyframe, click on the
 Reset View or
Reset View Vertically button.
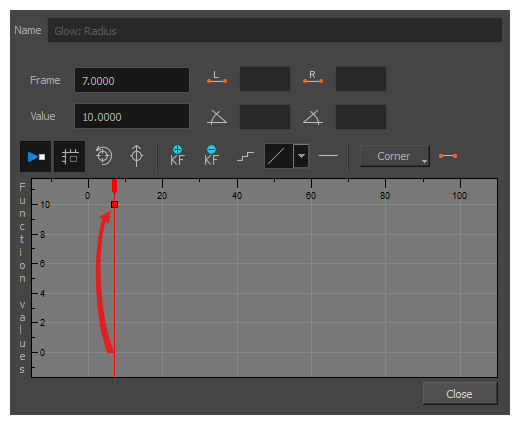
- Adjust the value of the parameter at the current frame by doing one of the following:
- In the Value field over the function graph, type in the desired value for the parameter.
In the function graph, click and drag on the
 keyframe , and move it up to increase its value, or down to decrease it. TIP If you want to set the keyframe to a value that is outside of the function graph's frame, you can press the 1 key to zoom out. You can also press the 2 key to zoom back in.
-
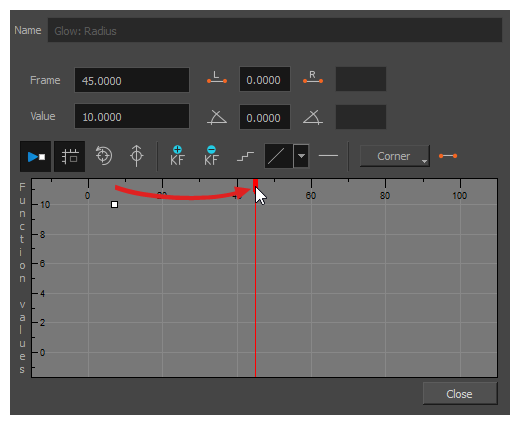
Click and drag on the red cursor to move it to the frame where you want to create your second animation keyframe.
-
Click on the Add Keyframe
button to create the second animation keyframe for the effect.
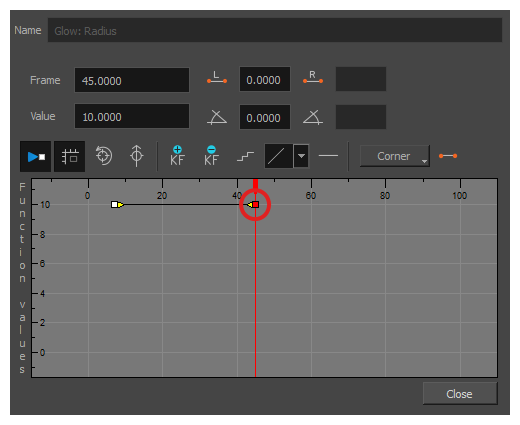
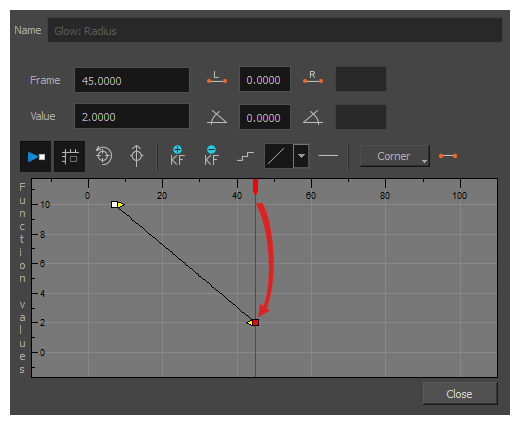
- Adjust the value of the parameter at the current frame by doing one of the following:
- In the Value field over the function graph, type in the desired value for the parameter.
- In the function graph, click and drag on the
 keyframe , and move it up to increase its value, or down to decrease it.
-
If you want to adjust the timing of the animation between the first and second keyframes, do the following:
-
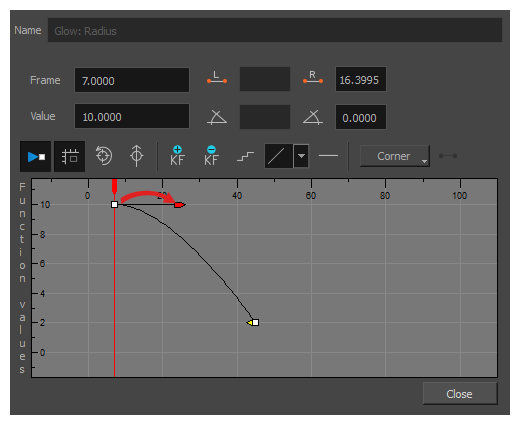
Click and drag the
 Bezier handle of the first keyframe towards the right, in any direction, to affect the ease-in of the animation.
-
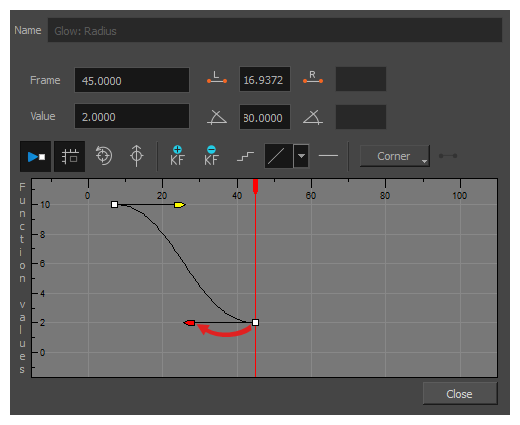
Click and drag the
 Bezier handle of the second keyframe towards the left, in any direction, to affect the ease-out of the animation.
-
- Repeat these steps until you created and timed every animation keyframe required to animate your effect.