The Volume Object node lets you define a volume zone the light will interact with.
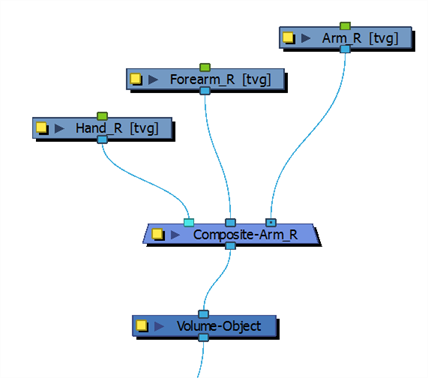
If there is a single drawing on which you want to apply shading, you only need one Volume Object node. For cut-out characters, you will require more as you will define which should be different volumes. For example, you could decide that the arm, forearm, and hand will form one shape for the light to hit and create a highlight. You could then define the body as a separate volume. If you use different Volume Object nodes on the arm pieces, you will get odd carvings and bumps where the joints overlap. Before adding light shading to your rig, you should analyze how the parts will interact with one another.
All the Volume Object nodes in your structure will be gathered in the Normal Map node where you can define the parameter for each volume.
Volume Object Properties

| Parameter | Description |
| Name |
With the light shading feature, the naming of the nodes becomes important. Since there isn’t any limitation on the number of Volume Object nodes that can be added to a node structure, it's quite important to give a good name to each Volume Object node. These names will later appear in the Normal Map node, in the Volume Creation section. |
| ID |
This is the identity number you assign to a drawing or a group of drawings that will be represented in the same volume once it is generated by the Normal Map node. This ID is also in the Normal Map node, where a list of all Volume Objects is applied. |
| Cut Volume Cues with Geometry |
When this option is not selected, Harmony cuts the 3D geometry (shading bas relief) of the drawing after it has been generated by the Normal Map node. Some nodes, such as filters, can affect the shape or colour of the drawing. Those nodes will be processed and recognized by the Normal Map node. Therefore, it is possible to limit the 3D geometry only on a part of the drawing, but not all of it. The 3D geometry follows the edge of the entire drawing and will not be affect by the filters. |
| Use Drawing to Create Volume |
During the generation created by the Normal Map node, the shape of the drawing or group of drawings identified with the same ID will be recognized to create the volume. When this option is selected, the Light Shader and Tone Shader effect appear inside the contour of those drawings. |
| Elevation Baseline |
The baseline defines how much you can add or carve the Volume Object. The drawing or group of drawings connected to this Volume Object node share the same baseline value. Because this setting is closely tied to the adding/curving option called Intensity (0-100) (accessible in the Volumetric Colour Information of the Normal Map node), both places need to have some parameters set. Playing only with the Geometry Intensity won’t change anything if there aren’t any parameters set in the Normal Map node. |