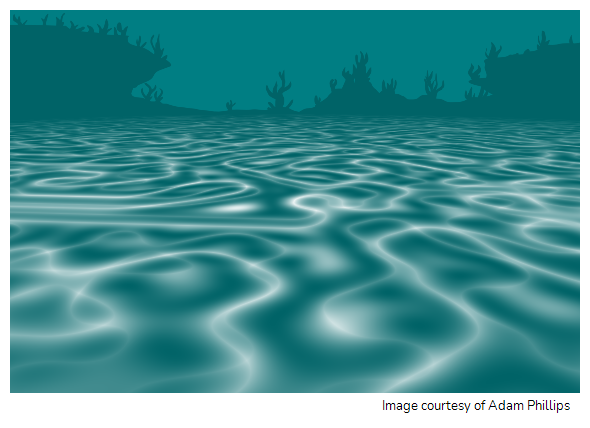
The Turbulent Noise effect uses Perlin noise to create greyscale noise for organic-looking backgrounds, displacement maps and textures. Among other things, it can be used to simulate fluid effects like clouds, fire, lava, steam, flowing water, or vapour. The Turbulent Noise effect models turbulent systems with smaller noise features moving more quickly than larger noise features. The Turbulent Noise effect creates smooth animations and takes less time to render than other noise or grain effects.
For detailed video tutorials and sample scenes by Adam Phillips, see:
https://www.toonboom.com/resources/video-tutorials/chapter/adam-phillips-harmony-effects
Connection
Being a generator, the Turbulent Noise node does not require an input image. It generates noise using its Layer Properties. However, its default settings will only output solid black.
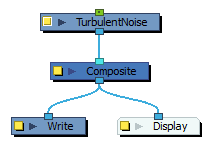
The Turbulent Noise node can be hooked to a peg, allowing you to transform and animate the effect.
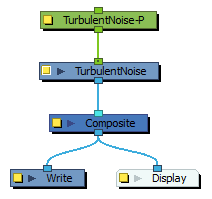
Optionally, a Turbulent Noise node can also be connected to a matte image. In this case, the noise will only fill the shape of the matte.
Layer Properties
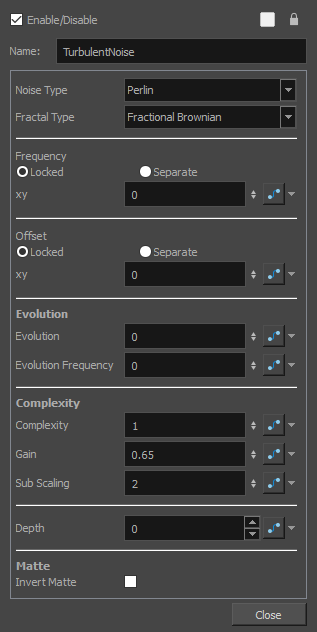
| Parameter | Description |
|---|---|
| Enable/Disable |
Allows you to enable or disable the node. When disabled, a node has no visible effect on the rendered image, nor on the preview in the Camera, |
| Colour Swatch |
Sets the colour of the layer in the Timeline view |
| Name | Allows you to enter a name for the node. |
| Noise Type |
The algorithm used to generate the noise:
|
| Frequency | The density of displacement appearing in the noise. A higher value produces a greater amount of displacement in a given area; a lower value produces a smaller amount. |
| Offset | Moves the entire image. |
| Locked | Applies parameter value while retaining the X and Y ratio. |
| Separate | Allows you to apply different parameter values to X and Y. |
| xy | When locked, applies parameter values to both X and Y. When separated, allows you to apply different value to X and Y. |
| Evolution | Determines the displacement pattern over time. |
| Evolution Frequency | This factor makes the complexity iterations animate or transform at a higher speed. In other words, the second, third, etc. passes, controlled by the Complexity parameter, will mutate faster than the main one. |
| Complexity |
The number of noise layers that make up the noise. Each successive layer has a higher frequency, resulting in a smaller noise effect. You can have up to seven passes. Increasing this number increases the depth and amount of detail in the noise. Use Complexity with Sub Scaling when the value is 1 or greater. NOTE Increasing the Complexity results in longer rendering times.
|
| Gain | Controls the amount of opacity present in the iteration of noise. This also affects the layer when using Sub Scaling. With a value of 0, you will not see the sub noise. A value of 1 will show the sub noise just as strong as the main one. For example, with water ripples, a higher amount of Gain will reveal more ripple or subripples. |
| Sub Scaling: | The factor by which the main noise is modified at each iteration of complexity. A value of 1 make the two noises identical. A value of 2 makes the sub noise twice as small. The next iteration would be 4 times smaller. Values must be greater than 1. |
| Depth | This value determines the composition order when the Z value of two elements is the same. |
| Matte | |
| Invert Matte | If the Turbulent Noise node is connected to a matte image, by default, the noise will only fill the opaque areas of the matte. If this parameter is enabled, the noise will fill the transparent areas of the matte instead. |