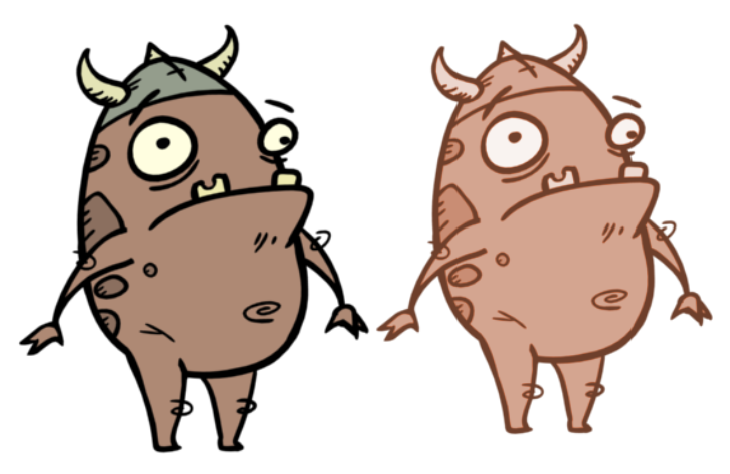
The Hue-Saturation effect lets you adjust the hue, saturation and lightness values individually or by using the HLS picker or Hue Range picker. You can achieve effects over the entire image, such as a sepia tone. Changes you make to the values are additive to the final image.
For detailed video tutorials and sample scenes by Adam Phillips, see:
https://www.toonboom.com/resources/video-tutorials/chapter/adam-phillips-harmony-effects
Connection
The Hue-Saturation node takes an image of any type as its input and outputs an image with different hue, saturation and lightness parameters.
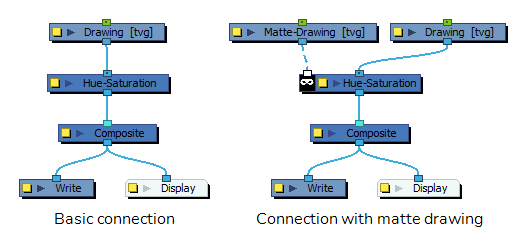
Optionally, it can also be connected to a matte image. In this case, only the parts of the input image that intersect with the matte will be affected by the effect.
Layer Properties
| Parameter | Description |
|---|---|
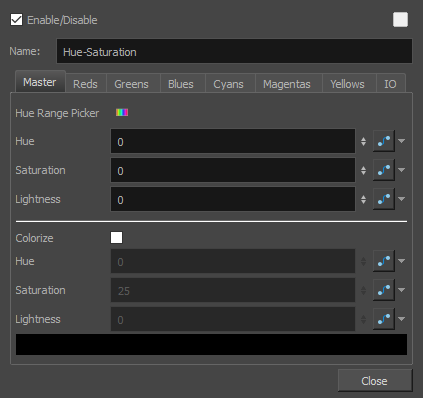
| Enable/Disable |
Allows you to enable or disable the node. When disabled, a node has no visible effect on the rendered image, nor on the preview in the Camera, |
| Colour Swatch |
Sets the colour of the layer in the Timeline view |
| Name | Allows you to enter a name for the node. |
Master Tab
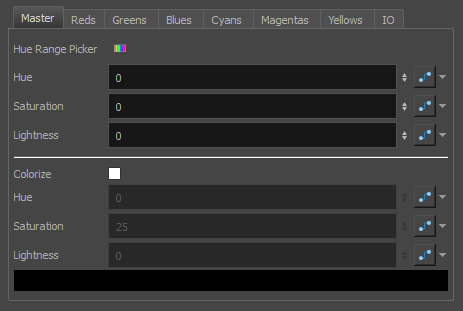
The master tab allows you to adjust the hue, saturation and lightness settings for all the hues in the source drawing simultaneously. It should be used unless you want to apply specific parameters on specific ranges of hues.
| Parameter | Description |
|---|---|
| Hue Range Picker |
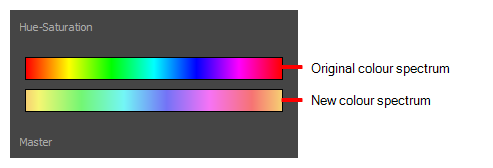
Opens the Hue Range Picker. In the Master tab, the Hue Range Picker can only be used to see the original colour spectrum of the image and compare it to the colour spectrum as processed by the Hue-Saturation effect.
|
| Hue | Offsets the hues in the source image. The hue of every pixel in the source image is offset on the spectrum of hues. This parameter can be set to a value between -360 and 360. |
| Saturation | Changes the saturation of the source image. This parameter can be set to a value between -100 and 100. Negative values make the image closer to a greyscale image. Positive values make the colours appear more saturated by exacerbating the difference between each channel. |
| Lightness | Changes the lightness of the source image. The lightness can vary between -100 and 100, where -100 makes the image solid back and 100 makes the image solid white. Hence, negative values darkens the colours by making every pixel proportionally closer to black, and positive values lighten the colours by making every pixel proportionally closer to white. |
| Colourize |
Enables colourization. Instead of affecting the existing colours of the input image, the Hue-Saturation effect will convert the image to greyscale, then add a single colour over the levels of grey based on the Hue, Saturation and Lightness settings you input below. NOTE When the Colourize parameter is enabled, fields below the check box are accessible and fields above the check box are greyed out.
|
| Hue | The colour with which to colourize the image. |
| Saturation | The saturation with which to colourize the image. A lower setting will make the colourized image closer to a greyscale image. A higher setting will make the colour more saturated. |
| Lightness | Changes the lightness of the source image. The lightness can vary between -100 and 100, where -100 makes the image solid back and 100 makes the image solid white. Hence, negative values darkens the colours by making every pixel proportionally closer to black, and positive values lightens the colours by making every pixel proportionally closer to white. |
| Colour Swatch |
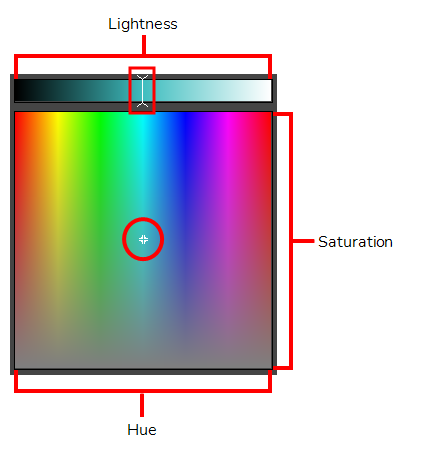
When Colourize mode is enabled, you can click on the colour swatch to open a Hue, Saturation and Lightness picker. The lightness can be selected by moving the slider at the top. The hue and saturation can be selected by moving the cursor in the box underneath the slider.
|
Hue Tabs
The other tabs in the Hue-Saturation Layer Properties are meant to allow you to specify the hue, saturation and lightness parameters for specific colour ranges. By default, each tab is configured to affect a specific colour range corresponding to their tab name, namely:
- Reds
- Greens
- Blues
- Cyans
- Magentas
- Yellows
At their default settings, all tabs combined cover the entire spectrum of hues. The colour spectrum that each tab affects can however be customized.
| Parameter | Description |
|---|---|
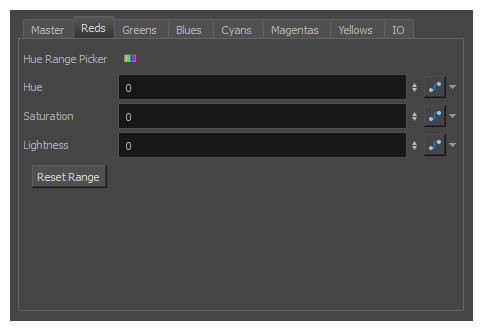
| Hue Range Picker |
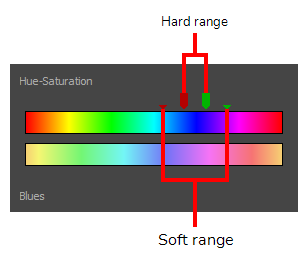
Open the Hue Range Picker dialog. This allows you to tweak the range of hues that the settings in the current tab affects. For example, this is the default range for the Blue tab:
Every pixel in the source drawing that has a hue within the hard range will be affected by the settings in the tab. As for pixels with a hue within the soft range, how much they are affected by the settings in the tab depends on how much their hue is closer to the hard range or to the limit of the soft range. The further away from the hard range the hue of a pixel is, the lesser the effect of the hue, saturation and lightness settings on this pixels is. This allows you to taper the effect of the ranges so as to not create hard seams between areas of different colours. |
| Hue | Offsets the hues in the area covered by the selected hue range. The hue of every pixel in this area is offset on the spectrum of hues. This parameter can be set to a value between -360 and 360. |
| Saturation | Changes the saturation of the area covered by the selected hue range. This parameter can be set to a value between -100 and 100. Negative values make the area closer to greyscale. Positive values make the colours in the area appear more saturated by exacerbating the difference between each channel. |
|
Lightness |
Changes the lightness of the area covered by the selected hue range. The lightness can vary between -100 and 100, where -100 makes the area solid back and 100 makes the area solid white. Hence, negative values darkens the colours by making every pixel proportionally closer to black, and positive values lighten the colours by making every pixel proportionally closer to white. |
| Reset Range |
Resets the range selected in the Hue Range Picker to the default range for the current colour tab. |
IO Tab
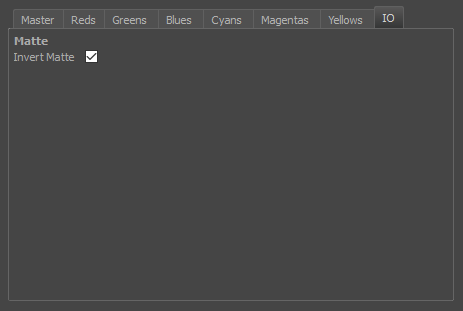
The IO tab contains parameters relating to the input and out ports of the effect.
| Parameter | Description |
|---|---|
| Invert Matte |
Inverts the matte used to generate the effect. By default, the effect is applied to the opaque areas of the matte drawing. When this option is enabled, the effect is applied to the transparent areas of the matte instead. |