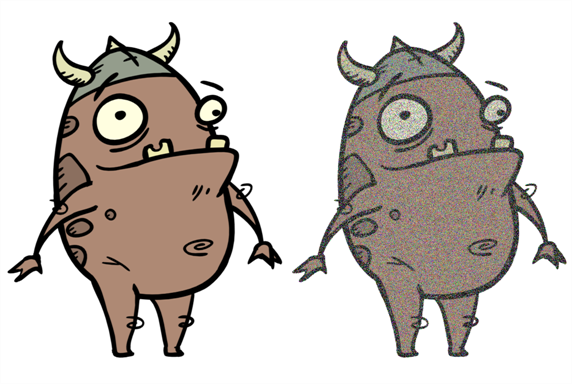
Use the Grain effect to add a film grain to an image; the film grain looks like video noise.
Refer to the following example to connect this effect:
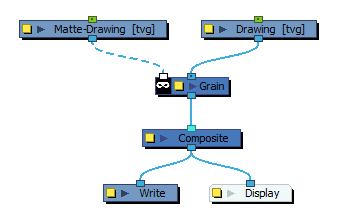
The Grain node has two input ports.
| • | On the left port, attach the element that will act as the matte defining the grain area. |
| • | On the right port, attach the element on which you want to apply the grain effect. |
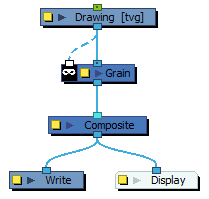
The Grain node requires a matte drawing. If you simply want to apply a grain over the source drawing, simply connect it to both the image input port and the matte input port of the node:
Properties
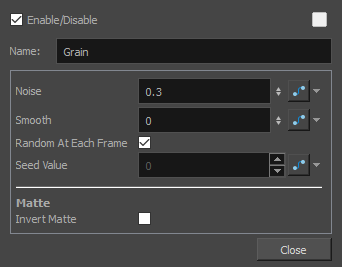
In the Layer Properties of the Grain node, you can adjust the amount of grain to add to an image as well as the sharpness and softness of the grain.
| Parameter | Description |
|---|---|
| Name | Allows you to enter a name for the node. |
| Noise | The amount of grain to add to the image based on the percentage of pixels to alter. The larger the value, the courser the grain. The smaller the value is to 0 (zero), the finer the grain. |
| Smooth | The amount of blending to apply to the grain effect, based on the blur radius, to make the effect appear less pixelated. The larger the value, the greater the smoothing. |
| Random at Each Frame | Computes the colour shift in the grain using a different value at each composite. This means that your images will look different each time you render them. Deselect this option and select a Seed Value to ensure the same result every time you composite the grain effect. |
| Seed Value | This value corresponds to a unique pattern in the grain. If you want to retain this pattern in other frames, you can reuse this value. |
| Matte | |
| Invert Matte |
Inverts the matte used to generate the effect. By default, the effect is applied to the opaque areas of the matte drawing. When this option is enabled, the effect is applied to the transparent areas of the matte instead. |