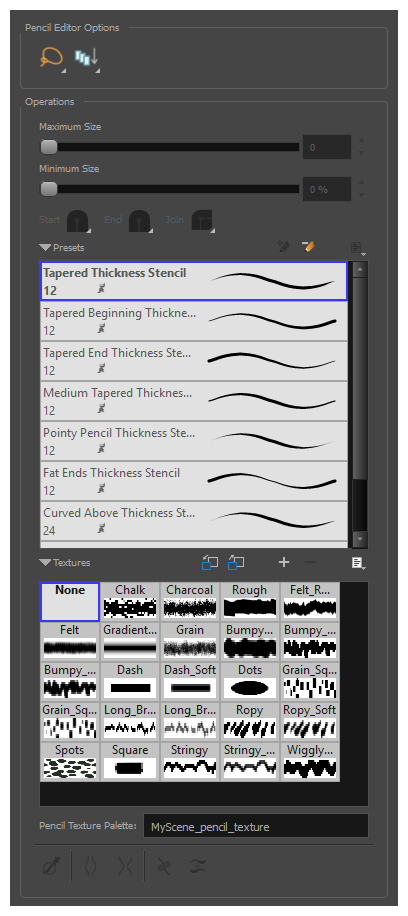
When you select the Pencil Editor tool, its properties and options appear in the Tool Properties view.

| Icon | Tool Name | Description |
|
|
Selection Mode |
Allows you to choose the method to visually select multiple elements:
TIP You can press and hold the Alt key to temporarily use the other selection mode.
|
|
|
Apply to Visible Drawing Layers |
This option allows you to select which layers the tool should affect. It can be toggled on or off. When toggled on, it has two different modes. You can select a mode by clicking and holding on the button.
NOTE This option only works in the Camera view.
|
| Maximum Size |
Defines the maximum width of the pencil line. If the pencil line has a constant size, this will define the width of the pencil line all over. If the pencil line has a varying size, this will define the width of its larger areas. Areas that are in-between the maximum and minimum size will be resized proportionally. |
|
| Minimum Size | Defines the minimum width of the pencil line. If the pencil line has a varying size, this will define the width of its smaller areas. Areas that are in-betwen the maximum and minimum size will be resized proportionally. | |
| Shape |
You can adjust the start, end, and join style of a pencil line.
|
|
| Presets |
Harmony provides a A thickness stencil saves the thickness information across the length of the line. When drawing with a thickness stencil, the pressure sensitivity of the tablet is discarded. A thickness stencil can be used while drawing, or applied afterwards. You also have the possibility to apply different textures to your lines by either using the default presets or to import your own. You can export the pencil presets that you have created and import those that others have created. This is a good way for you and project collaborators to keep a consistent look for the project. |
|
|
|
New Brush |
Allows to create a new preset from the selected pencil line. |
|
|
Delete Brush |
Deletes the currently selected preset. |
| Rename Brush |
Allows you to rename the currently selected preset. |
|
| Small Thumbnail, Large Thumbnail, and Stroke View |
Allows you to display the presets as small square thumbnails, large square thumbnails or a list of stroke preview. |
|
|
|
Use as Default Pencil Texture Palette |
Sets the currently selected pencil texture palette as the default pencil texture palette in your user preferences. The default pencil texture palette is added to every scene you create in Harmony. The palette is copied in your preferences, so it will be added to your new scenes in the exact state it is when you make it the default pencil texture palette. |
|
|
Reload Default Texture Palette |
Imports the default pencil texture palette as a new pencil texture palette into your scene's palette list, and selects it as the current pencil texture palette. |
| New Texture |
Adds a new custom pencil texture to the list. |
|
| Delete Texture | Deletes a texture preset from the list. | |
| Rename Texture | Renames the selected texture to keep the list organized. | |
| Presets |
Harmony provides a variety of pencil texture presets and also lets you create and save your own. |
|
| Pencil Texture Palette | Displays the colour palette assigned to hold the pencil textures. Use the Colour View menu to assign a new palette. | |
|
|
Smooth Selection |
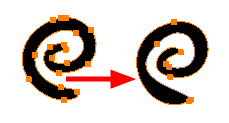
The Smooth operation lets you smooth out selected drawing strokes and remove extra points.
TIP
You can also smooth the selection by selecting
|
|
|
Pump Pencil Pressure |
The Pump Pencil Pressure option is used to increase the line thickness of a selected area on a pencil line.
|
|
|
Deflate Pencil Pressure |
The Deflate Pencil Pressure option is used to decrease the line thickness of a selected area on a pencil line.
|
|
|
Merge Pencil Lines |
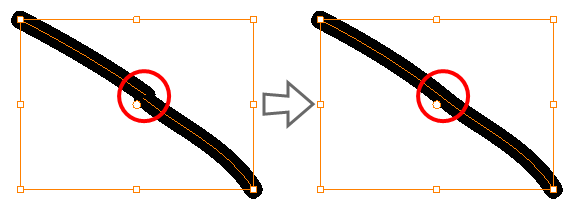
Because pencil lines are defined by their centre lines, two pencil lines that brush against each other may not actually make a closed shape, even if they appear closed. If you select several pencil lines that are close together, you can use this button to close the small gaps between these pencil lines and make them into a single pencil line.
|
|
|
Reverse Pencil Thickness |
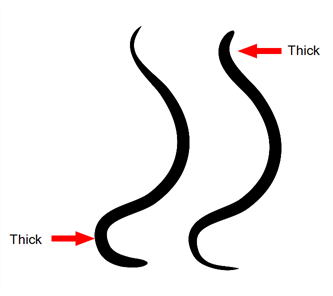
The Reverse Pencil Thickness option inverts the thick and thin section on a selected pencil line. This option will take the thickest size on the line and apply it to the thinnest, and it will apply the thinnest to the thickest.
|


