Setting up your scene can be compared to building a set for a television show. This is the point when you position each scene element such as the camera frame, the background elements and the characters.
Positioning Layers
The first step to setting up your scene is to place each layer in their initial position, angle and size. You can make any kind of geometric transformations on a layer using the Transform tool.
- In the Tools toolbar, select the
Transform tool or press Shift + T.
- In the Tools toolbar, if
Animate Current Frame or
Animate Onion Skin Range mode is enabled, click on it to open the Animate pop-up menu and select
Animate Off.
- In the Tool Properties view, make sure
Peg Selection Mode is disabled.
-
In the Camera or Timeline view, click on the layer you want to manipulate to select it.
TIPS- If you want to select multiple layers in the Camera view, hold down Shift and click on each layer you wish to select.
- If you want to select multiple layers in the Timeline view, hold down Ctrl (Windows/Linux) or ⌘ (macOS) and click on each layer you wish to select.
- If you want to select a contiguous series of layers in the Timeline view, hold down Shift, click on the first layer you want to select, then on the last layer you want to select.
A manipulator control box appears around the selected layer.
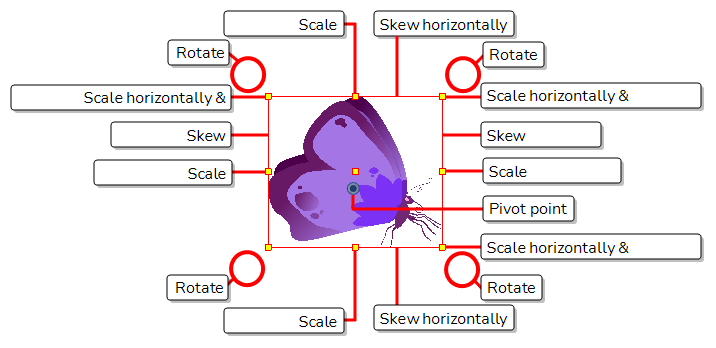
- Do one of the following:
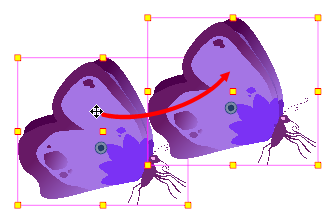
To move: Move the cursor over the artwork. When the cursor changes into
 , click and drag on the artwork to move it.
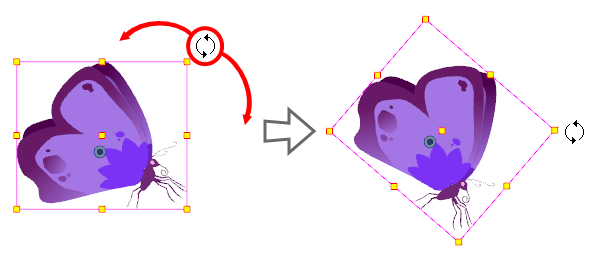
To rotate: Place the pointer outside of a corner of the bounding box. When the cursor changes into,
 , then click and drag to rotate.
To scale: Move the cursor over any of the yellow control points on the manipulator box. When the cursor changes into
 , click and drag to scale the layer.
 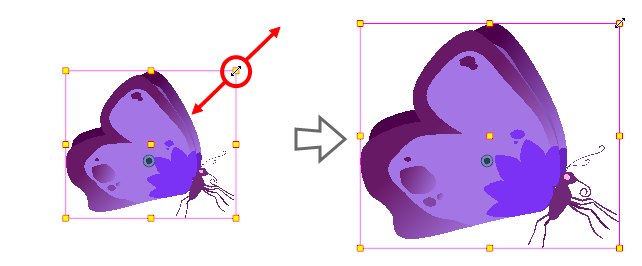 NOTE When scaling your selection, you can hold down Shift to preserve the proportions between its width and height.
Move the cursor over one of the vertical edges of the manipulator box. When the cursor changes into
 , click and drag up or down to skew the layer vertically.
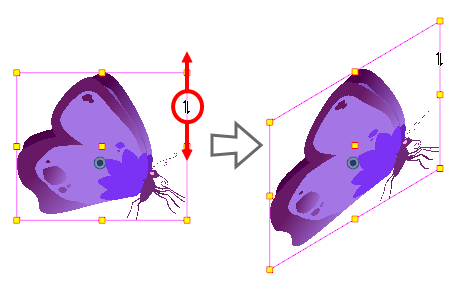
Move the cursor over one of the horizontal edges of the manipulator box. When the cursor changes into
 , click and drag left or right to skew the layer horizontally.
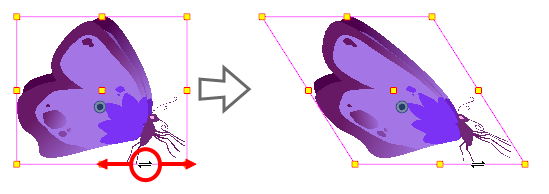
Repositioning the Pivot
Transformations made on a drawing layer, such as rotation, scale, skew and flip, are made relative to the position of the drawing's pivot point. For example, rotating a layer will make it rotate around its pivot point, and scaling the layer will make it scale as if its centre was actually its pivot point.
While making transformations using the Transform tool, you can drag and drop your selection's pivot. However, this has no permanent effect. It will only temporarily change the pivot's position to help you make transformations at the selected frame, but the actual pivot point of your drawing layer will remain the same.
You can reposition a layer's pivot point permanently by using one of the tools in the Advanced Animation toolbar.
- In the Advanced Animation toolbar, select the
Translate ,
Rotate ,
Scale , or
Skew tool.
- Do one of the following:
- In the Timeline view, select the layer for which you want to move the pivot.
- In the Camera view, Ctrl + click (Windows/Linux) or ⌘ + click (macOS) on the layer for which you want to move the pivot.
The  pivot point appears in the Camera view.
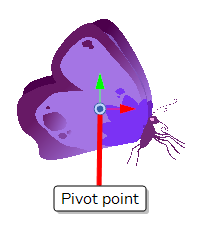
- Move the cursor over the pivot point. When the mouse cursor becomes
 , click and drag on the pivot point to reposition it.
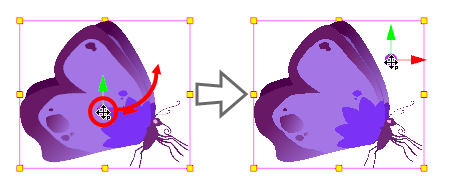
The layer's pivot point is now repositioned. If the layer has been animated, its position will be offset across the scenes relative to how much you just offset the pivot point.
Animating a Layer
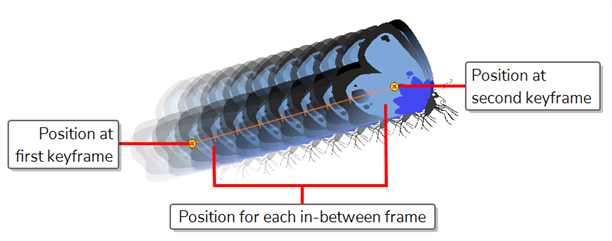
You can animate a layer by placing it in different positions, angles and sizes at different points across your scene's timeline. To do this, you can create animation keyframes on your layer. A keyframe records the geometrical transformations on a layer at a specific point in time. When two animation keyframes are on a layer at different points in your scene's Timeline, Harmony will automatically interpolate the position, angle and size of the layer on each frame between those two keyframes, creating an animation.
- In the Tools toolbar, select the
Transform tool or press Shift + T.
- In the Tools toolbar, if
Animate Off or
Animate Onion Skin Range mode is selected, click on it to open the Animate pop-up menu and select
Animate Current Frame.
-
If your layer has a parent peg:
- If you want to animate on the peg instead of the layer, make sure that
Peg Selection Mode is enabled in the Tool Properties view.
- If you want to animate directly on the layer, make sure that
Peg Selection Mode is disabled in the Tool Properties view.
- If you want to animate on the peg instead of the layer, make sure that
- In the Timeline view, go to the first frame.

- From the top menu, select Animation and make sure the Stop-Motion Keyframe option is unchecked. This will make it so Harmony automatically creates the animation between the animation keyframes you create.
- Select the cell where you want to create your first keyframe
-
To create your first keyframe, do one of the following:
- In the Timeline toolbar, click the
Add Keyframe button.
- Right-click and select Add Keyframe.
- Press F6.
- In the Timeline toolbar, click the
A keyframe is created on the first frame of the Timeline view.

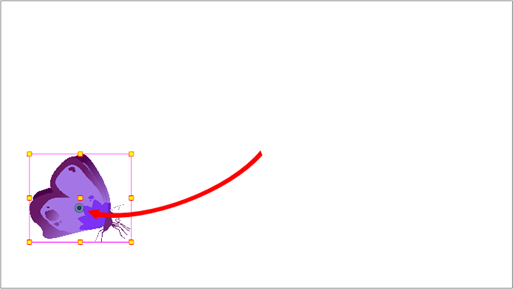
- In the Camera view, select the element to animate and move, rotate, scale or skew it so that it is in its proper starting position.
- In the Timeline view, go to the frame on which you want to set the second position.

- Select the cell where you want to create your second keyframe. right-click on the selection and select Insert Keyframe.
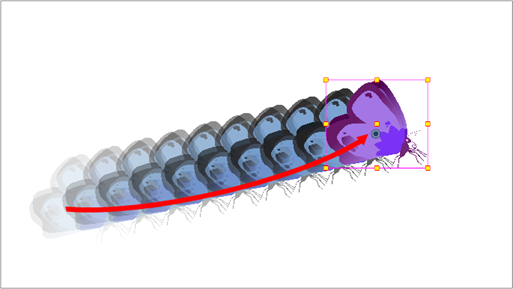
The second keyframe appears in the Timeline view, along with a line going from your first keyframe to your second keyframe. This indicates that every frame in-between will be animated by Harmony.

-
In the Camera view, move, rotate, scale or skew the element to that it is in its proper second position.
- In the Timeline view, select the first frame to rewind to the beginning of your animation.
- In the Playback toolbar, click on the
Play button to preview your animation.