The WMV Settings dialog box lets you set the video and audio settings when exporting a Windows Media Video (.wmv)movie.

NOTE For tasks related to this dialog box, see Exporting a Movie File .
NOTE The option to export to Windows Media Video is only available on Windows.
- From the top menu, select File > Export > Movie.
The Export Movie dialog box opens.
- Set Movie Format to Windows Media Video (*.wmv).
- Click on the Movie Settings button.
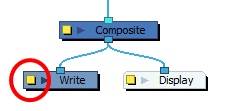
- In the Node view, locate your scene's Write node.
- Open the Write node's Layer Properties by doing one of the following:
- Click on the yellow square at the left end of the Write node.
- Right-click on the Write node, then select Layer Properties.
- In the Write node's Layer Properties, enable the Movie option.
- To the right of the Movie check box, open the drop down menu and select Windows Media Video (*.wmv).
- To the right of Movie Options, click on Customize.
| Parameter | Description |
| Video | |
|
Variable Bit Rate Quality |
Lets you choose a quality setting ranging from 5 to 100 for the video stream. The higher the quality of the export, the larger the resulting file. |
| Sound | |
|
Profile |
Lets you choose among preset combinations of audio sample rates, sample sizes and channel modes for the audio stream:
NOTE Exporting in 8-bit audio requires Apple QuickTime to be installed.
|