Use the Colour Banding effect to add a colour banding visual effect to your elements. The node will associate a flat colour to the different regions of your element. These regions are delimited according the alpha values that are set up in the effect node and which will be recognized on the original element. You can use this effect to change the visual style of a particle node, for example, by giving it a more cartoonish look.
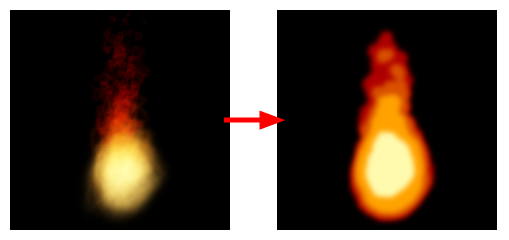
In this example, a Colour Banding node has been connected to a fire created with particle effects.
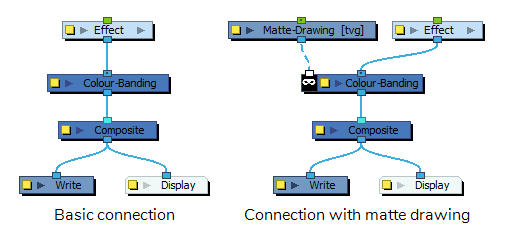
Refer to the following example to connect this effect:
Properties
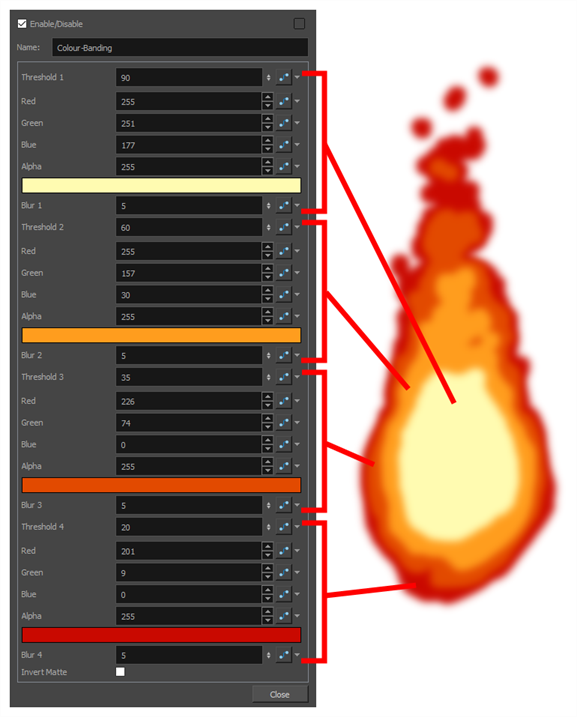
The Colour Banding node requires you to configure it with four colours, and to assign each of these colours with a threshold. Colours with a high threshold will replace brighter areas of the input image, and colours with a low threshold will replace its darker areas. Hence, the order in which you configure these colours does not matter.
| Parameter | Description |
|---|---|
| Name | Allows you to enter a name for the node. |
| Threshold |
The minimum value required in the source pixel for this colour to replace the source image colour. The threshold can be set to a value between 0 and 100. A high setting will make the colour replace brighter areas of the input image, whereas a low setting will make it replace darker areas. Colours are applied on the output image in order of their threshold. The colour with the lowest threshold is applied first, then the one with the second lowest threshold is applied over it, followed by the one with the second highest threshold and finally the one with the highest threshold. Setting this parameter to 100 will remove the colour from the effect, allowing you to use less than four colours if preferred. |
| Colour |
The colour with which to fill the zone that exceeds the threshold:
|
| Colour Swatch |
Opens the Colour Picker dialog, in which you can visually select a colour for the zone. |
| Blur | The amount of blurriness to apply to the zone. |
| Invert Matte |
Inverts the matte used to generate the effect. By default, the effect is applied to the opaque areas of the matte drawing. When this option is enabled, the effect is applied to the transparent areas of the matte instead. |