Creating a Rough Animation
The first step to create paperless animation is the rough construction, which is the skeleton of your animation. You would usually start by animating the most important part of a character's action. For example, to animate a walk cycle, you will start with the torso motion and the legs. Secondary animation such as the head, arms and clothes can be added afterward.
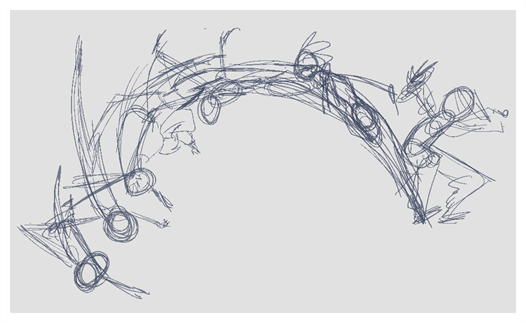
For a satisfactory animation, start by animating the main action with quick, rough sketches, then add the details when you're satisfied with the movement. If you start animating all the details right away, you will lose a lot of time if you have to make corrections, and your animation is likely to look rigid.
- In the top row of the Timeline view, click on Show All Thumbnails
to enable Thumbnail mode.

- Press Ctrl + U (Windows/Linux) or ⌘ + U (macOS) to open the Preferences dialog box.
- Select the Exposure Sheet tab.
- Select the Use Current Frame as Drawing Name option. When this preference is enabled, each new drawing will be named by the frame number they are created on.
- In the Tools toolbar, select the Brush
tool or press Alt + B.
- In the Colour view, select a colour for the brush. It is a good idea to choose a light colour for your rough animation. This will make the clean up process easier as your clean dark lines will contrast with your light sketch lines.
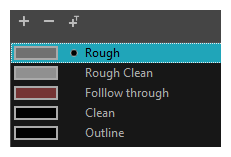
- In the Timeline or Xsheet view, select the cell where you want your first drawing to appear.
- In the Camera or Drawing view, draw the first key drawing.
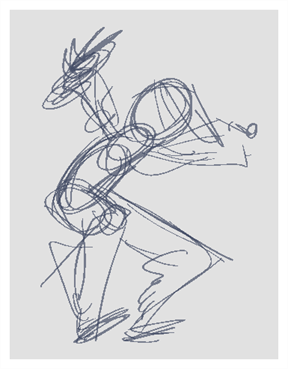
As soon as you draw your first stroke, a drawing is automatically created in the cell you selected.

- Increase the Timeline view's zoom level until you see the thumbnails inside the cells by doing one of the following:
- Drag the Timeline Zoom
 slider to the right.
 - Click on the Timeline view's tab, then press 2 repeatedly.
- Move the mouse cursor in the Timeline view, then hold Ctrl (Windows/Linux) or ⌘ (macOS) and roll the mouse wheel up.

- With your first cell still selected, do one of the following to mark your drawing as a key drawing. This will help you stay organized.
- Enable the Mark Drawing toolbar by selecting Windows > Toolbar > Mark Drawing from the top menu, then click on the Mark Selected Drawings as Key
button.
- Enable the Xsheet toolbar by focusing on the Xsheet, then selecting Windows > Toolbar > Xsheet from the top menu. Then, click on the Mark as Key Drawing
button.
- In the Timeline view menu, select Drawings > Mark Drawing As > Key Drawing.

- In the Timeline or Xsheet view, select the cell where your next key drawing will appear.

- In the Tools toolbar, click the Onion Skin
button. This will display the previous and next drawings in a light colour in the Camera or Drawing view, behind your current drawing, so that you can use them as references to draw new drawings with accuracy. This can be useful to draw breakdown poses between two key poses, or to add an in-between drawing between two other drawings.
- Ensure the onion skin displays your first key drawing, so that you can base your second key drawing on it. To do this, do one of the following:
- In the Timeline view, drag the blue onion skin markers to extend the number of past and future drawings to display as onion skin.

- In the Camera View or Drawing View toolbar, use the Onion Skin Add One Previous Drawing
, Onion Skin Reduce One Previous Drawing
, Onion Skin Reduce One Next Drawing
and Onion Skin Add One Next Drawing
buttons to adjust the span of the onion skin frame by frame.
NOTEWhen in the Drawing view, you can use the Onion Skin toolbar to make onion skin display only specific types of drawings, such as key drawings or breakdowns. Keep in mind that this does not work in the Camera view.
- Create a new empty drawing by doing one of the following:
- In the Timeline or Xsheet toolbar, click on the Create Empty Drawing
button.
- Press Alt + Shift + R.
- In the Camera or Drawing view, draw your second key drawing.
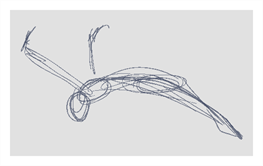

- In the Xsheet or Timeline view, identify the drawing as a key drawing.

- In the Timeline or Xsheet view, select a cell between the two key drawings. Using the onion skin markers, ensure the onion skin covers both your first and last drawings.

- Create a new empty drawing by doing one of the following:
- In the Timeline or Xsheet toolbar, click on the Create Empty Drawing
button.
- Press Alt + Shift + R.
- In the Camera or Drawing view, draw your new pose.

- In the Timeline or Xsheet view, select a new cell and repeat the previous steps for each new drawing.
Reviewing your Animation
Flipping through drawings can help see if the drawings you're working on connect well together and create the proper illusion of movement. You can quickly flip through your drawings using the Go to Previous Drawing and Go to Next Drawing keyboard shortcuts
- In the Timeline or Xsheet view, select the drawing from which you wish to flip.
- Do one of the following:
- Press F to go to the previous drawing.
- Press G to go to the next drawing.
- Press either shortcut repeatedly at a fast pace to flip through drawings backward or forward.
- Switch to the Drawing view.
- In the top menu, select Windows > Toolbars > Easy Flipping to enable the Easy Flipping toolbar.

- In the Easy Flipping toolbar, click the Previous
or Next
button to see the previous or next drawing of your animation.
- To display drawings in the first frame after you reach the last frame of your animation, select the Loop option.

- Move the slider to the right to flip forward and to the left to flip backward through your drawings.

The further you move the slider to the left or right, the faster the drawings will flip.
- In the Preroll field, enter the amount of drawings to automatically flip through before and after the current drawing.
- In the FPS field, enter the speed at which you would like to automatically flip through your drawings, in frames per second.
- Click on the Easy Flip button
to automatically flip through the drawings based on the Preroll and FPS settings.
When your rough animation is finished, play it back to make sure it looks as expected before proceeding to the next step.
- In the Timeline view, use the Enable/Disable All
and Solo
buttons to turn off any layers you don't want to see during playback.

- In the Timeline view, move the red playhead to the first frame of your animation and click the Start button on the Timeline toolbar. Then, move the playhead to the last frame of your animation and click the Stop button.

- In the Playback toolbar, click the Loop
button to enable looping during playback.
- In the Playback toolbar, click the Play
button to begin playback.
Cleaning Up
When your rough animation is completed, it is time to clean it up and ink it. This step is also called tracing. It consists of tracing solid and clean lines over the rough animation to close any open zones. This is the final paperless animation step before the ink and paint step.
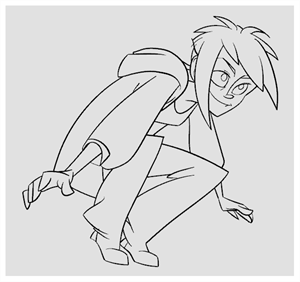
In traditional animation, cleaned up drawings are usually traced on a new sheet of paper with the rough underneath, made visible using the animation disk's light table. Likewise, in Harmony, you will need to add a new drawing layer on which to draw cleaned up drawings. When you're done cleaning up, you can simply disable the layer containing the rough animation so that it does not appear in the final animation. This approach also allows you to keep the roughs and the cleaned up drawings intact and to manage them independently.
In the Camera view, you will see your rough animation while working on your clean up layer. If you prefer to work in the Drawing view, you can enable the light table to display the rough animation while tracing on your clean up layer.
- In the Timeline view, rename the layer on which you created your rough animation by double-clicking on its name and entering its new name, for example: "Rough".
- In the Timeline view, add a layer by doing one of the following:
- In the Timeline view's layers toolbar, click on the Add Drawing Layer
button
- Press Ctrl + R (Windows/Linux) or ⌘ + R (macOS).
The Add Drawing Layer window opens.
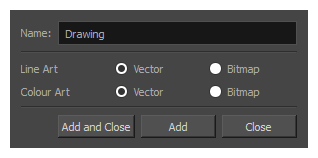
- In the Name field, type in your new layer's name, for example: "Clean-up".
- Set the Line Art and Colour Art options to Vector to get a vector layer or to Bitmap to have a bitmap layer.
- Click Add and Close to add a new layer and close the window.
A new drawing layer is added to the Timeline view.

- In the Timeline view, click the Lock
icon of the layer containing your rough animation to prevent the layer from being selected in the Camera view.

- In the Timeline or Xsheet view, select the new layer’s cell corresponding to the first key drawing of your rough animation.

- In the Tools toolbar, select a drawing tool such as the Pencil
tool.
- In the Colour view, select a colour for tracing your animation. Pick a dark bold colour, such as black, to make sure it contrasts well with the light colour of your rough animation.
- In the Camera or Drawing view, start tracing the first key drawing.
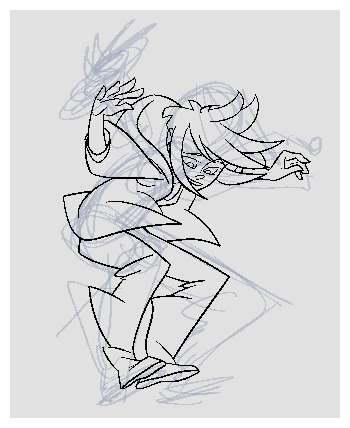
NOTEIf overlay layers are in the way, you can disable them temporarily by clicking on their Enable/Disable buttonin the Timeline view, so that only your rough animation and your clean up layers are displayed.
- In the Timeline or Xsheet view, select the next cell corresponding to a rough drawing.
- In the Tools toolbar, click the Enable Onion Skin
button.
- Ensure onion skin displays your previous cleaned up drawing, by doing one of the following:
- In the Timeline view, drag the blue onion skin markers to extend the number of past and future drawings to display as onion skin.

- In the Camera View or Drawing View toolbar, use the Onion Skin Add One Previous Drawing
, Onion Skin Reduce One Previous Drawing
, Onion Skin Reduce One Next Drawing
and Onion Skin Add One Next Drawing
buttons to adjust the span of the onion skin frame by frame.
- In the Camera view, trace your next drawing.
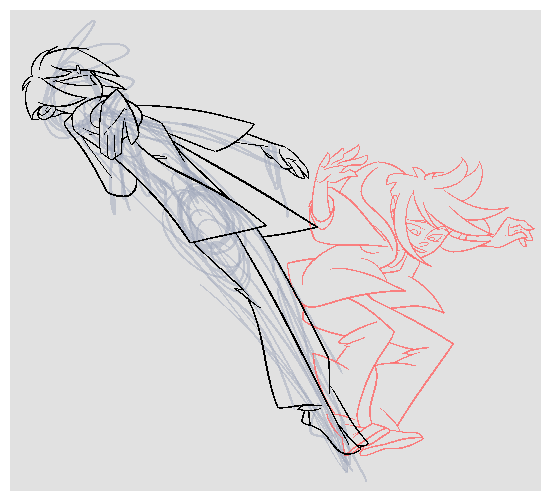
- Repeat the previous steps for each drawing.