Cut-out animation allows for great advancements and time saving in production, but it has certain limitations. One of the main advantages of using a cut-out puppet is the ability to reuse your characters without having to redraw them and you can modify your animations very quickly. This speeds up the process quite a bit. One of the disadvantages of cut-out animation when wanting to retain the time saving factor and ability to quickly modify an animation, is the fact that you cannot easily create tones and highlights. To do so, you must draw all the highlight zones for each frame by hand. Following that, if you want to modify your animation, you have to redraw those zones. This slows down the process. There are a few tricks for doing simple automated highlights, but the results are not always convincing.
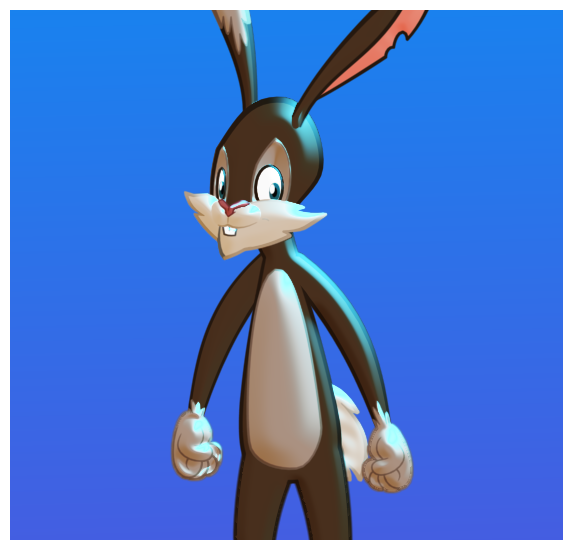
The Harmony Light Shading effect provides a proper solution to this issue. It allows you to add a few nodes to your original puppet rig and obtain a customizable lighting effect on your characters. It can be applied to any object in your scene, not only on cut-out characters. The light shading effect allows you to define your volume zones as well as your light source and animate its position.
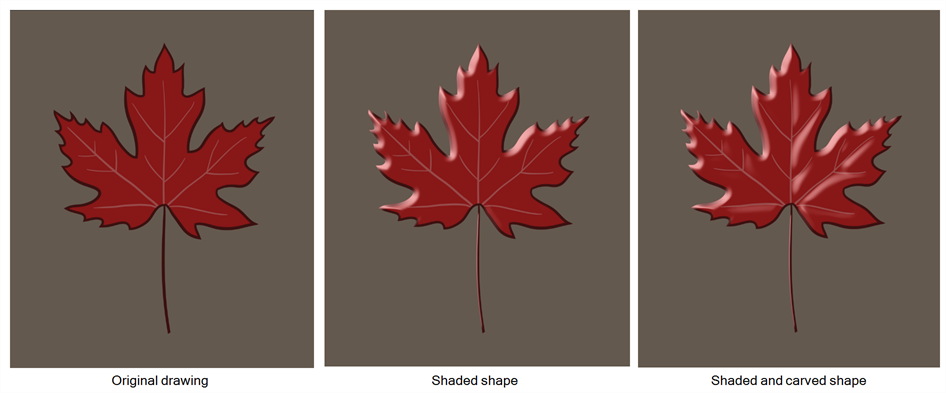
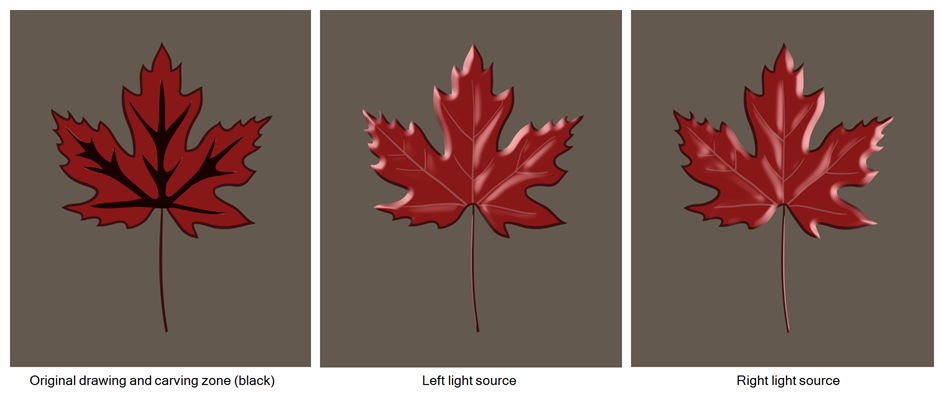
In Harmony, all drawings are flat 2D planes, unless you imported 3D elements. A light source cannot interact well with a flat shape to create tone and highlight areas within it. To create shading zones, Harmony uses the bevel principle to create a three-dimensional shape illusion. To do that, you must define which object or combination of objects should be defined as a volume. Next, you can carve and emboss areas using colour zones within the volumes to create what is referred to as 3D geometry.

If you have a scene with one single drawing layer, you will define that layer as your volume object, since there are no other elements in the scene. The light shading effect will emboss the contour of the shape, but if you want to have highlight and tone zones within the drawing, you will need to carve and emboss areas using specific colour zones.
If you have a cut-out character composed of several drawing layers, you will need to identify the different layers or group of layers you want to define as volume objects. For example, you could group the arm, forearm and hand layers as one object, while the head could be another volume. Depending on your design, you will have to analyze and decide what should be grouped. You can then use colours to carve areas within those volumes.
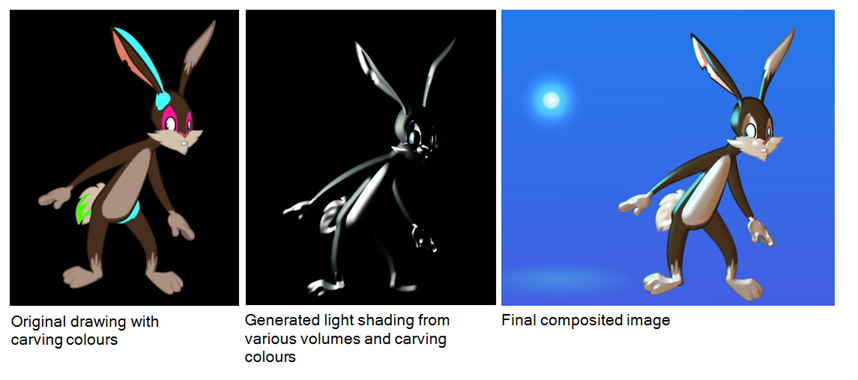
The beauty of the light shading effect is that you only have to set it up once. You can animate the light source position, shading style, as well as colour and your volume objects, carving and adding areas will be accurately used. There's no need to redraw another set of zones depending on the light source or even draw tones for any animation frames. This only needs to be done once in the character rig. The compositing artist will then have the freedom to play around with the light positioning and ambiances.
Harmony provides you with a series of nodes and parameters allowing you to shape, carve and model your image's 3D geometry as you like. Each volume object has an ID number. You can have several volumes using the same ID so they can receive the same shading, smoothing and bevelling parameters. If you want to treat each area individually, you can assign them different ID numbers.
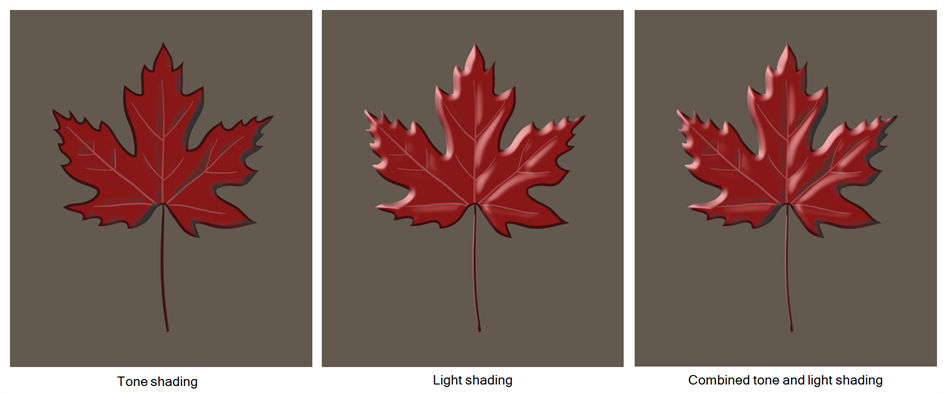
You also have the possibility to create tones, not only highlights. You can also combine both on the same image. Both tones and highlights react to the same carving colours, modelling parameters, and set volume objects.