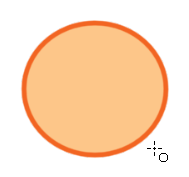
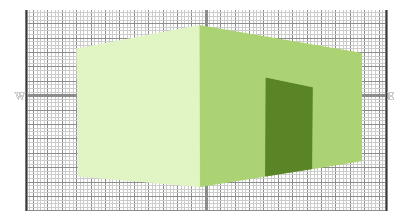
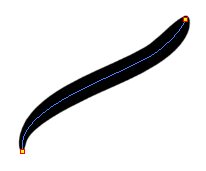
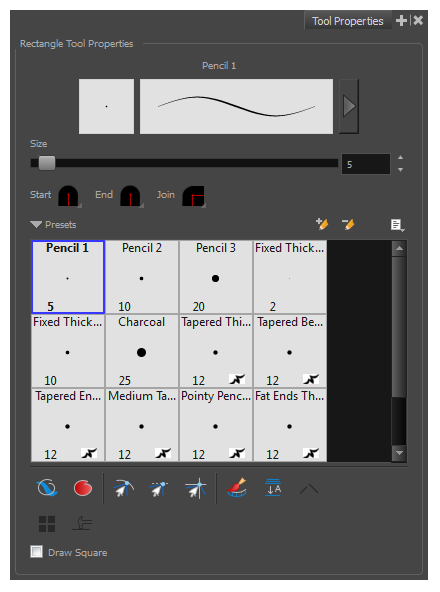
When you select the Rectangle tool, its properties and options appear in the Tool Properties view.
| Icon | Tool Name | Description |
| Previewing the Stroke |
The Preview area lets you see a preview of the stroke your drawing tool will make.
|
|
| Size |
Defines the width of the pencil line used to draw the rectangle. |
|
| Shape |
You can adjust the start, end, and join style of a pencil line.
|
|
| Presets |
Harmony provides a variety of presets and also lets you create and save your own. It is a good idea to create and save pencils with precise sizes and parameters when you draw and design for efficiency and consistency. All tools using pencil lines share the same preset list. Therefore, the Polyline, Line, Rectangle, Ellipse, and Pencil tools share the same preset list. |
|
|
|
New Brush |
Creates a new preset based on the current brush properties. |
|
|
Delete Brush |
Deletes the currently selected preset. |
| Rename Brush |
Deletes the currently selected preset. |
|
| Import Brushes |
Allows you to import brush presets exported from Harmony. |
|
| Export Brushes |
Allows you to export your brush presets into an .xml file. |
|
| Small Thumbnail, Large Thumbnail, and Stroke View |
Allows you to display the presets as small square thumbnails, large square thumbnails or a list of stroke preview. |
|
|
|
Draw Behind |
When enabled, your brush strokes will appear behind the existing artwork. Note that they will appear over your artwork while drawing your stroke, until you release the brush.
|
|
|
Automatic Filling |
Use the Automatic Filling option to automatically fill your shape with the selected colour as you draw. By default, the Shape tool creates the outline of an empty shape that you can later fill using the Paint tool. This option is unavailable for the line tool.
|
|
|
Snap to Contour | Snaps your selection or point to any line you position it on. As soon as you move it close enough to another line, your point or selection will snap to it. |
|
|
Snap and Align | Snaps the selected anchor point to any existing line while displaying temporary rulers as a guide that you can also snap your anchor point to. |
|
|
Snap to Grid |
Snaps your selection following the currently enabled grid.
|
|
|
Automatically Create Colour Art |
As you draw in the Line Art layer, the Automatically Create Colour Art option instantly creates the corresponding strokes in the Colour Art layer.
|
|
|
Auto-Flatten Mode |
By default, when drawing
NOTE
Using the Select tool, you can use select and remove a segment of flattened pencil lines. Overlapping pencil lines drawn with the Auto-Flatten mode are essentially cut into segments by the overlap and can be treated as individual lines. |
|
|
Use Stored Colour Gradient |
The Use Stored Colour Gradient option can be used when painting with a gradient colour to always position the gradient in the same way it was stored, making it consistent across brush strokes. You can store a gradient by selecting a zone painted with a gradient with the Select tool, then clicking on Store Colour Gradient |
| Draw Square | Enable this option to draw perfect square (ratio 1:1) without holding any keyboard shortcuts. As an alternative, you can hold down the Shift key. |
Pencil Properties Dialog
The Rectangle tool draws the same type of line as the Pencil tool. Hence, you can configure the Rectangle tool's lines using the Pencil Properties dialog, which you can open by clicking on the arrow button right of the stroke display area in the Tool Properties view.

Size and Smoothness Tab
The Size and Smoothness tab allows you to select your pencil's size, its smoothing parameters as well as the shape of its tips and corners.
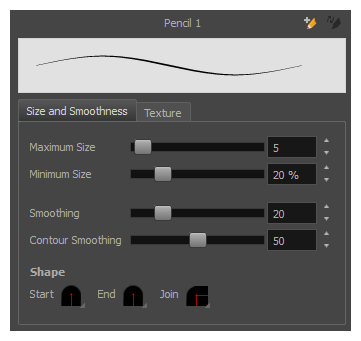
| Tool Name | Description |
| Maximum Size | Defines the maximum size of the pencil line. If the tool is used with a pressure sensitive pen tablet, the width of the stroke will vary between its maximum size and minimum size depending on the amount of pressure used. If used with a mouse, the width of the stroke will always be its maximum size. |
| Minimum Size |
Defines the minimum size of your stroke as a percentage of the maximum size. If you do not have pressure sensitivity from a pen table, the minimum size value will be ignored. |
| Smoothing | Defines the number of control points added to the centre line. The fewer the control points the smoother (but less faithful) the line. |
| Contour Smoothing | Defines the number of points on the contour share of your stroke. This will smooth out the bumps and waves on tour contour shape of your brush strokes. |
| Shape |
You can adjust the start, end, and join style of a pencil line.
|
Texture Tab
In the Pencil Properties view, the Texture tab allows you to select a pencil texture from the currently selected pencil texture palette to use with the Pencil tool. You can also add, remove or rename textures, save the current pencil texture palette as the default one, or import the pencil texture palette into your scene.
The pencil texture palette used in the Texture tab of the Pencil Properties dialog is the one selected in the Colour view. You can select a pencil texture palette by selecting it from the pencil texture palette list in the Colour view—see Colour View.
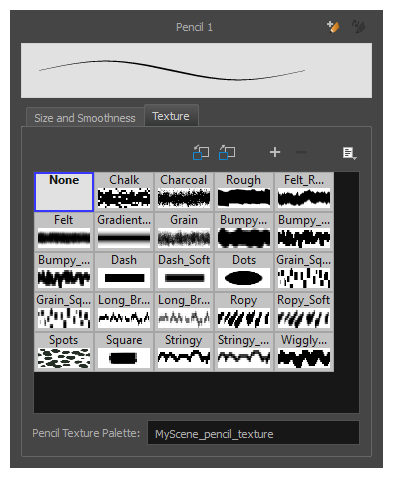
| Icon | Tool Name | Description |
|
|
Use as Default Pencil Texture Palette |
Sets the currently selected pencil texture palette as the default pencil texture palette in your user preferences. The default pencil texture palette is added to every scene you create in Harmony. The palette is copied in your preferences, so it will be added to your new scenes in the exact state it is when you make it the default pencil texture palette. |
|
|
Reload Default Texture Palette |
Imports the default pencil texture palette as a new pencil texture palette into your scene's palette list, and selects it as the current pencil texture palette. |
|
|
New Texture |
Allows you to import an image file into a new pencil texture swatch in the current pencil texture palette. The pencil texture's effect on your pencil line will be based on the image's transparency channel, and will follow your pencil lines on its horizontal axis. |
|
|
Delete Texture | Deletes a pencil texture swatch from the current pencil texture palette. |
| Rename Texture | Renames the selected pencil texture swatch in the current pencil texture palette. | |
| Pencil Texture List |
Displays the pencil textures in the current pencil texture palette and allows you to select one to use with the Pencil tool. |
|
| Pencil Texture Palette | Displays the name of the currently selectedpencil texture palette, for reference. To select a different pencil texture palette, you must select it in the Colour view—see Colour View. |


