Adding a lip-sync to your animation is essential to making your characters seem alive. However, it is also a particularly tedious part of the animation process.

To solve this problem, Harmony provides an automatic lip-sync detection feature. This feature analyzes the content of a sound track in your scene and associates each phoneme it detects with one of the mouth shapes in the following mouth chart, which is a standard mouth chart in the animation industry.
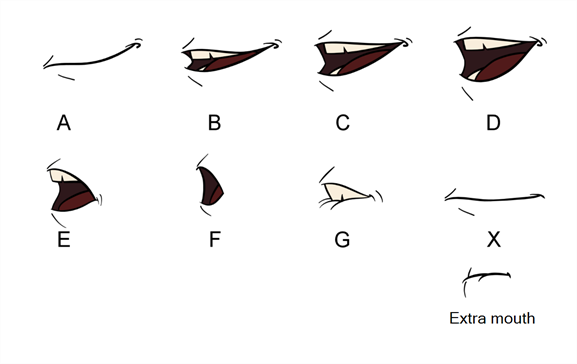
This is an approximation of the English phonemes each mouth shape can be used to represent:
- A: m, b, p, h
- B: s, d, j, i, k, t
- C: e, a
- D: A, E
- E: o
- F: u, oo
- G: f, ph
- X: Silence, undetermined sound
When performing automatic lip-sync detection, Harmony does not create mouth drawings. It simply fills the drawing column of your character's mouth layer with the generated lip-sync, by inserting the letter associated with the right mouth shape into each cell of the column. Therefore, for the automatic lip-sync detection to work, your character's mouth layer should already contain a mouth drawing for each drawing in the mouth chart, and these drawings should be named by their corresponding letter.
- In the Timeline or Xsheet view, select the sound layer.
The options for that layer will appear in the Layer Properties view.
- In the Layer Properties, click Detect.
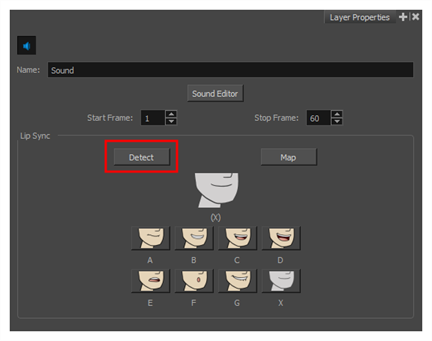
Harmony analyzes the selected sound clips and assigns a lip-sync letter to each sound cell.
- Click the Map button to open the Lip-Sync Mapping dialog box.
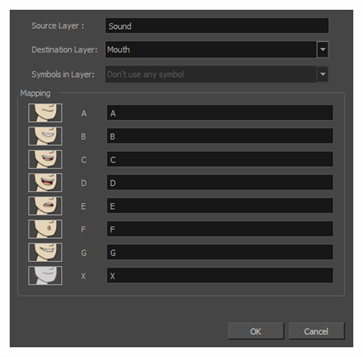
- From the Destination Layer menu, select the layer that contains the mouth positions for the character's voice track.
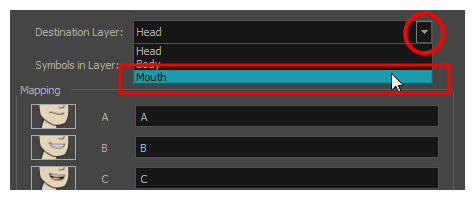
- In the Mapping section, type the drawing name or Symbol frames in the field to the right of the phoneme it represents. If your drawings are already named with the phoneme letters, you can skip this step.
- Click OK.
- In the Playback toolbar, enable the Enable Sound
option.
- Press the Play
button in the Playback toolbar to see and hear the results in the Camera view
You can manually create the lip-syncing for your scene by selecting which mouth drawing should be exposed at each frame of your character's dialogue. For this process, you will be using the Sound Scrubbing functionality, which plays the part of your sound track at the current frame whenever you move your Timeline cursor, allowing you to identify which phonemes you should match your character's mouth to. You will also be using drawing substitution to change which mouth drawing is exposed at every frame.
- In the Playback toolbar, enable the Sound Scrubbing
button.
- In the Timeline view, drag the red playhead along the sound layer waveform.
- When you reach a frame where a mouth position should go, for example, an open mouth with rounded lips for an "oh" sound, click on that frame on your mouth shapes layer.
- In the Parameters section, staying on your mouth shapes layer, place your cursor on top of the drawing name (often a letter) until it changes to the swapping
 pointer.
- Pull the cursor to see the list of mouth shape names and choose the one you want. The current drawing automatically changes to the new selection.

- In the Playback toolbar, click the Sound Scrubbing
button.
- In the Timeline view, drag the red playhead along the waveform of your sound layer.
- When you reach a frame where a mouth position should go, for example, an open mouth with rounded lips for an "oh" sound, click on that frame on your mouth shapes layer.
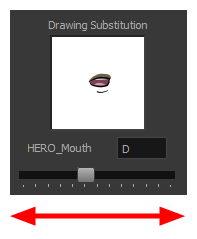
- In the Drawing Substitution window of the Library view, drag the slider to choose a mouth shape. The current drawing is swapped for the one in the preview window.
