
Adding Key Exposures
Key exposures are mainly used for swapping drawings in cut-out animation where you will have numerous drawings for the various positions of the mouth or eyes of a character for example.
If there is a particular drawing you want to keep on a specific frame, you can set it as a key exposure. This prevents it from be overwritten by a drawing swap on a preceding frame. A key exposure is simply a property of an exposure that forces it to be exposed on a certain frame regardless of whether the previous exposure is the same drawing or not.
Example: Swapping a drawing with no key exposure
In the following example, drawing 3 (DR 3) is selected on the timeline and it contains no key exposure.

When it is swapped for drawing 4 (DR 4), the entire duration of drawing 3 substituted for drawing 4.

Example: Swapping a drawing with a key exposure
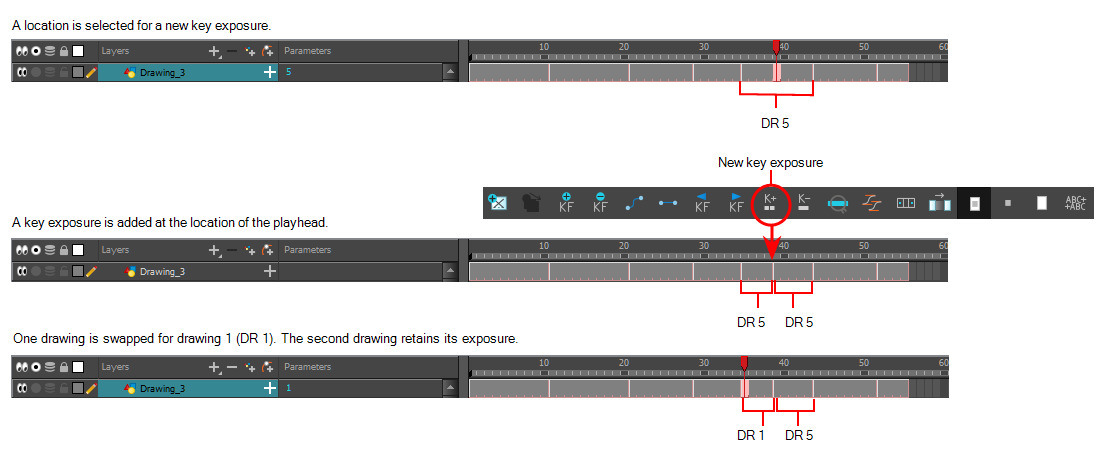
Here's what happens when swapping a drawing with a key exposure. In the following example, the playhead is positioned in the middle of drawing 5 (DR 5) to set the position for the new key exposure. When the new key exposure is added, drawing 5 is split in two; both halves contain drawing 5. Now if you swap the first drawing 5 for drawing 1, the second drawing 5 retains its exposure.
- In the Timeline view, select the drawing cell to set as the key exposure.
- Do one of the following:In the Timeline toolbar, click the Add Key Exposure
 button.
| ‣ | In the Timeline toolbar, click the Add Key Exposure |
| ‣ |
|
| ‣ | Right-click and select Exposure > Add Key Exposure. |
A new key exposure is added.
If you added a key exposure at the beginning of the drawing, the entire exposure is filled with that same drawing. If you added a key exposure anywhere other than the beginning of the drawing, then the drawing is split in two and both parts contain the same drawing.