
Importing Bitmap Images As Toon BoomBitmap
T-HFND-007-002
Importing a bitmap imageas Toon Boom bitmap preserves its original detail, but allows the user to modify them using Harmony's bitmap drawing tools.
- Do one of the following:
- From the top menu, select File > Import > Images.
- In the File toolbar, click the Import Images
button.
- In the Xsheet view, right-click anywhere in the frame area and select Import > Images.
The Import Images dialog box opens.
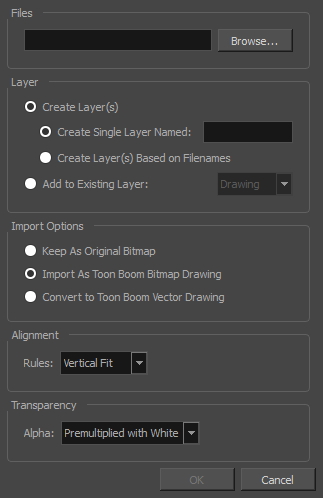
- In the Files section of the Import Images dialog box, click Browse to select one or more images from your computer.
- Select the destination for your images:
- Create Single Layer Named: Creates a new layer with the specified name and imports the images into it.
- Create Layer(s) Based on Filenames: Creates a layer based on each unique filename prefix. For example, if you import three files named a-1.tga, a-2.tga and b-1.tga, this will create two layers, one named "a" and one named "b". Layer "a" will contain the two first images and "b" will contain the third one.
- Add to Existing Layer: Imports the images into the specified layer. Note that you can only import into layers that are compatible with your import options. For example, if you're importing images as vector drawings, you can only import them into vector drawing layers.
- In the Alignment section, decide on the size and placement of your image within the camera frame. You can choose between the following options:
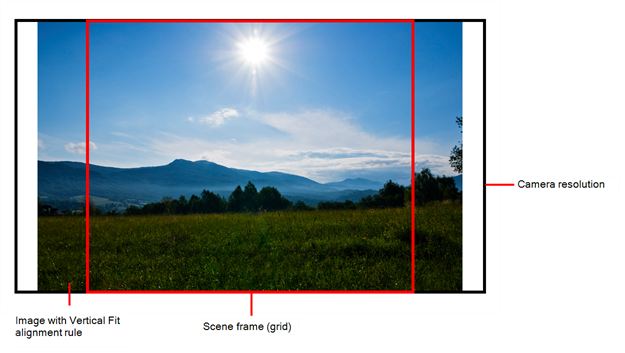
Parameter Description Vertical Fit Adjusts the image's size so that its height matches the scene's height, without affecting its aspect ratio.
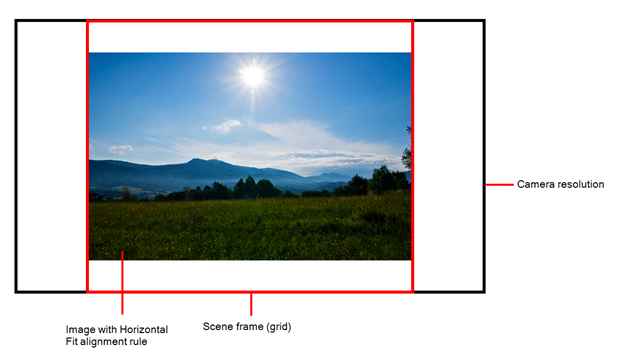
Horizontal Fit Adjusts the image's size so that its width matches the scene's width, without affecting its aspect ratio.
Actual Size Imports the image in its actual size, without adjusting its size relative to the scene's resolution. For example, if the image's dimensions in pixels are half of the scene's resolution in pixels, then the image's dimensions will appear to be half of the scene field's dimensions.
- In the Transparency section, decide how the bitmap image will be antialiased, more specifically, the way the pixels along the edge are blended with the other colours. You can choose between the following options:
Parameter Description Premultiplied with White
Individual pixels at the edge of an image are blended with white.
Premultiplied with Black
Pixels at the edge of an image are blended with black.
Straight
Pixels at the edge of an image are blended with black, white and greys.
- Click OK.