
How to Add Effects to a Scene
When creating a scene, rigging a character or once your animation is finished, you can add effects such as blurs, glows, shadows, colour filters and transparency filters and to enhance your project's quality. Effects change the way layers or groups of layers are rendered in your scene.
About Effects
Effects are special types of
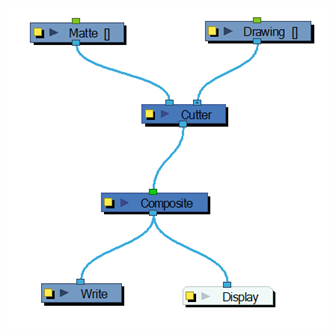
Some effects need to be linked to another layer referred to as the matte layer, which is used to define the area they should affect. The most basic example of this is the Cutter effect. Alone, a cutter effect does not have any effect on your drawing. Once combined with a matte layer, the Cutter effect cuts the shape of the matte out of the drawing.
A matte layer is simply a drawing layer that is connected to an effect as its matte. The effect takes the shape of the drawing in the matte layer, ignoring its colours and details.
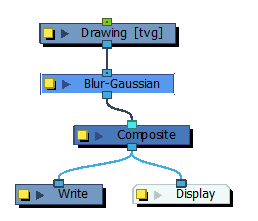
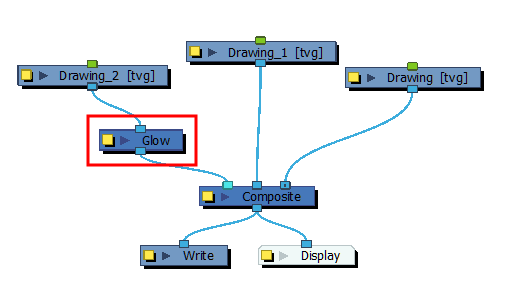
In the Node view, an effect must be connected to the drawing or composite it is meant to affect by its input (top) port, and its output (bottom) port must be connected to the composite. Most effects that require a matte must be connected to their drawing layer by their right input port, and to their matte layer by their left input port, like this:
Once your effect is connected, you can adjust its parameters using the Layer Properties view. If desired, you can even animate the parameters of your effect by converting their values to functions.
Adding Effects
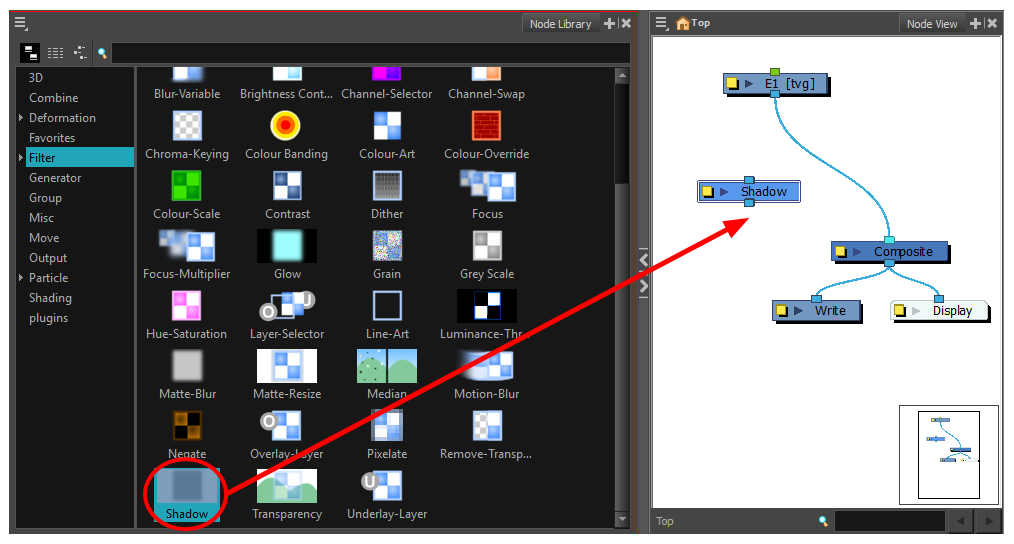
In Harmony, you can add effects by dragging them from the Node Library view to the Node view and connecting them as an intermediary between their drawing layer and their composite. Then, you can achieve the intended effect by adjusting its parameters in the Layers Properties view, and connecting it to a matte or other types of input layers it might require.
Working with the Node View and Node View Library
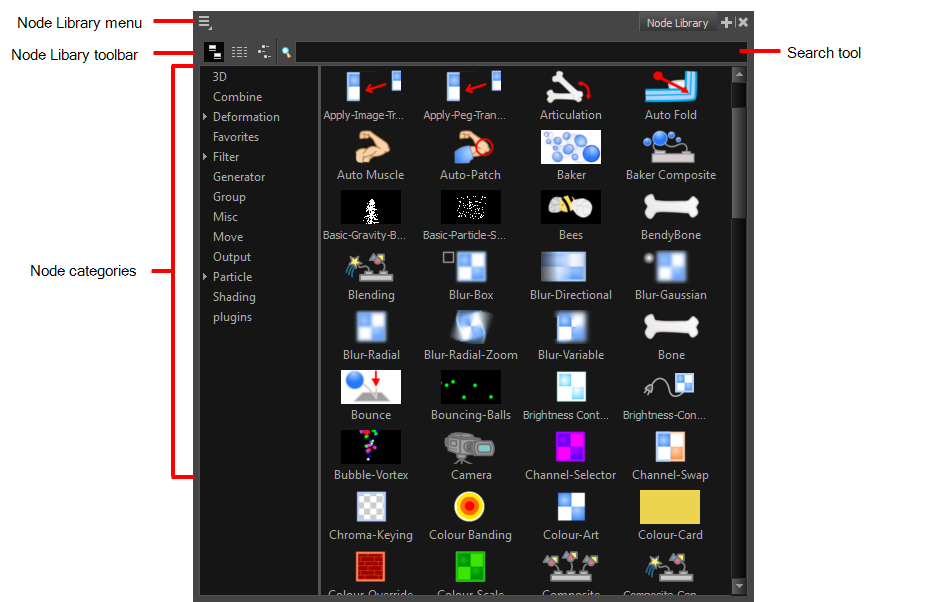
To add effects or other types of nodes to the Node view, you must first find them in the Node Library view.
When you create a new project in Harmony, the default node system that appears in the Node view looks similar to the one below.
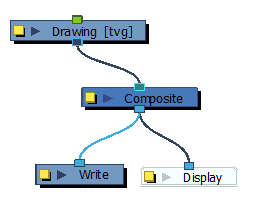
Notice how layers are connected to your scene's composite. For an effect to work, it must be connected as an intermediary between a layer and its composite, as if it was made to filter the layer's drawing information before it reaches the composite.
- In the Node Library view, select an effect and drag it to the Node view. You can use the Search toolbar to find nodes quicker.
- In the Node view, click on the input or output port of a node and drag out a cable.
- Connect the cable to the output port or input port of another node.
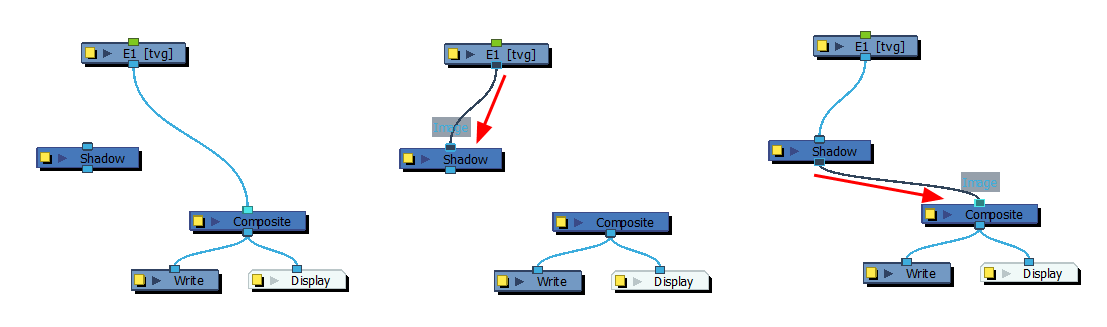
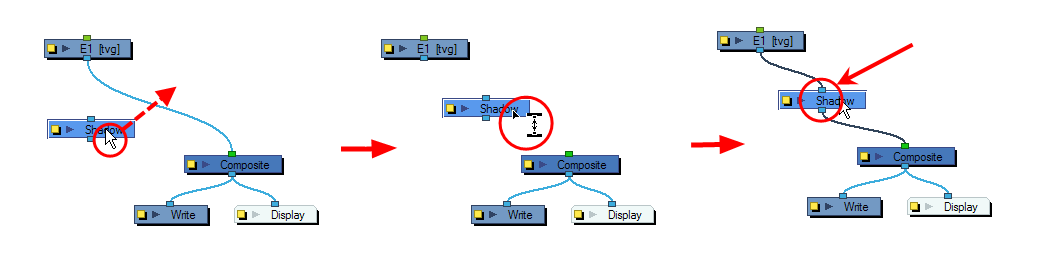
- To connect a node between two connected nodes, use the Alt key as you drag the new node over the existing cable connection. Use the same Alt key to disconnect a node.
- To remove a node, select and press Delete to remove it from the Node view.
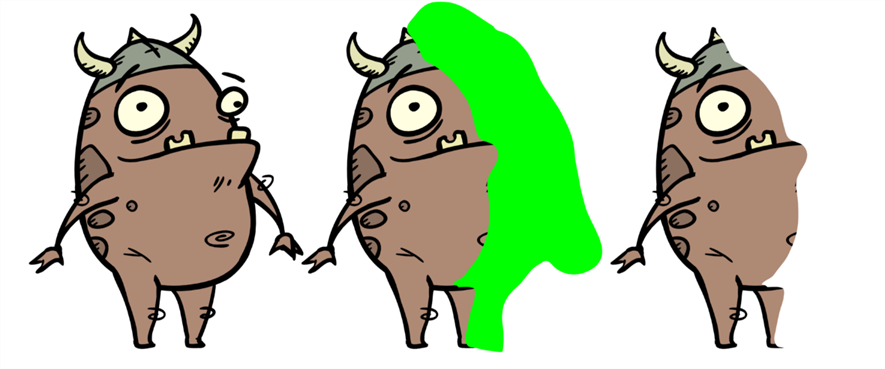
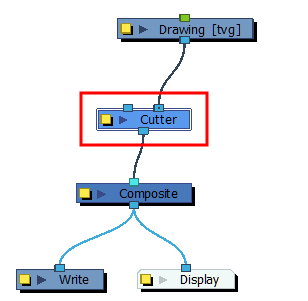
Cutter Effect
The Cutter effect cuts out a portion of an image. To accomplish this, it needs to be connected to the drawing it is intended to cut as well as to a matte layer. The cutter will take the shape of the drawing in its matte layer and cut this shape out of the drawing layer. This is especially useful if you want to make a character disappear between a background element, or if you want to cut out a hole in the middle of a character.
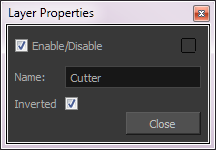
The Cutter effect has an Inverted parameter, which is disabled by default. When enabled, the Cutter will have the revert effect: Instead of cutting the matte's shape out of the drawing, it will cut everything outside of the matte's shape out of the drawing, leaving only the parts of the drawing that are covered by the matte.
- Select a drawing layer and do one of the following:
- From the Node Library view, select the Cutter effect and drag it to the Node view.
- In the Node view, right-click and select Insert > Combine > Cutter.
- Connect the Cutter node between the Drawing and Composite nodes.
- In the Timeline view, create a new layer, which will be used as your Cutter effect's Matte layer.
- In your new Matte layer, draw the shape that you want to cut out from your drawing layer.

- Connect the Matte drawing to the Matte port of the Cutter node.
- If you want to invert the Cutter's effect, double-click on your Cutter layer to open its Layer Properties dialog, then enable the Inverted option.
Animating an Effect
In some cases, you may want to have the intensity, color, or another parameter of an effect animated. For example, you may want an object to fade in or out, which would require making its transparency level animated so that it increases or decreases as your scene goes. You can animate an effect's parameters by creating a function curve for its parameter. You can then add keyframes to the function and set them to different values, hence making your effect's parameter change value as your scene plays out. To do this, you will need to use the Layer Properties view.
- Add an effect node to the Node view by doing one of the following:
- Right-click in the Node view and select Insert > desired effect.
- Drag a node from the Node Library view to the Node view.

- Connect the effect between the drawing element on which you want to apply the effect and a composite node. You can do this by manually unplugging your existing connections and creating the right connections, or you can simply hold Alt as you drag your effect node over the connection between the drawing and the composite to automatically insert it in the connection.
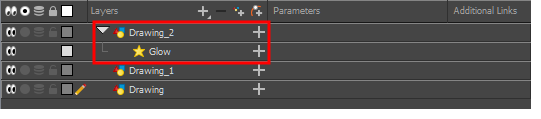
The effect also appears in the Timeline view.
- Create the function curve by doing one of the following:
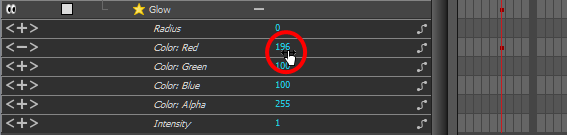
- Double-click on the effect layer to display the effect properties. Click the Function
button of the parameter you want to animate and create a function curve.

- In the Timeline view, expand the effect layer's parameters by clicking the Collapse/Expand
button. Then click the Function

- In the Timeline view, go to the frame on which you want to start animating the effect.
- In the Timeline toolbar, click the Add Keyframe
 button.
- In the Value field of the parameter you want to animate, enter the keyframe value. If your keyframes are stop-motion keyframes, in the Timeline view, select the new keyframes. Right-click and select Set Motion Keyframe.
- Repeat these steps until your effect's animation is complete.