How to Rig
In Harmony, a character rig is basically a template based on your character's model, but in which all movable parts are broken down into different layers, and arranged in a hierarchy that facilitates digital animation, also known as cutout animation.
To make a puppet, we must first make sure you have a character model to build on. If you have any drawing of a character available on your computer, import it into a new scene, then scale and position it to your liking. Once you have a model ready, we can start breaking it down into parts to build your rig with.
There are many techniques you can use to break down a puppet. In this section, you will learn about one of the most common and simplest methods. For your first character breakdown, follow these instructions to get an idea of the way Harmony works. Once you understand Harmony's basic functions and commands, you will be able to create your own techniques to satisfy the needs of your production.

Drawing the Pieces
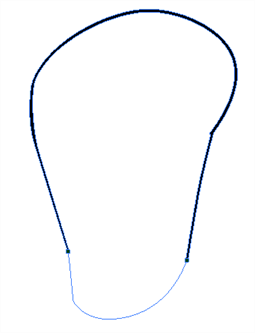
The main breakdown technique shown here is to trace your model.
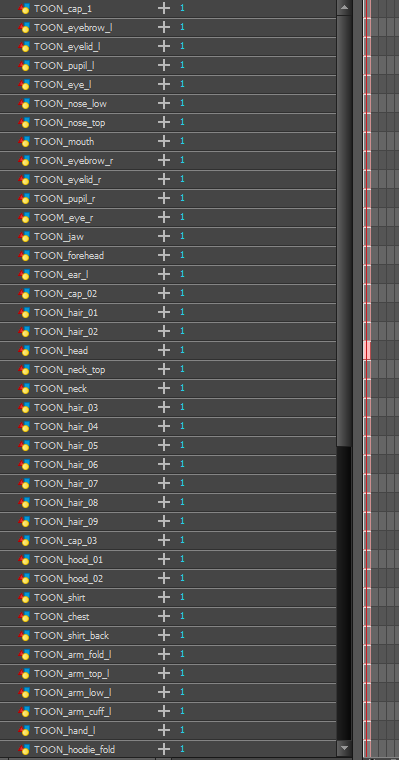
- In the Timeline view, add a new drawing layer for each body part to separate. You can press Ctrl + R (Windows/Linux) or ⌘ + R (Mac OS X)
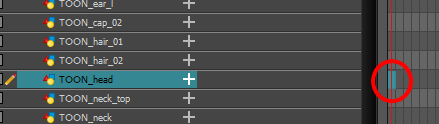
- In the Timeline view, select the layer's first cell in which you want to draw the part.
- In the Tools toolbar, select a drawing tool.
- In the Colour view, select a colour swatch. If you haven't created a palette for your character yet, see
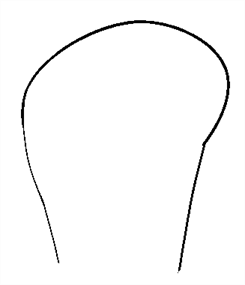
- In the Camera or Drawing view, draw the new part with as with as few points as possible so the pieces are easy to manipulation, modify or redraw. There exists two easy ways to do this:
- By using the Polyline
 tool
tool - By drawing with the Pencil
 tool, then smoothing your lines with the Smooth Editor
  tool
tool
If you are working in the Drawing view, click the Light Table ![]() button in the Drawing View toolbar to display the other layers in washed out colours. You can also press Shift + L.
button in the Drawing View toolbar to display the other layers in washed out colours. You can also press Shift + L.
- If you want to close a shape without drawing an actual stroke, you can use the Stroke tool in the Tools toolbar to create an invisible hairline .
- Select View > Show > Show Strokes or press K to display the invisible lines.
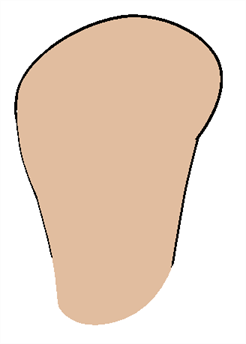
- In the Tools toolbar, select the Paint
 or Paint Unpainted
  tool to colour your drawing.
- In the Colour view, create the desired fill colour if it's not already in your palette, then select it.
- In the Camera or Drawing view, paint your drawing.
- In the Tools toolbar, select the Select
 tool. Select your drawing and flatten the lines by clicking the Flatten
  button in the Tool Properties view.
- Repeat the entire process for every body part that you wish to make animatable.
Adding Pegs
Pegs are a special type of layer that do not contain any drawing. They are used strictly to offset and transform drawings that are under their hierarchy, without transforming the actual drawing.
When rigging or setting up a scene, it is recommended to add parent pegs for each of your drawing layers. This allows you to keep animation keyframes and drawings on separate layers, making it easier to work on the position and exposure of your drawing layers independently in the Timeline view. It also makes it easier to create a hierarchy of which body parts can be animated together and independently.

If you want to animate only on pegs, you can activate the Peg selection mode of the Transform tool in the Tool Properties view. You can also disable animating drawing layers, so that only pegs can be animated.
- In the Timeline view, select all the layers.
- In the Timeline Layer toolbar, click the Add Parent Peg
 button to add a parent peg to all selected layers.
 s
s
Parenting Layers
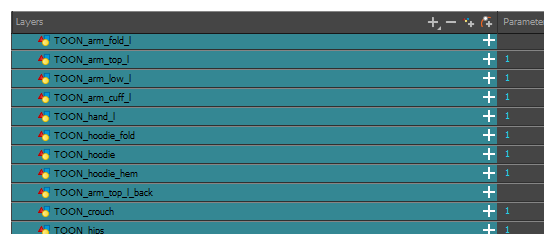
Harmony lets you build your rig in an elaborate hierarchy, allowing you to set which parts of your rig should influence other limbs, and how they can move independently. For example, when rigging a simple character's arm, you can make the forearm layer a child of the arm layer, and the hand layer a child of the forearm layer. This way, if the character moves their forearm, the hand will follow, and if they move their arm, the forearm and hand will follow.
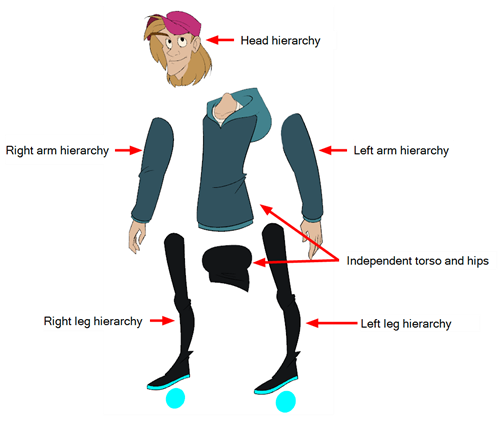
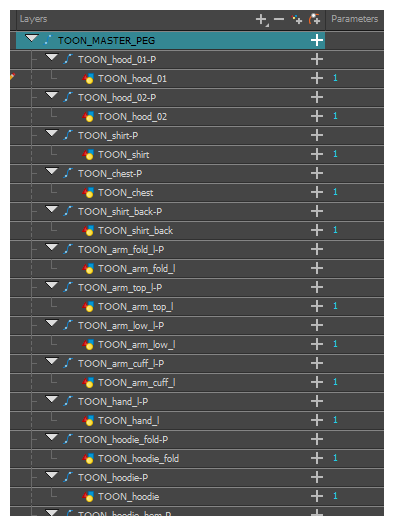
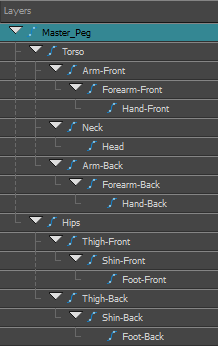
When building a basic character rig, you should at least have a hierarchy for each arm and each leg. You can make a hierarchy going from the torso, the neck and the head, and rig the arms to the torso, and you can rig the legs to the hips. This would make a hierarchy like this:
- In the left area of the Timeline view, select the layer which you want tomake a child layer
- Drag the child and drop it over the layer which you want to make the parent layer. Make sure you are not dropping the child layer between two layers.
- Repeat until you've created a hierarchy that rigs all of your character's parts, with a master peg at the root. While rigging, if you want several layers to have a common parent, but no existing part of your rig can serve as that parent, create a new peg and nest those layers under that peg.

When rigging, keep in mind that the order of the layers in the Timeline view affects the order in which they're rendered. Layers on top of the list will be rendered over layers at the bottom of the list. Should you need to change a layer's order while animating, you can nudge this layer's position on the Z-axis to override the layer order and force it to appear beneath or over other layers.
- In the Tools toolbar, select the Transform
 tool.
tool.
- In the Timeline, Node or Camera view, select the layer you want to nudge.
- If you selected the layer from the Timeline or Node view, click on the Camera view tab to set the focus on the Camera view.
- Do one of the following:
- To nudge the layer forward, press Alt + Down Arrow.
- To nudge the layer backward, press Alt + Up Arrow.
Master Peg
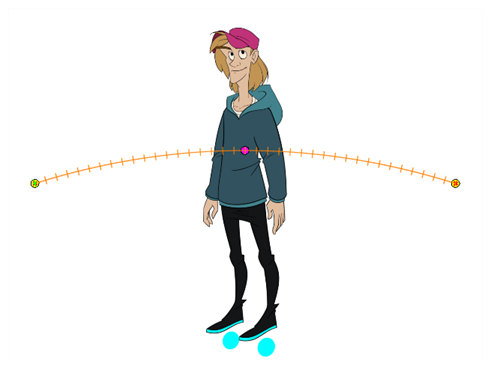
Your character rig should always have a master peg which connects to all of its parts. The master peg allows you to manipulate the entire rig from a single layer, without having to manipulate each individual part. This is useful for positioning and scaling your character relative to the scene, as well as to animate your character's trajectory when it has to move between areas of the scene.
- In the Timeline view, select the top layer.
- In the Timeline view, click on the Add Peg
 button.
A new peg is added to the timeline as a parent of the selected layer.
- Name the new peg
Masterplus the character's name. - In the Timeline view, select all the layers you want to attach to your new peg. Remember that one item is already parented to that peg.
- Drag your selection ON to the peg layer to parent all your character's pieces to the peg. If your layers are added above the already parented layers, move that parented layer back on top of the layer stack.