How to Morph Drawings

Hand-drawn animation requires you to spend a lot of time tracing in-between drawings. Harmony's morphing feature can help speed up the process. This powerful feature automatically creates computer-generated drawings between your vector drawings to save time and increase productivity. You can easily modify the timing and velocity (ease in and ease out) of a morphing animation.
One of the main uses of the morphing feature is effects animation. For example, animating smoke or water can be time-consuming because these types of effects are usually slow moving requiring a large number of closely placed inbetweens.
The morphing feature is used to animate similar and simple shapes such as hair or smoke. It helps you by saving time when you are working on tedious inbetweening and tracing tasks This, in turn, provides you with more time to spend on complex animation tasks such as walk cycles or acrobatic sequences.
To learn how to morph drawings, it is better to start with basic shapes such as circles and rectangles. Once you are more familiar with the tool, you can increase your knowledge and expertise. In a very short time you will be producing some remarkable effects.
It is helpful to know the pros and cons of morphing before you start. Understanding what you can do and which drawing lines may be more useful or problematic will enable you to design your key drawings so they morph efficiently.
- In the Timeline toolbar, click the Add Drawing Layer
 button to add a new layer to your project.
- Rename the new layer ( for example,
Morphing).
- In the Timeline or Xsheet view, select the first cell in the layer.

- Do one of the following:
- In the Tools toolbar, select the Rectangle
tool.
- Press Alt + 7.
- In the Camera or Drawing view, draw a rectangle.
NOTE: When drawing a rectangle or an ellipsis, you can hold down the Shift key to draw your shape with equal dimensions, so as to make a square or a circle instead. You can also hold down the Alt key to draw the shape from its center rather than from its corner.
- Paint your rectangle using the Paint tool.

- In the Xsheet or Timeline view, select the cell on which you want your morphing sequence to end.

- Do one of the following:
- In the Tools toolbar, select the Ellipse
tool.
- Press Alt + =.
- Draw and paint the ellipse with the same outline and fill colours as the rectangle.

- In the Xsheet or Timeline view, select the range of frame going from your first drawing to your second drawing, including the frames containing the drawings.

- Do one of the following:
- From the top menu, select Animation > Morphing > Create Morphing.
- In the Xsheet or Timeline view, right-click and select Morphing > Create Morphing
- Press Alt + M.
Arrows appear between the two key drawings to show that computer generated inbetweens have been created.

Adjusting the Morphing Velocity
When you look at your animation you will notice that the morphing motion is constant. To produce a less mechanical motion, you will probably want to create some ease in or ease out.
- In the Tools toolbar, select the Morphing
 tool or press F3.
 - In the Timeline view, click on a frame in the morphing sequence you want to adjust.
- In the Tool Properties view, increase and decrease the Ease In and Ease Out value to adjust the sequence's velocity.

Adding Morph Hints
Harmony's Morphing tool allows you to control your morphing sequence in many ways. One of those ways is to place hints to ensure Harmony morphs your drawings the way you intended.
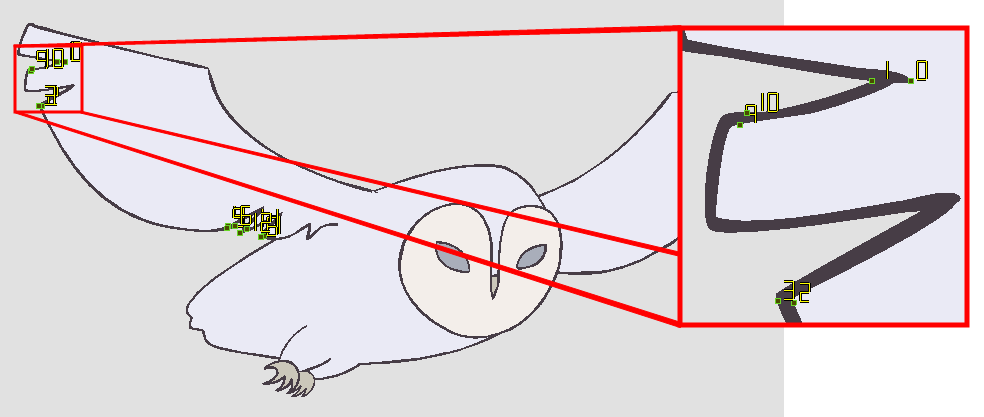
Hints are points that are placed in both the source and destination drawings to associate zones and lines between the two drawings. They are used to fix errors in the way Harmony morphs drawings, such as a line that is not following the colour fill zone, or when a part of your source drawing doesn't morph into its corresponding part of the destination drawing. By default, Harmony will associate a corner or a point in the source drawing with the nearest corner or point in the destination drawing. Hence, hints quickly become necessary if the shape being morphed or its movement is complex.
- In the Timeline or Xsheet view, select the source drawing of your morphing sequence.
- In the Tools toolbar, select the Morphing
 tool or press F3.
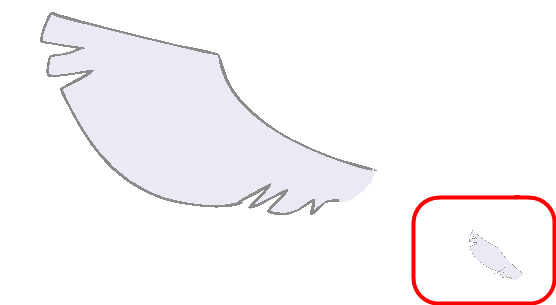
Use your other morphing key drawing, shown in the Drawing view's bottom right corner, as a reference.
- In the Tool Properties view, select the type of hint you want to use.
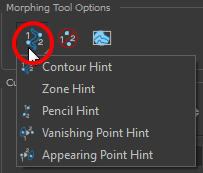
- Select Contour Hint to correct a brush line or colour zone's contour (Contour vector).
Contour Hint points will behave similar to Pencil Hint points when used on a pencil line. Note that you obtain better results using the Pencil Hint point on pencil line rather than Contour Hint points.- Select Pencil Hint to correct a pencil line (Central vector).
- Select Zone Hint to correct a colour zone morphing match.
- Select Vanishing Point Hint to correct a vanishing shape's trajectory.
- Select Appearing Point Hint to correct an appearing shape's trajectory.
- In the Camera or Drawing view, click on the drawing near the problematic area.
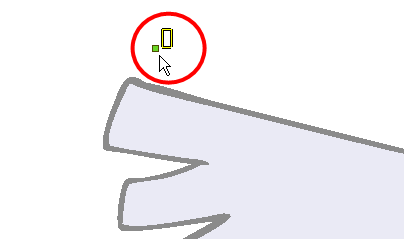
- Select the hint's point and move it to its correct position.
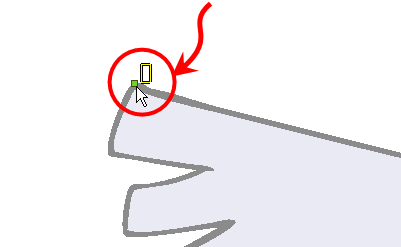
- In the Timeline or Xsheet view, select your destination drawing.
- Find and move the corresponding hint's point to the matching part of your destination drawing.
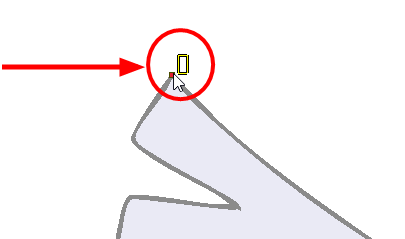
- In the Playback toolbar, press the Play
 button to see the result.
