Light Shading Setup
The first step in setting up your light shading effect is to identify which volumes you want the light to interact with.
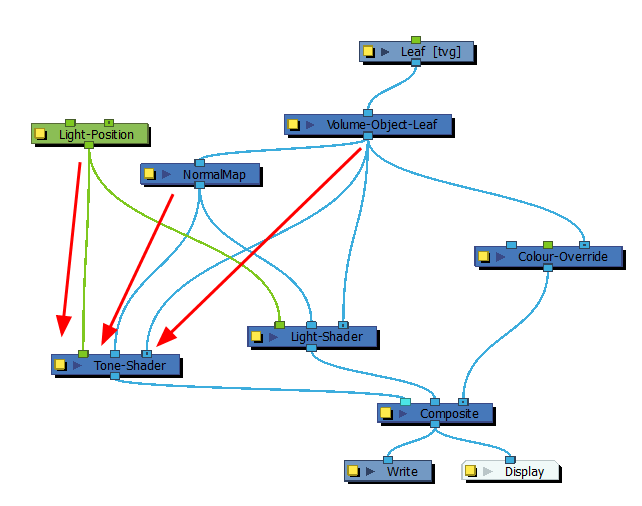
Here's what a basic light shading effect node structure looks like:
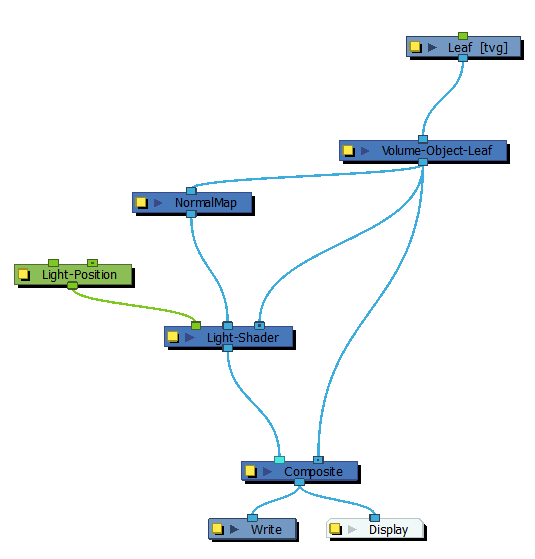
To learn more about each node's parameters, see Light Shading Properties.
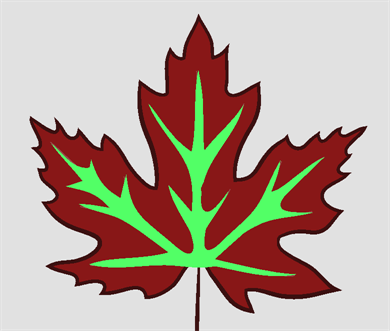
Once your basic volumes are set up, you can use colours from your colour palettes to carve or add zones. Depending on the design of the drawing, you may want to use the same palette as the character, background or object, or you may want to use a specific palette reserved specifically for this purpose.
Finally, you can set up the light source and animate it.
- In the Node Library view, select a Volume Object node from the Shading category and drag it to the Node view.
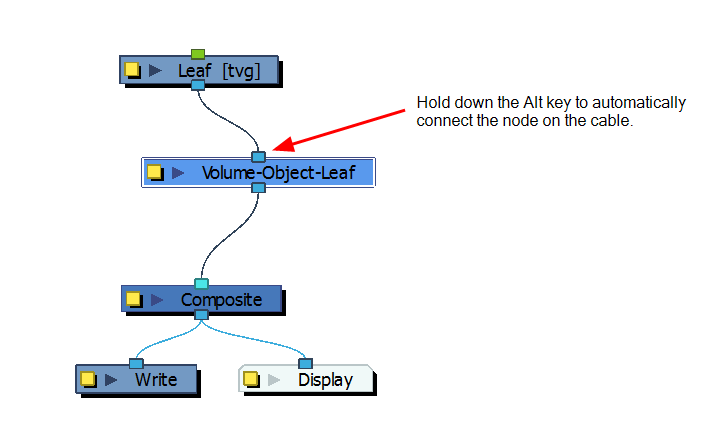
- In the Node view, connect the Volume Object node between the drawing node and the Composite node. Click on the node's properties button (yellow square) and rename it with the volume it represents. This will make it much easier to edit the beveling in the Normal Map node later on.
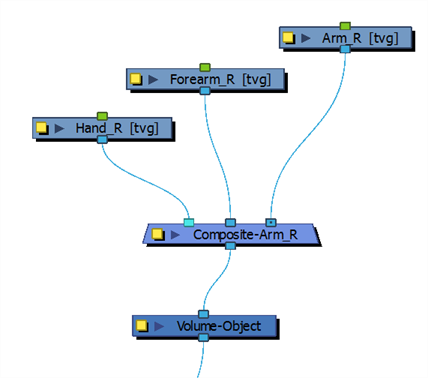
If you need to combine several elements into one volume, you can connect the elements into a Composite node set to Pass-Through and connect that Composite node to the Volume Object node.
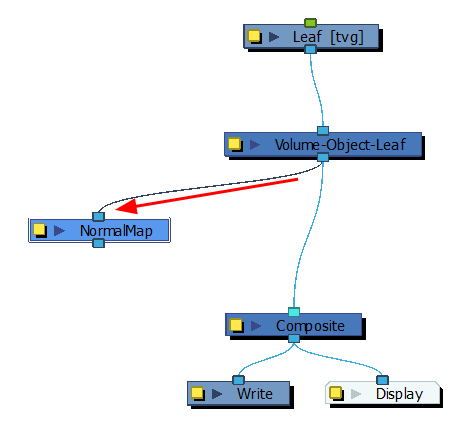
- In the Node Library view, in the Shading category, select a Normal Map node and drag it to the Node view.
- In the Node view, connect a second connection from the Volume Object node to the Normal Map node. Don't connect the Normal Map's output port yet.
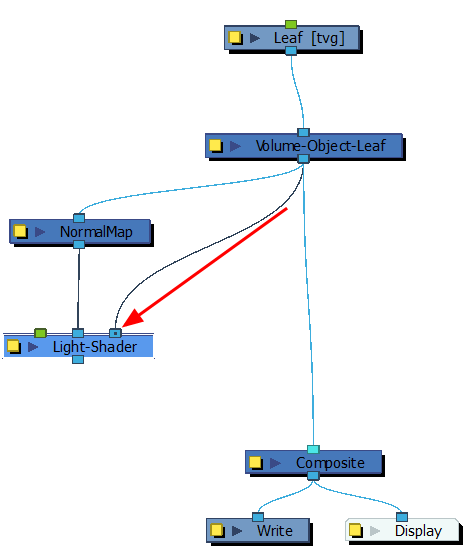
- In the Node Library view, in the Shading category, select a Light Shader or Tone Shader node and drag it to the Node view.
- In the Node view, connect the Normal Map output node to the shader node's middle input port.
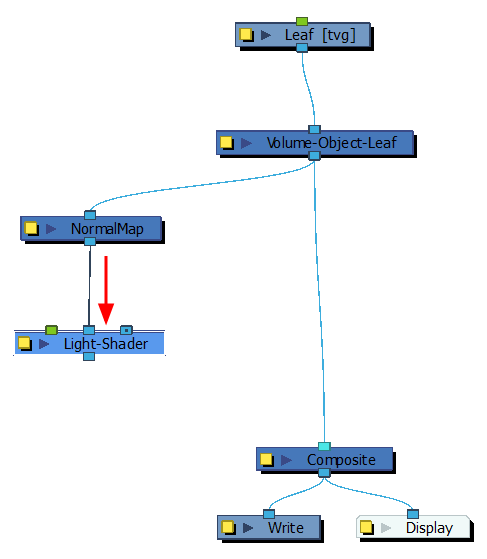
- From the Volume Object node, pull out a third connection and connect it to the shader node's right input port.
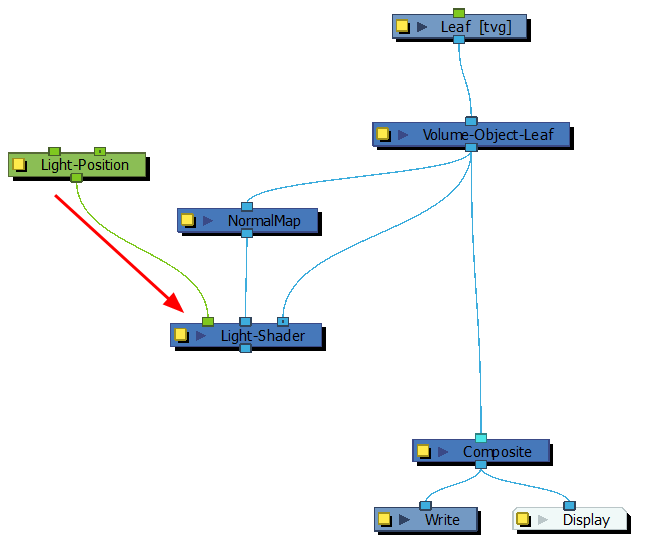
- In the Node Library view, in the Shading category, select a Light Position node and drag it to the Node view.
- In the Node view, connect the Light Position output node to the shader node's left input port (green).
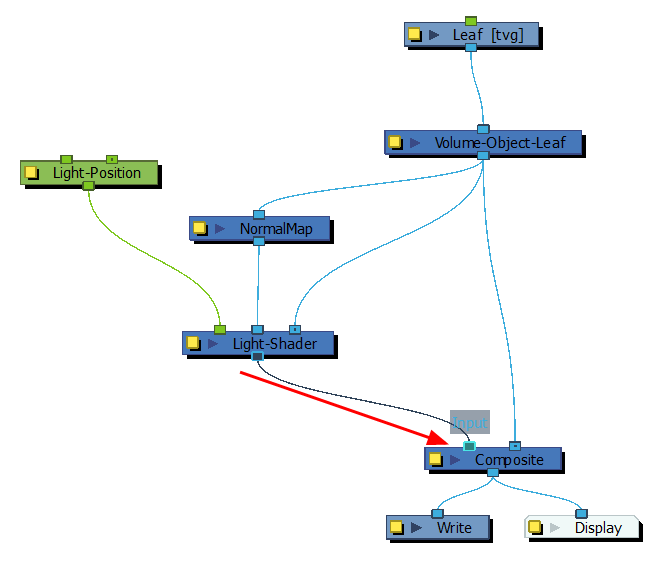
- Connect the shader's output port to the Composite node to the left (in front) of the Volume Object's Composite connection. This will display the light shading effect on top of the original drawing. Connecting it to the right would result to nothing as the effect would be hidden behind the drawing.
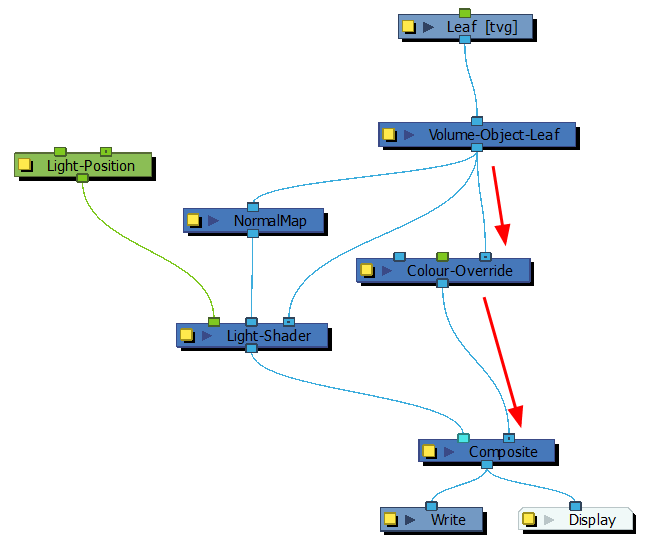
- If you added colours to your drzwing to carve in some areas, in the Node Library view, select a Colour-Override node and drag it to the Node view.
- In the Node view, connect the Colour-Override node between the Volume Object and the Composite nodes. Make sure the Volume Object node is connected to the Colour-Override's right input port.
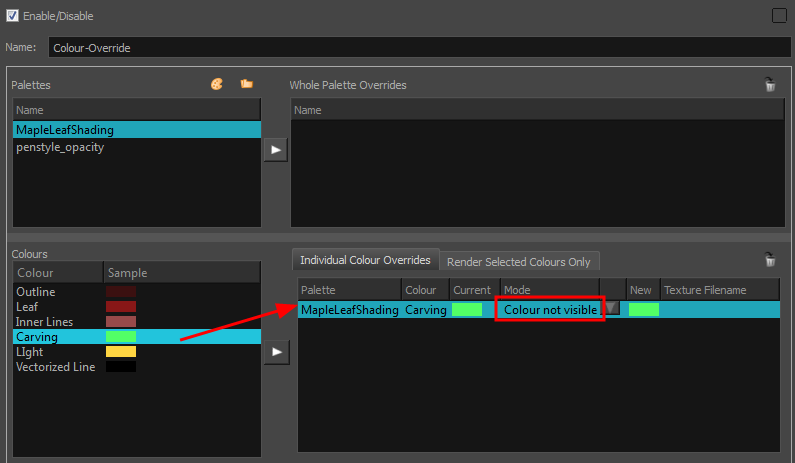
- Click the Colour-Override node's properties button (yellow square) to open the Layer Parameters dialog. From the Colours section, drag your carving colours to the Individual Colour Overrides section. In the Mode column, set all your colours to Colour not visible.
- To combine both the Tone Shader and the Light Shader, from the Node Library bring the other shader node and drag it to the Node view.
- In the Node view, connect the same Light Position, Normal Map and Volume Object nodes to the new shader node.
- Click the Normal Map node's properties button (yellow square) to open the Layer Parameters dialog.
- In the Volume Creation section, from the Object List , select all the Volume Object nodes you want to use in this map.
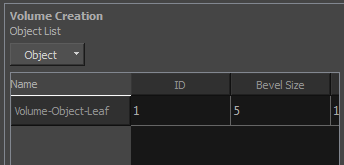
| ‣ | It's possible to add all Volume Object nodes at the same time by selecting the Add all Defined Objects option or it's possible to add each Volume Object node one by one. |
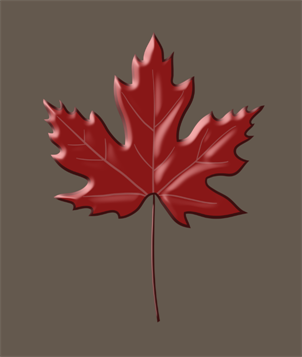
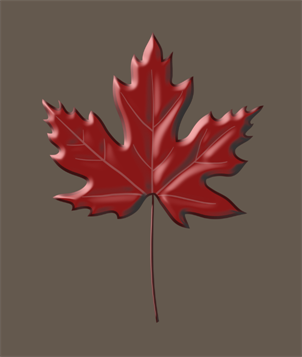
- In the Camera view, enable the Render mode to view the final effect.
- See Light Shading Properties to adjust the light shading parameters.
- Add colour swatches in your character's colour palette or in a new palette solely reserved for carving. Name them
CarvingandAdding. By choosing different colours, it will be easier to differentiate where those colours will carve or add.
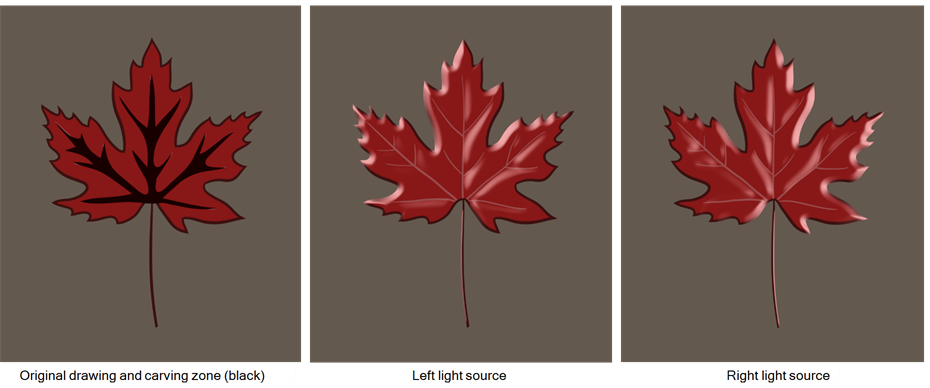
- In the Camera or Drawing view, draw the areas you want to carve out and add. It's recommended to draw them in the Underlay or Colour Art layer.
- In the Node view, click the Normal Map's properties button (yellow square) to open the Layer Properties window.
- In the Override Modelling by Colour section, click Add Colour and select the palette containing your carving and adding colours.
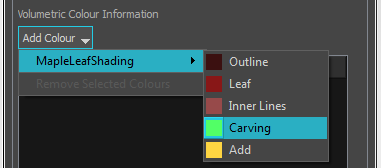
- Add your Carving and Add colour swatches.
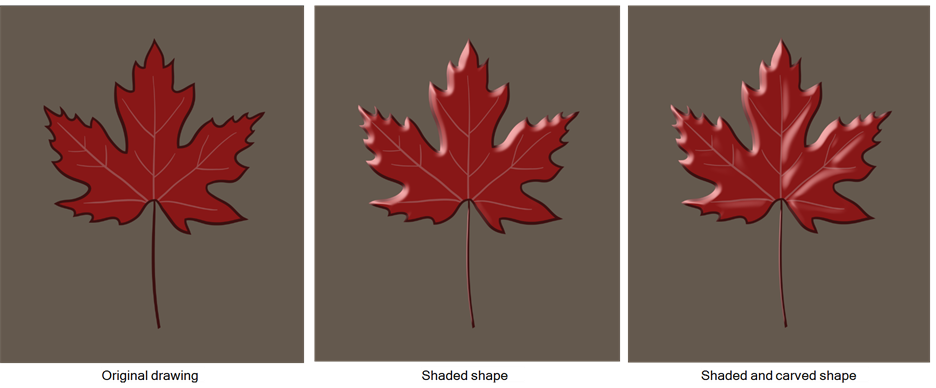
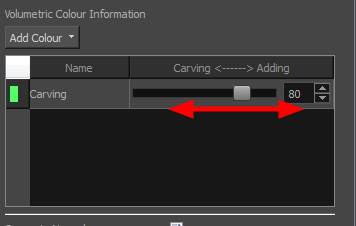
- Increase or decrease the Carving - Adding value by adjusting the slider to carve or emboss your volumes using the colour zones.
- In the Camera view, enable the Render mode to view the final effect.
- In the Node view, select the Light Position node.
- Do one of the following:
| ‣ | In the Camera View toolbar, click the Show Control |
| ‣ | From the top menu, select View > Show > Control. |
| ‣ | Press Shift + F11 (Windows/Linux) or ⌘ + F11 (Mac OS X). |
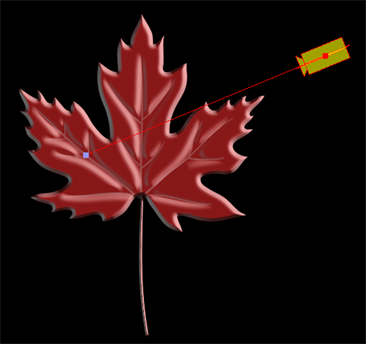
A yellow camera appears in the scene, representing the light source.
- In the Tools toolbar, select the Transform
 tool and animate the light source or target.
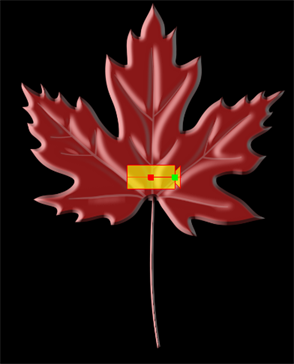
- Before moving the light source for the first time, you must move the light to make it visible. At the moment, the target is not visible because it is hidden behind the light source.
A red line appears, starting at the light source. This line represents the direction of the light. The green dot at the end of the line represents the target. Depending on the setting of your Light Shader or Tone Shader node, the direction or target may be more useful.