


Light Shading Nodes
You can build your light shading effect using these five nodes:
| • | Volume Object |
| • | Normal Map |
| • | Light Position |
| • | Light Shader |
| • | Tone Shader |
To learn more about each node's parameters, see Light Shading Properties.
Volume Object
The Volume Object node lets you define a volume zone the light will interact with.
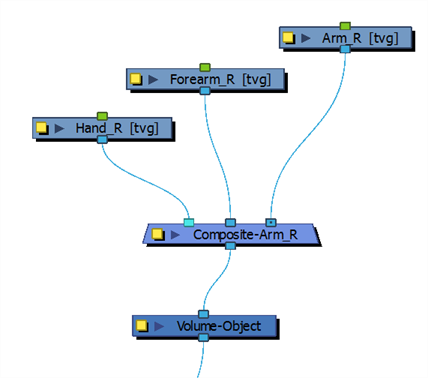
If three is a single drawing on which you want to apply shading, you only need one Volume Object node. For cut-out characters, you will require more as you will define which should be different volumes. For example, you could decide that the arm, forearm, and hand will form one shape for the light to hit and create a highlight. You could then define the body as a separate volume. If you use different Volume Object nodes on the arm pieces, you will get odd carvings and bumps where the joints overlap. Before adding light shading to your rig, you should analyze how the parts will interact with one another.
All the Volume Object nodes in your structure will be gathered in the Normal Map node where you can define the parameter for each volume
Normal Map
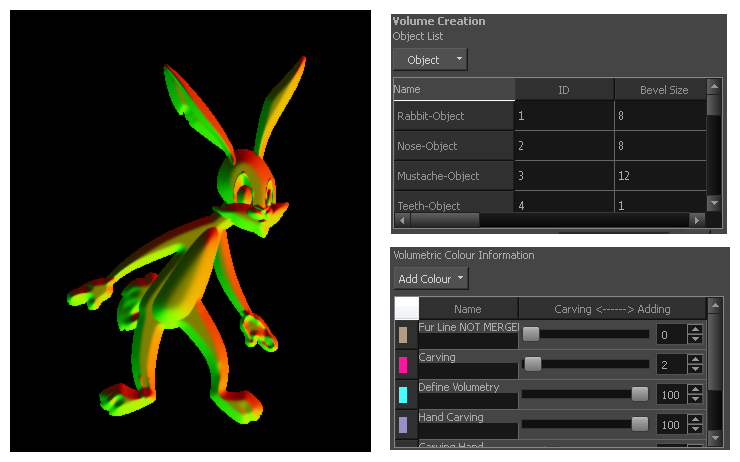
The Normal Map node lets you centralize all Volume Object nodes and chisel out the shading 3D geometry (bevel height, smoothing, carving, etc.). It could be described as carving a bas relief. You only need one Normal Map node per light shading effect and, in general, only one per scene
The normal map will carve and emboss a flat plane using vectors. The X, Y and Z coordinates of the normal map vectors are stored in RGB values to convert the 3D aspect into a visual result and use it to create various effects, such as light reflections (light shading). The X value is stored in the Red channel. The Y value is stored in the Green channel. The Z value is stored in the Blue channel.
A normal map can be used to create other effects. If you're are working with an OpenFX plugin or other plugin requiring a normal map, you can use the Normal Map Converter node to translate the Harmony normal map to a format supported by your plugin. The Normal Map Converter node has been optimized to work with GenArts® plugins, but you also have the ability to use it on custom plugins.
Light Position
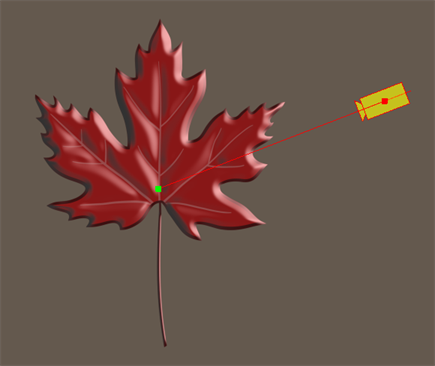
The Light Position node is the actual light source interacting with all the defined volume objects. You can set its position in relation to the objects and animate it over time. All volumes will react according to the light's motion.
This is not where you set the light type or colour. You'll be adjusting these in the Light Shader and Tone Shader nodes
Light Shader
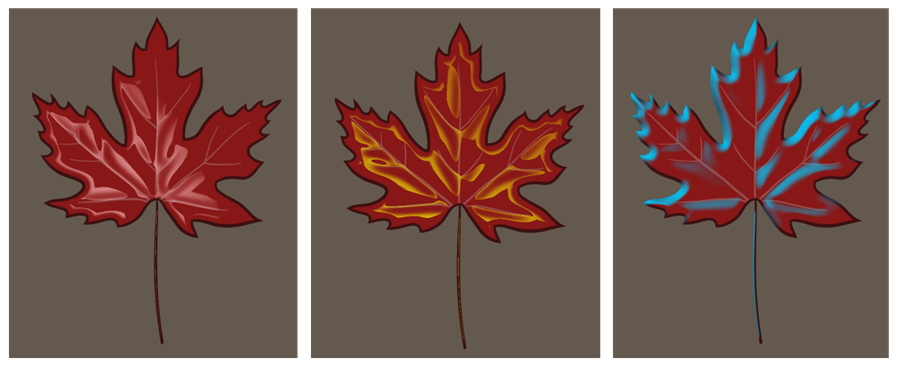
The Light Shader node lets you adjust the highlight parameters, such as the colour, to create the desired ambiance. You can animate most parameters over time to create a mood change, sunset or any other type of light transition. The beveling height and smoothing is set in the Normal Map node
Tone Shader
The Tone Shader node lets you adjust the tone parameters, such as the colour, to create the desired ambiance. You can animate most parameters over time to create shade transitions. The beveling height and smoothing is set in the Normal Map node