


More Drawing Tools
Harmony offers a wide variety of useful tools to optimize your drawings and work more efficiently; tools such as Group, Arrange, and the animation disk to rotate your workspace.
| • | Arrange |
| • | Convert Brush Strokes to Pencil Lines |
| • | Pencil Lines to Brush Strokes |
| • | Strokes to Pencil Lines |
| • | Optimize |
| • | Remove Extra Strokes |
| • | Reduce Drawing Texture Resolution |
| • | Crop Brush Textures |
| • | Create Contour Stroke |
| • | Remove Contour Stroke |
| • | Grid |
| • | Group/Ungroup |
| • | Hand |
| • | Rotate View |
Arrange
The different Arrange options let you reorder drawing objects inside a single layer in the
| Name | Button | Description | Access Method |
| Bring to Front |
|
Moves the selected art to the front (on top). |
From the top menu, select Press Ctrl + Shift + PgUp (Windows/Linux) or ⌘ + Shift + PgUp (Mac OS X). |
| Bring Forward |
|
Moves the selected art one level forward (closer to the front). |
From the top menu, select Press Ctrl + PgUp (Windows/Linux) or ⌘ + PgUp (Mac OS X). |
| Send Backward |
|
Moves the selected art one level lower (behind). |
From the top menu, select Press Ctrl + PgDown (Windows/Linux) or ⌘ + PgDown (Mac OS X). |
| Send to Back |
|
Moves the selected art behind everything (bottom / back). |
From the top menu, select Press Ctrl + Shift + PgDown (Windows/Linux) or ⌘ + Shift + PgDown (Mac OS X). |
Convert Brush Strokes to Pencil Lines
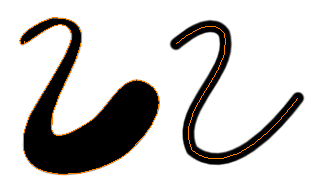
The Brushes Strokes to Pencil Lines operation converts selected contour strokes into centreline pencil strokes. The brush stroke thickness will be lost.
| ‣ | From the top menu, select |
| ‣ | Right-click on the selection, select Convert > Brush Strokes to Pencil Lines or press ^ |
Pencil Lines to Brush Strokes
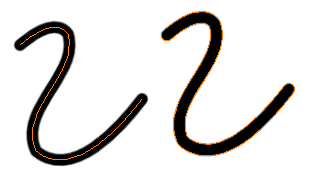
The Pencil Lines to Brush Strokes operation converts the selected centreline pencil strokes into contour strokes brush lines.
| ‣ | From the top menu, select |
| ‣ | Right-click on the selection, select Convert > Pencil Lines to Brush Strokes or press & |
Strokes to Pencil Lines
The Strokes to Pencil Lines operation converts the selected invisible line to a pencil line.
| ‣ | From the top menu, select |
| ‣ | Right-click on the selection, select Convert > Strokes to Pencil Lines or press Shift + F12 (Windows/Linux only) |
Optimize
The Optimize command reduces the number of layers, such as overlapping brush strokes, in the selected drawing objects. Drawing objects will only be flattened and optimized if the selected objects do not change the appearance of the final image when they are merged.
For example, if you have selected a number of partially transparent objects, which you layered to create an additive colour effect, the selected transparent drawing objects will not be merged. This is because merging the transparent drawing objects will cause them to lose the effect of the layered transparent colours.
| ‣ | Use the Select tool to select the drawing objects you want to optimize. |
| ‣ | From the top menu, select |
| ‣ | From the Camera or Drawing view menu, select Drawing > Optimize > Optimize. |
Remove Extra Strokes
The Remove Extra Strokes option let you remove the invisible lines in your selection.
- In the Tools toolbar, select the Select tool.
- In the
- From the top menu, select
| ‣ | From the Camera or Drawing view menu, select Drawing > Optimize > Remove Extra Strokes. |
Reduce Drawing Texture Resolution
When you import and vectorize as texture (colour) a high resolution image, the size of your drawing can be heavy. You can reduce the size and resolution of the textures in a drawing.
When you import and vectorize drawings using the grey or colour preset styles, you don't have control on the size of the bitmap texture. You can reduce that bitmap texture.
- In the Tools toolbar, select the Select tool.
- In the
- From the top menu, select Drawing > Optimize > Reduce Drawing Texture Resolution.
| ‣ | From the Camera or Drawing view menu, select Drawing > Optimize > Reduce Drawing Texture Resolution. |

- In the dialog box, drag the slider toward the left to reduce the texture resolution.
- Enable the Apply to All Drawings option if you want the modification to be applied to all the drawings in your layer.
- Click OK.
Crop Brush Textures

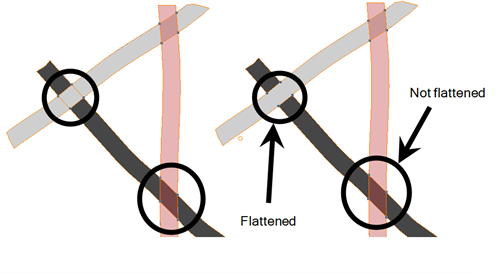
The Crop Brush Textures option is used to crop an unnecessarily large texture bitmap that lies unseen beneath the vector contour of a textured line. This often occurs when you cut and paste textured lines from one drawing into another. If you cut a portion from a textured line and paste it into a different drawing, Harmony pastes the entire unseen texture bitmap from the source drawing into the new one, even if you only took a small portion of the source drawing. Using the Crop Brush Texture command will crop away extraneous texture that does not touch the vector area. If there are many textured lines in your scene, this will greatly reduce the file size.
In the example shown above, a textured line is cut from a drawing and pasted into a new drawing. At first, it appears as if only a cropped section of the underlying texture bitmap was cut and pasted as well. However, using the Contour Editor tool to expand the vector envelope of the textured line, it is revealed that more texture bitmap exists beyond the cropped boundary. If you use the Crop Brush Texture command, the bitmap texture is cropped to the boundaries of the textured line’s vector contour (as seen in the fourth image where the vector envelope has been pulled out to reveal empty space).
- In the Timeline or Xsheet view, select the drawing whose texture you want to crop.
- From the top menu, select Drawing > Optimize > Crop Brush Textures.
- From the Camera or Drawing menu, select Drawing > Optimize > Crop Brush Textures.
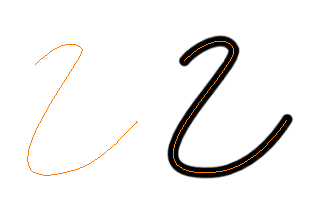
Create Contour Stroke
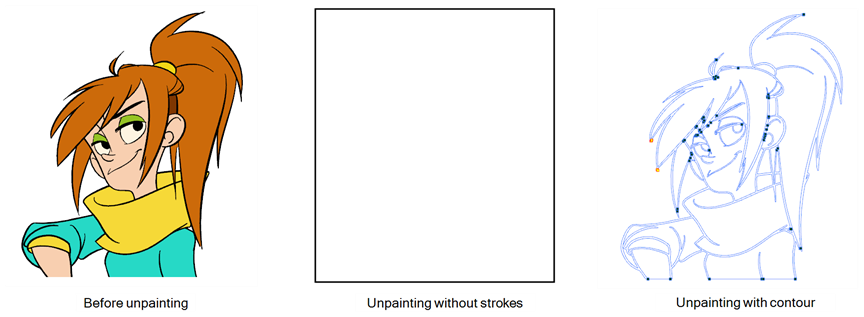
The Create Contour Stroke ![]() option is used to add a permanent invisible line around a shape that was drawn directly in Harmony. This allows you to unpaint your lines with the Paint
option is used to add a permanent invisible line around a shape that was drawn directly in Harmony. This allows you to unpaint your lines with the Paint ![]() tool but maintain the shape of the lines, should you need to repaint later.
tool but maintain the shape of the lines, should you need to repaint later.
This command is useful when inking and painting and using the Apply to All Drawings in Layer ![]() option.
option.
- In the Tools toolbar, select the Select tool.
- In the
- From the top menu, select
Remove Contour Stroke
The Remove Contour Stroke option is used to remove any permanently invisible lines that were created while scanning and vectorizing drawings or manually adding contour strokes. This is useful if you want to remove the intersection triangles created during vectorization.
- In the Tools toolbar, select the Select tool.
- In the
- From the top menu, select
Grid

Use the Show Grid option to display a grid in the Drawing
| Name | Button | Description | Keyboard Shortcut |
|
Show Grid
|
|
Displays the grid. |
View > Grid > Show Grid Press Ctrl + ' (Windows/Linux) or ⌘ + ' (Mac OS X). |
| Grid Outline Only | Displays the outline of the grid only. |
View > Grid > Grid Outline Only |
|
|
Square |
|
Displays a standard square grid. |
View > Grid > Square |
|
12 Field Grid |
|
Displays a 12-field size grid. |
View > Grid > 12 Field Grid |
|
16 Field Grid |
|
Displays a 16-field size grid. |
View > Grid > 16 Field Grid |
|
Underlay |
|
Displays the grid under the drawing elements. | View > Grid > Underlay |
|
Overlay |
|
Displays the grid over the drawing elements. | View > Grid > Overlay |
Group/Ungroup
Use the Group option to group selected drawing objects. This can help in the selection, repositioning, re-scaling and other transformations to be applied to multiple objects of a drawing.
| • | From the top menu, select |
| • | From the Camera or Drawing view menu, select Edit > Group > Group or Edit > Group > Ungroup. |
| • | Press Ctrl + G and Ctrl + Shift + G (Windows/Linux) or ⌘ + G and ⌘ + Shift + G (Mac OS X). |
Hand
Use the Hand tool to pan through the Drawing
| • | In the Tools toolbar, select the Hand |
| • | You can also Hold down the Spacebar, click in the Drawing |
Rotate View
The Rotate View ![]() tool lets you rotate the Drawing
tool lets you rotate the Drawing

- Do one of the following:
| ‣ | From the top menu, select |
| ‣ | Press Ctrl + Alt (Windows/Linux) or ⌘ + Alt (Mac OS X). |
| ‣ | In the Tools toolbar, select the Rotate View |
| ‣ | In the Drawing |
- In the Drawing