Colour-Override Editor Interface

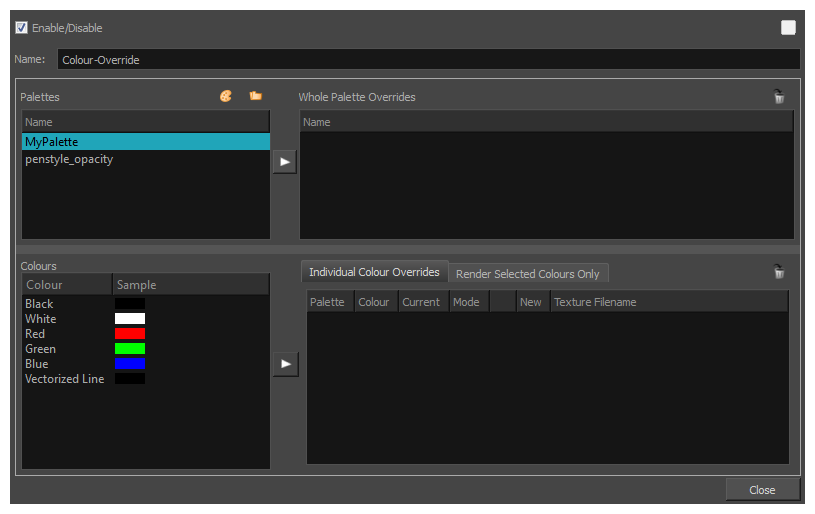
The Colour-Override editor interface is comprised of the following sections:
| • | Palettes |
| • | Colours |
| • | Whole Palette Overrides |
| • | Individual Colour Overrides |
| • | Render Selected Colours Only |
Palettes
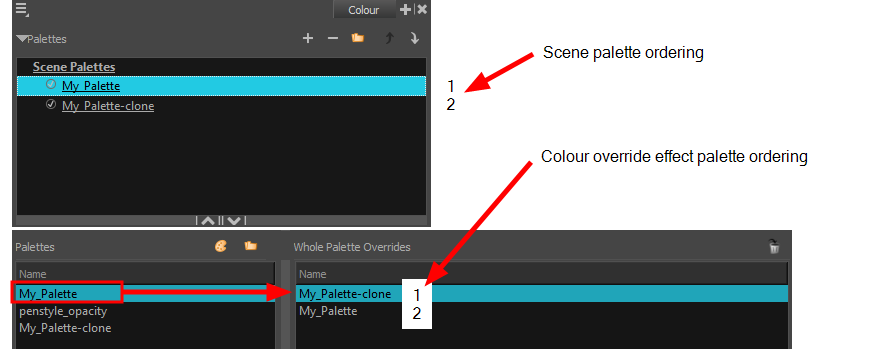
The Palettes section displays the palettes in the palette list of the selected layer. You can move these palettes into the Whole Palette Overrides section to reorder them. If you have cloned palettes, the higher one in the list will override the others. This is useful for overriding the clone palette ordering set in the scene through the Colour view.
You can load additional palettes in the palette list from either your project, by clicking on The Palette ![]() button, or your computer by clicking on the Browse
button, or your computer by clicking on the Browse ![]() button.
button.
| • | The Palette |
| • | The Browse |

Colours
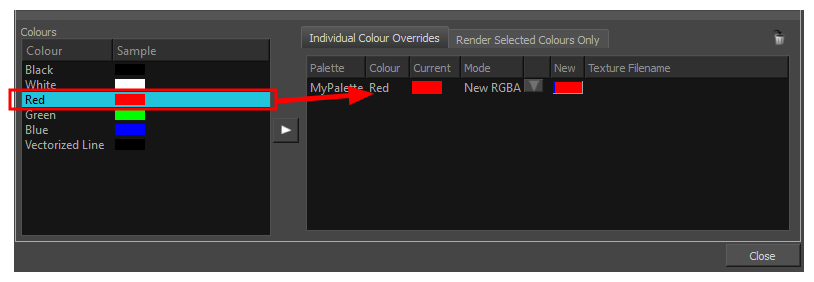
The Colours section displays the colour swatches of the selected palette. Move a swatch into the Colour-Overrides section to change its value.

Whole Palette Overrides
The Whole Palette Overrides section forces the use of a particular palette (clone palette) or palette list ordering during the compositing process. You must drag palettes from the Palettes section to change their order. Harmony uses the palettes in the order they appear in the palette list to find the colour values associated with the colour IDs of each colour zone. To apply a different version of a colour palette to, for example, switch from a day to a night palette, use the Override section to change the order of the colour palettes (you must be working with cloned palettes).

Individual Colour Overrides
When you drag a swatch from the Colours section to this section, you can override its value.
The Current column always displays the colours from the currently active palette. Selecting a clone palette in the Palettes area will not change the colours if you haven't changed the active palette in the Whole Palette Overrides section. The update will be done once you close and reopen the Colour Override Layer Properties window.

Render Selected Colours Only
The Render Selected Colours Only section is used to display some colours and ignore all others. You may, for example, want to display only the colour used for the character outline and ignore all the filling colours.

Only the colour swatches listed in the Rendered Selected Colours Only section will be rendered. The option is not activated by default. If you want to display only the selected colours, you must select the correct option from the Rendering menu:
| • | Render All: This is the default option. All colours in the palettes are rendered regardless of the listed selection. This allows you to quickly switch back and forth between your selection of colours and all the colours without having to delete and add your swatches from and to the list. |
| • | Render Selected Colours: When this option is selected, the Colour Override module displays only the colours listed in your selection. |
| • | Rendered Selected Colours and Bitmaps: This option displays all colours listed as well as any bitmap images passing through the Colour Override node. For example, if you have a Composite node grouping a series of drawing and bitmap nodes, the vector colours will be filtered through the Colour Override nodes but the bitmap images will pass through without being affected. Note that you must be in Render View mode to see the colours and bitmaps. |
You might have situations where your Colour Override node is placed below a Cutter node using a mask input and a drawing input. By default, the Colour Override only processed the colours in the drawing input. The mask drawing remains untouched. If you want the Colour Override to also filter the mask drawing, select the Apply to Matte Ports on Input Effects option.


