


Chapter 16: How to Create Templates
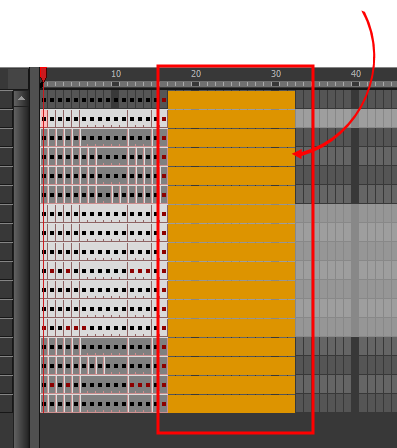
You can create a template from a layer or from cells. You can store anything available in the Timeline view as a template.
When creating a template from the Timeline view, it will lose the extra connections, effects and groupings from the Node view.
Creating a template by selecting a layer will incorporate the layer and all the drawings that were created in it, even if they're not exposed in the Timeline view. Selecting cells will only save those specific drawings in the template.
- In the Timeline view, select some cells or layers.
- In the Library view, select a folder to store the template.
- If a library folder is locked, right-click and select Right to Modify.
- Drag the selection to the Stage Library folder or any other library folder.

- In the Rename dialog box, give the new template a name.
To rename a template once it is created, right-click on the symbol and select Rename.
- Click OK.
- In the Library view, select the template you want to import.
- Drag the selected template to the Camera view or to the left side of the Timeline view.
- You can also drag a template to the right side of the Timeline view and into existing layers if the layer structure is the same as the existing one.
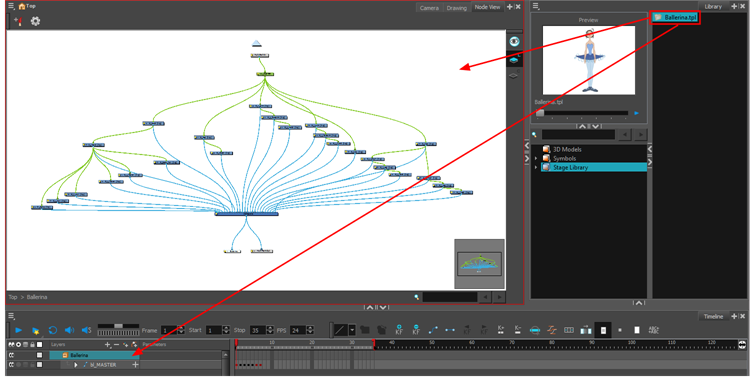
Creating a Template from the Node View
The Timeline and Node views display different information about a scene.
A main character's template, also known as a master template, is created from the Node view. This template contains all the connections, effects, composites, nodes, pegs, advanced groupings, function columns, scene lengths, drawings, timings, and so on. The template is saved in the Library view and must be imported back into the scene for use, either into the Node view or the left side of the Timeline view.
- In the Library view, select the folder in which you want to store the template.
- If the library folder is locked, right-click and select Right to Modify.
- In the Node view, select the nodes for creating the template and group them. It is very important to group your cut-out character rig before storing it in the Library, so your files are organized.
- From the top menu, select Edit > Group > Group Selected Layers or press Ctrl + G (Windows/Linux) or ⌘ + G (Mac OS X). Make sure you have a composite under the connections before grouping, otherwise there will be numerous connections going outside the group.

- In the Node view, click on the group node's yellow button to open the Layer Properties window.

- In the Node view, select the group node and copy and paste it inside the template folder in the Library view or press Ctrl + C and Ctrl + V (Windows/Linux) or ⌘ + C and ⌘ + V (Mac OS X).

- In the Rename dialog box, give the new template a name and click OK.
