Importing a Photoshop Layout
If you exported a Photoshop layout image from a Harmony project, you can easily import it back into Harmony. Just be sure to import it at the beginning of the project for accurate scene planning.
- In your Harmony project, select File > Import > Images.
The Import Images dialog box opens.
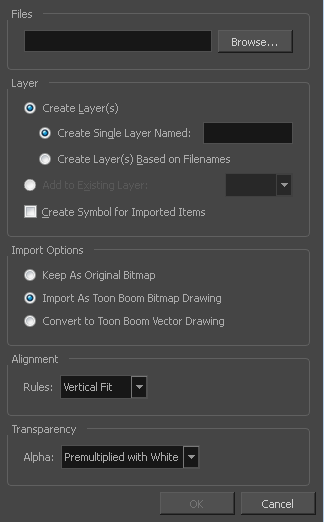
- In the Files section, click Browse to find and select the .psd layout file on your computer. Note that this layout file must have its corresponding .xli file in the same folder.
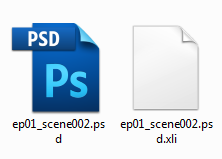
- Once you have selected the layout file, the Use Position Information Contained in XLI File option appears in the Layer section.
This option is enabled by default. When you import the layout image in your scene, it will be automatically positioned to fit the original layout scene creating an accurate layout guide. You can disable this option if you want the imported layout image to be imported according to the normal behaviour of the import process. The layout image will be incorrectly aligned as it was when it was first created.

- In the Layer section, select the Create Layer(s) option, then select one of the following options:
| ‣ | Create Single Layer Named: Creates a layer you can name. |
| ‣ | Create Layer(s) Based on Filenames: Creates a layer based on each unique filename prefix. For example, the filenames a-1.tga, a-2.tga and b-1.tga will create layers name "a" and "b", where "a" has two drawings and "b" has one. When creating a single layer from these three filenames, all three drawings will be inserted in the new layers. |
- Select the Create Symbol for Imported Items option if you want the layers to be contained in symbols.
- In the Import Options section, select one of the following:
| ‣ | Keep As Original Bitmap: Retains an imported image as a bitmap. In the Alignment section, decide on the size and placement of your image within the camera frame. Depending on the Scene Settings (the height and width in pixels that you chose for your project), an image that you import may get scaled to the point where all its individual pixels become visible. There are three options available in the Alignment section: |
| Parameter | Description |
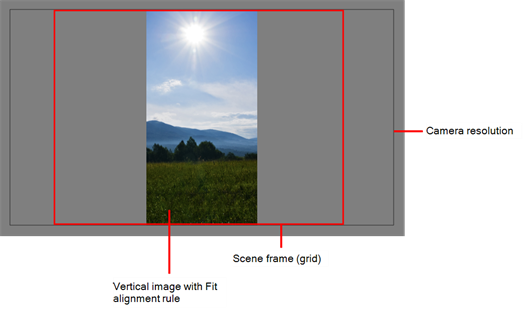
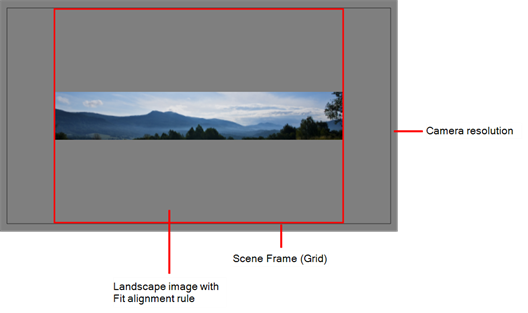
| Fit |
Enlarges or shrinks (but not distorts) the image height to match the full height of the scene grid.
If the image orientation is landscape, this will enlarge or shrink (but not distort) the image width to match that of the scene grid.
Note that the Fit alignment rule equals the Center Fit rule in the layer properties. |
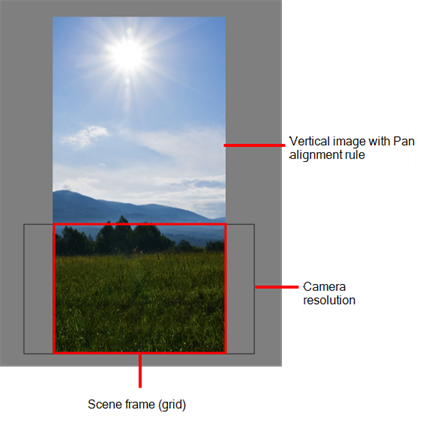
| Pan |
This is the opposite of the Fit parameter. If the image orientation is portrait, its width will be made to match the width of the scene grid. As a result, part of the image’s height will extend beyond the height of the frame. This can be useful if you want to make your background move up and down, or from left to right to make it appear as if the camera is panning or to actually perform a camera pan.
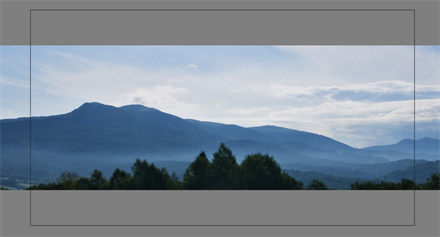
The opposite will apply to a landscape image. Its height will be fit to the scene grid, therefore it is possible that the image will extend beyond the scene grid's boundaries.
Note that the Pan alignment rule equals the Center First Page rule in the layer properties. |
| Project Resolution |
Scales the image in proportion to the scene's resolution. The system looks at the resolution of the bitmap image, for example 4000 x 2000, then compares it to the scene's resolution, for example 1920 x 1080, and adjusts the scale factor in proportion. So, in this example, the bitmap would appear at 208% (4000/1920). If you import a bitmap that is 960 x 540, it will be displayed at 50% (960/1920) of the size of the project resolution.
Note that the Project Resolution alignment rule is equal to the As Is rule in the layer properties. |
| ‣ | Import As Toon Boom Bitmap Drawing: Imports a drawing into a vector layer where you can edit the image using the drawing tools. In the Alignment section, select one of the following: |
| Parameter | Description |
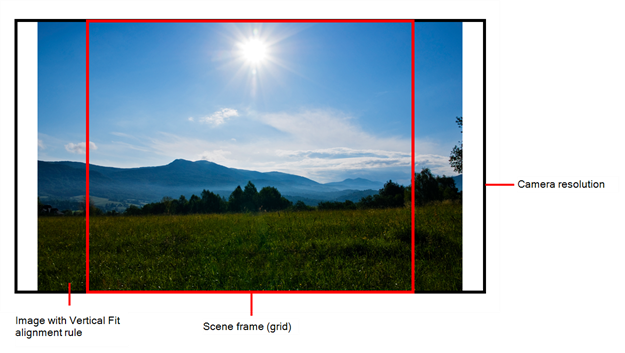
| Vertical Fit |
Enlarges or shrinks (but not distort) to your image height to match the full height of the scene frame (alignment grid).
|
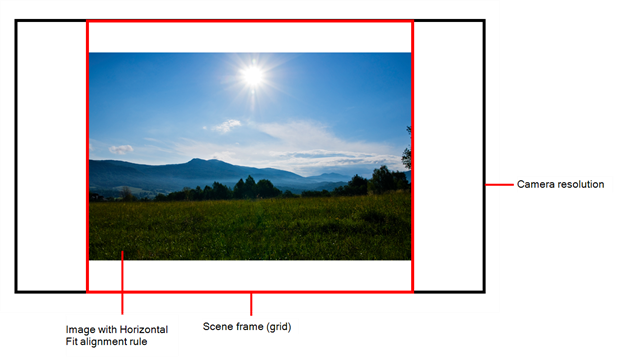
| Horizontal Fit |
Enlarges or shrinks (but not distort) to your image height to match the full width of the scene frame (alignment grid).
|
| Actual Size |
Scales the image in proportion to the scene's resolution. The system looks at the resolution of the bitmap image, for example 4000 x 2000, then compares it to the scene's resolution, for example 1920 x 1080, and adjusts the scale factor in proportion. So, in this example, the bitmap would appear at 208% (4000/1920). If you import a bitmap that is 960 x 540, it will be displayed at 50% (960/1920) of the size of the project resolution. |
| ‣ | Convert to Toon Boom Vector Drawing: Imports a drawing and converts it to a Toon Boom vector drawing. In the Vectorization section, select one of the following: |
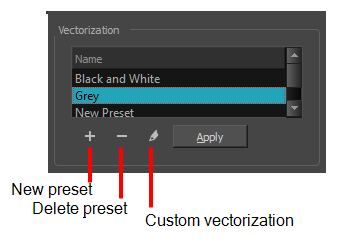
Black and White: Vectorizes drawings as a solid black line; creates a 100% vector-based drawing.
Grey: Vectorizes the image as a mix of vector contour and greyscale bitmap filling. Lines keep the texture from the scan, and the white of the paper becomes transparent.
New Preset: Lets you create a new preset.
Delete Preset: Lets you delete any preset in the list.
Custom vectorization: Lets you set custom vectorization parameters—see Creating a Vectorization Style .
- Click OK.
The Multilayer Image Import Settings dialog box opens.
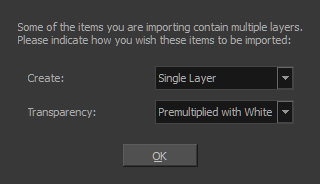
- From the Create menu, select one of the following:
| ‣ | Single Layer: To import the Camera and Layout layers merged together. |
| ‣ | Separated Layers: To keep your Camera and Layout layers separated. |
- From the Transparency menu, select one of the following if applicable:
| Parameter | Description |
|
Premultiplied with White |
Individual pixels at the edge of an image are blended with white. |
|
Premultiplied with Black |
Pixels at the edge of an image are blended with black. |
|
Straight |
Pixels at the edge of an image are blended with black, white and greys. |
| Clamp Colour to Alpha | Premultiplies the colour value with the alpha value. When the colour is clamped to the alpha, the colour value cannot be higher than the alpha value. It calculates the real colour value faster. When the RGB values are multiplied with the alpha value, that is to say, if you have a pixel of value R=247, G=188, B=29 and the alpha is 50% or the image has a 50% transparency, then the actual RGB values that are output would be half of the amounts listed above. |
- Click OK.
Your image appears as separate layers in the Timeline view, corresponding to the .psd layer group folders Camera_Set and Layout_Set. You can now use this layout as a guide for scene settings.


