Animating Deformations
The controls to animate deformations work the same as those for setting up the chains. You simply need to create keyframes and position the control points.
If you need to reset the current pose of the entire chain for the entire scene, you have the possibility to reset the deformation chain to the resting position on the current or all frames.
When adding new drawings while animating, you may need to see the reference drawings as their original resting position as it may be quite difficult to draw on a deformed canvas. You have the possibility to disable the deformations to see the resting position while drawing. Note that this will not affect the exported images. It's only a display mode. You can see the result in OpenGL and Render modes in the Camera view, but the exported images will always be deformed.
- In the Timeline view, go the frame on which you want to create the first animation pose.
- In the Tools toolbar, select the Transform
 tool.
tool.
- If you want to create animation keyframes, enable the Animate
 mode in the Tools toolbar.
- Do one of the following:
- In the Timeline toolbar, click the Add Keyframe
button.
- Right-click and select Add Keyframe.
- Press F6.
A keyframe is added on the current frame.
- In the Timeline view, select the deformation nodes you want to animate—see Displaying the Deformation Controls.
- In the Deformation toolbar, click the Show Selected Deformers and Hide All Others
 button to display the deformer of the selected piece.
- In the Camera view, do the following:
- Rotate the first bone to rotate the limb.
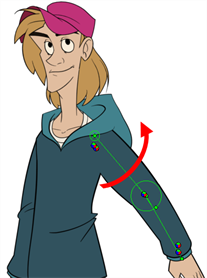
- Rotate the subsequent bones to bend the limb.
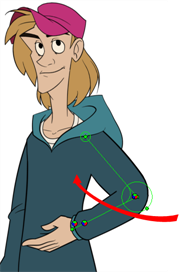
- Use the root control to reposition (offset) the entire chain.
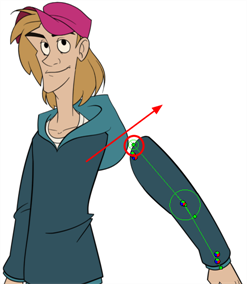
- Use the control points to reposition the articulations. This will elongate, shorten, or change the direction of the bone and offset the subsequent children.
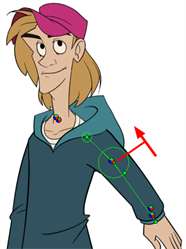
- Use the articulation's control (square) to change the size of the articulation. For quality purposes, it is recommended to have an articulation which fits the diameter of the part it controls.
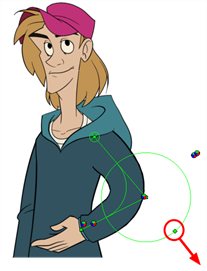
- In the Timeline view, go the frame on which you want to set the next key pose. You will need to expend the exposure to see your drawings further down the Timeline view.
- Add a keyframe on the current frame by doing one of the following:
- In the Timeline toolbar, click the Add Keyframe
button.
- Right-click and select Add Keyframe.
- Press F6.
- Repeat the previous steps to animate your character.
You can also manipulate the deformer by typing values directly in the Layer Properties of the deformation effect nodes.
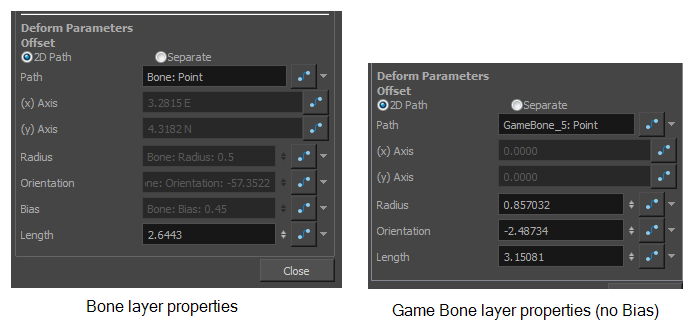
- In the Timeline view, move the playhead to the frame where you want to reset the puppet to the resting position.
- In the Timeline or Node view, select the deformation group or node you want to reset.
- In the Deformation toolbar, click on the Reset Current Keyframe
 button to reset the position of the selected chain on the current frame.
- To completely reset the position and remove all keyframes on all frames, click on the Reset All Keyframes
button.
- In the Timeline or Camera view, create or duplicate your new drawing.
- In the Deformation toolbar, enable or disable the Enable Deformations
 button, depending on your needs.
 - In the Camera view, start drawing.
- To continue animating, in the Deformation toolbar, reactivate the Enable Deformations
 button.


