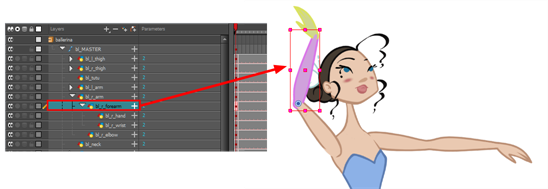
Selecting Layers to Animate or Position
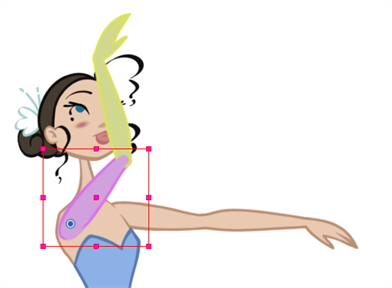
When you're animating characters, it's important to understand how the Animate mode allows you to create keyframes on the current frame or reposition the entire layer.
Animate Mode
The Animate ![]() button, in the Tools toolbar, turns keyframing on or off. With this mode enabled, as soon as you move an element in the Camera view, a keyframe is positioned on the current frame in the Timeline view to indicate the new position.
button, in the Tools toolbar, turns keyframing on or off. With this mode enabled, as soon as you move an element in the Camera view, a keyframe is positioned on the current frame in the Timeline view to indicate the new position.

When you turn off the Animate mode, and you select and move an element, the entire animation in the layer will be offset.
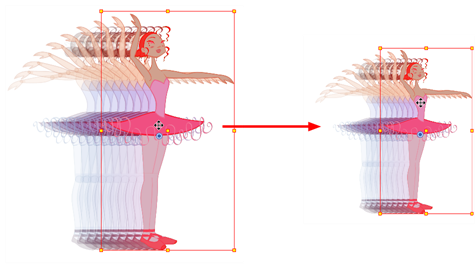
This means that when you are animating a character, you must enable the Animate mode. If you are scaling down your puppet to fit the scene composition and want to resize the entire animation, you must disable the Animate mode.
- In the Tools toolbar, click the Animate
 button or select Animation > Animate.
Selecting Drawing Layers Using the Transform Tool
To manipulate the drawing layers in order to animate them, you must use the Transform ![]() tool. The Select tool is used to modify the drawing strokes and not the actual drawing layer.
tool. The Select tool is used to modify the drawing strokes and not the actual drawing layer.
When selecting the drawing layers with the Transform tool, make sure the Peg Selection Mode option is turned off in the Transform Tool Properties view. Otherwise, if it's left on, it will limit the selection in the Camera view to pegs only.
- Do one of the following:
| ‣ | In the Tools toolbar, click the Transform |
| ‣ | From the top menu, select Animation > Tools > Transform. |
| ‣ | Press Shift + T. |
- In the Transform Tool Properties view, make sure the Peg Selection
 mode is deselected.
- In the Camera view, select the element to animate.
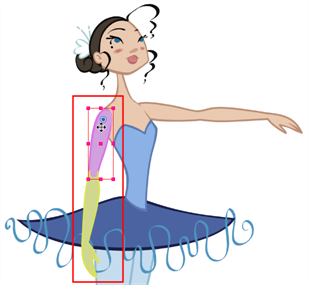
Selecting an Element in the Camera View Using the Transform Tool
When you select an element in the Camera view using the Transform tool, make sure the Peg Selection ![]() mode is disabled in the Transform Tool Properties view. The element selected is the actual drawing layer corresponding to the selected element. If you have a layer parented to a peg, you must use the keyboard shortcuts to go up the hierarchy chain, select it in the Timeline view, or enable the Peg Selection
mode is disabled in the Transform Tool Properties view. The element selected is the actual drawing layer corresponding to the selected element. If you have a layer parented to a peg, you must use the keyboard shortcuts to go up the hierarchy chain, select it in the Timeline view, or enable the Peg Selection ![]() mode option in the Transform Tool Properties view. This will limit the selection in the Camera view to pegs only.
mode option in the Transform Tool Properties view. This will limit the selection in the Camera view to pegs only.

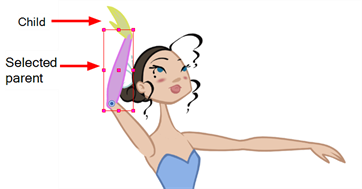
If the layer has child layers, they will also be highlighted. Depending on whether you're using pegs or only drawing layers in your rig, the selection can be magenta, yellow or both.
Selecting a Layer in the Timeline View
When you select a layer in the Timeline view, the corresponding element is highlighted in the Camera view. If the selected layer has child layers, they are also highlighted.
