


Toon Boom Harmony 12 Release Notes
Release 12
Here are the new features, changes, and improvements in Toon Boom Harmony 12:
| • | The New Harmony |
| • | Drawing Tools |
| • | Animation Tools |
| • | Compositing and Effects |
| • | Import |
| • | Timeline |
| • | Miscellaneous |
The New Harmony
Three Editions
![]()
Toon Boom Harmony is now available in three editions, catering to different types of users and their unique animation requirements:
| • |  Harmony Essentials is for simple paperless and cut-out style animation projects. By using the introductory edition of Harmony, enthusiasts and hobbyists have all the fundamental drawing, painting and animation tools they need. Harmony Essentials is for simple paperless and cut-out style animation projects. By using the introductory edition of Harmony, enthusiasts and hobbyists have all the fundamental drawing, painting and animation tools they need. |
| • |
 Harmony Advanced is a professional-grade solution for studios, freelancers or anyone who needs full paperless and simple cut-out animation capabilities. Harmony Advanced is a professional-grade solution for studios, freelancers or anyone who needs full paperless and simple cut-out animation capabilities. |
| • |
 Harmony Premium is for full paperless and sophisticated cut-out style animation. This is the most powerful, professional edition of Harmony that adds the ability to create sophisticated character rigs, highly organic movement and unlimited special effects for any style of animation. Harmony Premium is for full paperless and sophisticated cut-out style animation. This is the most powerful, professional edition of Harmony that adds the ability to create sophisticated character rigs, highly organic movement and unlimited special effects for any style of animation. |
Desktop Subscription
Harmony is now available by Desktop subscription, which lets you choose the level at which you want to use Harmony and its features. You can subscribe monthly or annually—visit Desktop Subscription.
Online Availability
Harmony 12.1 is available for purchase at the Toon Boom online store. A full-featured Trial version for each Harmony edition is also available. Harmony can be updated online via the Toon Boom Upgrade Center.
For more information, visit the following:
| • | Toon Boom Store |
| • | Trial Versions of Harmony |
| • | Toon Boom Upgrade Center |
Harmony Server
Harmony Server (formerly called Network) enables production teams working in Harmony Advanced and Harmony Premium to access shared assets directly from a database in a server-client configuration. The server stores all the assets and holds the database. Clients machines run Harmony and access the database instead of storing files locally. You can share assets, vectorize and render in batch for increased productivity and security.
Drawing Tools
![]() Bitmap/Vector Drawing and Bitmap Brush Engine
Bitmap/Vector Drawing and Bitmap Brush Engine
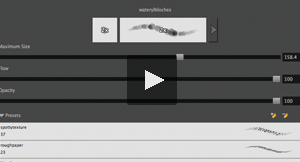
Bitmap Brush Improvements
The brush engine in Harmony has been improved to provide even better quality and more artistic control. You can now control the brush shape to provide a random effect on strokes or create and save a custom brush that acts like a calligraphy pen fixed at any angle you desire.
A dual tip is introduced that mixes two shapes or textures cookie cutter style to create an infinite range of fuzzy or watercolour lines. This is perfect for organic and experimental drawing styles. Previously, you were limited to a finite number of brush presets
Update Brush Properties
You can select a preset brush, pencil or eraser and change its properties to update the preset instead of creating a new one
Animation Tools
![]() Deformers and Game Engine Export
Deformers and Game Engine Export
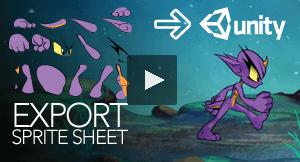
Game Bone Deformers
A simplified set of Game Bone deformers is provided for easy import into game engines like Unity. The properties of these bones can be read by game engines and are optimized for real-time deformations in a game
Simpler Bone Set-up (Workflow)
The default user interface for creating bones in Harmony is now more straightforward in operation and simpler to understand. Set-up is now a single operation, instead of requiring two different tools and one mode. This provides for additional efficiency and clarity throughout the process.
Envelope Deformers
You can now apply an overall bend or stretch to a set of deformers for even more flexibility. The new Envelope option for Curve and Offset deformers lets you generate and distort an envelope around an object and deform it while keeping its parent or child curves intact. It could be used, for example, to squeeze the overall shape of an octopus character to fit through a porthole without affecting the curves used to manipulate each tentacle
Harmony Game Previewer
The new Harmony Previewer lets you see if your animations and rigs will work once imported in Unity. This can be useful if you're not a developer. You can visualize your characters in the Unity game engine with no programming required. To get the latest version of the Harmony Game Previewer, visit toonboom.com/games.
Compositing and Effects

Terminology
The term "module" has been replaced with "node". Module Library is called Node Library and Network view is called Node view.
Node (Module) Library Search
The ability to search nodes has been introduced in order to provide a quick way to find your effects, like Bloom, Burn-In Luminance, Blurs, Colour Override, Particles or Lens Flare. We also added more descriptions to provide better search results. The search will not only look through the node names, but also the descriptions. For example, when you type the letters for “blur”, you will gets search results for Blur-Box and Shadow (the word blur is in the description for the Shadow node)
Node Library Organization Improvement
A new vertical listing of node names allows you to more rapidly find the effects you want to use in the compositing process. This interface improvement allows an unlimited number of nodes to be presented along with their subgroups
Node Backdrops
Backdrops are a way to work with complex node systems that let you associate a selected set of nodes by colour. You can add as many backdrops to your node structure as needed. The idea is to visually organize the structure so you can quickly identify the particular set of nodes
Node Properties
Nodes have collapsible parameters sections to take less room.
Node Connections
When connecting to a node, you can now see input ports that reveal what type of connection is supported by each port.
Node Port Tooltips
A tooltip appears when you hover over node ports. The parent/child node is displayed, as well as the type of input or output port you are using.
Insert Menu
The new Insert menu, which you can access from the top menu, allows you to quickly add any effect from a menu list instead of dragging them from the Node library. This can be useful in speeding up your workflow.
Support for OpenFX Plugins
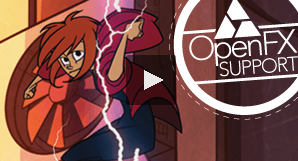
With Harmony 12.1, you can add third party OpenFX plugins into the Node Library to have an expanded range of effects to use in compositing operations. This not only expands the range of effects that can be applied to a production, it also consolidates workflow within Harmony by avoiding a back and forth workflow with an external compositor. You can obtain OpenFX plugins from open source providers or commercial OpenFX plugin creators such as GenArts Inc.
Burn-In Node
A new node (module) called Burn-In lets you superimpose scene information, which is visible in the Camera view. The information is displayed on top of any content in the scene. You can choose to display the scene name, timecode, frame count, environment and job, as well as add a frame offset if you need blank frames to precede the scene content. Also, to make the information more visible, you can also add a background and choose its colour, and customize the text font and alignment
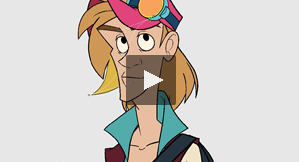
Light Shading Node
Cut-out animation allows for great advancements and time saving in production. However, it's not easy to create tone and highlights. To do so, you must draw all the highlight zones for each frame by hand. Following that, if you want to modify your animation, you have to redraw those zones. This slows down the process. There are a few tricks for doing simple automated highlights, but the results are not always convincing.
The Light Shading node provides a proper solution to this issue. It allows you to add a few nodes to your original puppet rig and obtain a customizable lighting effect on your characters. It can be applied to any object in your scene, not only on cut-out characters. The light shading effect allows you to define your volume zones and generate a normal map, as well as your light source and animate its position
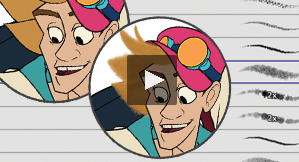
Median Node
A new node (module) called Median lets you smooth out imperfections in your drawings and deliver a posterization effect with a slight blur. Harmony sorts the values of pixels within a specified radius and uses the median value. It can be used to add glamour to a character’s face or create an Impressionistic style to a background
Render Preview Node
A new node lets you more quickly preview effects on your screen when using OpenGL, so you can more easily test animated effects on screen. It provides a variable quality preview of an effect, removing the need to render out to an intermediate file(s). This is especially useful for evaluating OpenFX plugins when you want to see the visual impact of changing individual parameters
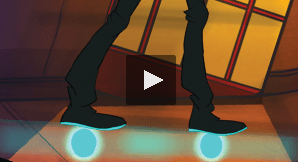
Bloom Node
A new node (module) called Bloom lets you isolate bright areas and achieve a nice atmospheric effect which is useful for foggy streetlights or glowing faces in front of a flickering fireplace. It's also especially good for adding a bloom to once hard-to-isolate areas, such as on an imported photo of a night time street. The Bloom effect is a combination of the Luminance Threshold, Cutter, Blur - Gaussian and Composite Generic nodes
Luminance-Threshold Node
The new Luminance-Threshold node allows you to isolate areas of an image according to their brightness, and subsequently apply effects to those regions. You can add a ghostlike glow effect to all the shiny armour in a scene for example
Placeholder Node
The Placeholder has been removed from the Node Library.
Constant Particle Generation Option

You can now have Harmony optionally generate particles between frames to create things like constant comet trail effect. This new particle emitter option provides for particle system continuity over the life of the particle system. You can use it to create jet exhausts, volcanic eruptions, or sparkler effects that need to span a range of frames.
Exposure Fill Using Render Change Option
Harmony can now detect if a threshold of changes has occurred between two consecutive images and then expose the affected textures for further processing. It can be used for example to change the texture on a characters shirt only when the shape of the shirt is changed significantly from the previous frame. This avoids unnecessary repetitive texture changes on every frame
Intensity Option
This new Intensity option lets you directly vary the intensity of Glow, Matte-Blur, Shadow, Highlight and Tone effects. This means you don’t have double or triple the connection to make the effect stronger.
Colour Override Options
Two Colour Override options give you more flexibility in changing individual colours when you have a network of nodes that includes a matte. It lets you decide if you want to apply the Colour Override to only to the image, or also to the matte, of the parent effects
Flatten Option
When using the Line Art or Overlay Layer node and placing a node below a Composite node containing several drawing nodes, such as a cut-out character, you can use the new Flatten option to flatten the extracted result. For example, when extracting a series of outlines, parts that may have been hidden by colour fills might now be visible. The Flatten option cuts the extra artwork
Import
Importing FLA Files
You can import and export files from Flash to Harmony to transfer character rigs, props and backgrounds. Flash import is available on all three editions of Harmony on Windows and Mac OS X. It is not possible to do so on Linux versions.
On the Flash side, the command works on these versions: Adobe Flash CS5 to Adobe Flash CC. Exports from older versions of Flash software is not possible
New 3D Import Formats
Harmony can now import new 3D formats as 3D elements in your project. The new formats are two popular data exchange formats: Collada (.dae) and Alembic (.abc).
OSB Conversion Option
There is a new option to convert 3D files directly to the OSB file format and save them so the next time you reload the scene, it is quicker as Harmony does not have to reconvert them again. This improves workflow in situations where multiple 3D files (with their own relative paths) were loaded by storing them in a single file.
More Powerful SWF Import
There is now support for a later version of the SWF (SWF 10) format, avoiding the need to use older versions of Flash to export files to Harmony.
Vectorization Parameters Dialog Box
The Vectorization Parameters dialog box has been reorganized for efficiency
Timeline
Solo Mode
Using the new Solo mode, you can temporarily display one or multiple layers in the Camera view without changing the final output. You can also activate/deactivate selected layers without redoing the selection for additional display control
Show/Hide Additional Links
The new Show/Hide Additional Links ![]() button at the bottom-left of the Timeline view lets you display links associated with a layer. For example, if you connect a mask to more than one effect such as a Tone and a Highlight, you can see these connections in the Additional Links section
button at the bottom-left of the Timeline view lets you display links associated with a layer. For example, if you connect a mask to more than one effect such as a Tone and a Highlight, you can see these connections in the Additional Links section
Connect Multi-layers as Input to Effects
You now have the ability to connect multi-layers as input to effects
Apply Ease on the Timeline View
The new Set Ease Menu in the Timeline toolbar lets you quickly and easily create different speed patterns between keyframes. You can customize the Timeline toolbar with the corresponding toolbar button called Apply Ease to Selection ![]() . This lets you quickly reapply the ease type without going through the Set Ease Type menu each time
. This lets you quickly reapply the ease type without going through the Set Ease Type menu each time
Shortcut for Scene Markers
There is a new shortcut for scene markers called Mark Current Frame
Parameters Section
In the Timeline view, the Parameters section uses alternating colours to differentiate the area from the layers
Groups in the Timeline View
Groups in the Timeline view are now easier to identify with the new icons expanding groups, which also show child layers in the timeline
Paste Special Option
A new Paste Special option, called Replace Existing Drawings, replaces drawings with the same names to update a scene with new modified drawings and preserve the animation. This lets you modify rigs or animations non-destructively by only replacing the drawings. You could easily replace or update the shirt on an animated character, for example. You can find this option in the Advanced tab of the Paste Special dialog box
Miscellaneous
More Useful Tooltips
Tooltips now contain more information about tools, tool properties, and scripts.
Search for Shortcuts
You can easily find shortcuts with a new search capability in the Preferences dialog box
Script Icon Tooltips
You can now reveal the function of a script by viewing its tooltips, which you provide.
Overwrite Images During Scan
In Harmony Advanced and Harmony Premium, you can overwrite existing images but keep the same cell names. This allows you to fill your exposure first and then fill it with the scanned images.
Web Control Center (Part of Harmony Server)
A new web interface for the Web Control Center offers the ability for Harmony users working from remote locations to upload and download projects to a central server using the Internet.