
Shape Tool Options
When you select a shape tool (Rectangle, Ellipse, Line), its properties and options appear in the Tool Properties view.

The Preview area lets you see a preview of the stroke that will be produced after you customize the different parameters in the Tool Properties view.
- Select a brush style from the Presets section. It's a good idea to choose a brush preset that is closest to the style you want to create.
- Click on the Show Extended Properties arrow to display advanced customization parameters.

Move the Size slider left to reduce the line thickness and to the right to increase its width.

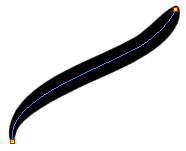
You can adjust the start, end, and joint style of a selected pencil line.
| • | Start: Lets you select the style of the start tip, which is the first tip you drew. You can choose between Round or Flat style. |
| • | End: Lets you select the style of the end tip, which is the last tip you drew. You can choose between Round or Flat style. |
| • | Join: Lets you select the joint style. The joints are where the line curves abruptly. You could also define the Join style as the corner style. You can choose between Round, Mitre and Bevel style. |
Harmony provides a variety of pencil presets
A thickness stencil saves the thickness information across the length of the line. When drawing with a thickness stencil, the pressure sensitivity of the tablet is discarded. A thickness stencil can be used while drawing, or applied afterwards.
You can export the pencil presets that you have created and import those that others have created. This is a good way for you and project collaborators to keep a consistent look for the project—see Working with Pencil Presets

When the Draw Behind ![]() mode is enabled, the lines you draw will appear behind the art that already exists.
mode is enabled, the lines you draw will appear behind the art that already exists.
Use the Automatic Filling ![]() option to automatically fill your shape with the selected colour as you draw. By default, the Shape tool creates the outline of an empty shape that you can later fill using the Paint tool. This option is unavailable for the line tool.
option to automatically fill your shape with the selected colour as you draw. By default, the Shape tool creates the outline of an empty shape that you can later fill using the Paint tool. This option is unavailable for the line tool.
When drawing a shape, you can enable different snap modes to help you create your shape.
| • | The Snap to Contour |
| • | The Snap and Align |
| • | The Snap to Grid |
As you draw in the Line Art layer, the Create Colour Art Automatically ![]() option automatically creates the corresponding strokes in the Colour Art layer.
option automatically creates the corresponding strokes in the Colour Art layer.
When enabled, the Auto-Flatten![]() mode automatically flattens the new lines created with the existing artwork as you draw in the Drawing
mode automatically flattens the new lines created with the existing artwork as you draw in the Drawing
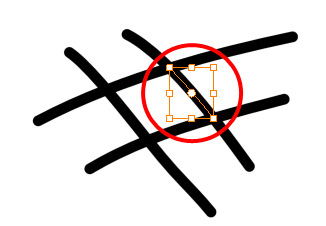
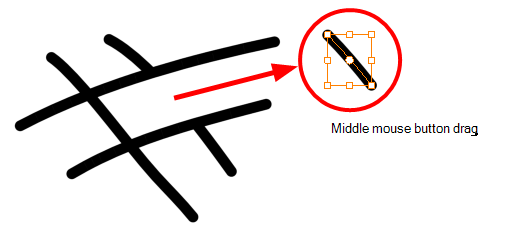
Using the Select tool, you can use the middle mouse button to select a segment of flattened pencil line. This creates a nice finish on the lines and corners of your artwork.
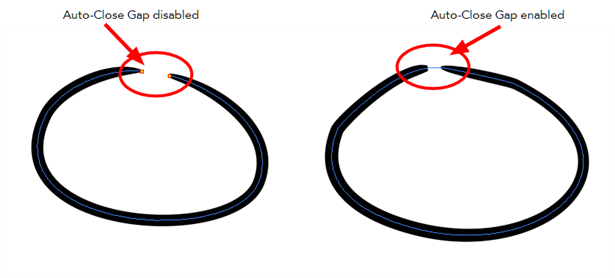
When enabled, the Auto-Close Gap ![]() mode automatically connects, with an invisible stroke, the pencil lines you draw close to each other in the
mode automatically connects, with an invisible stroke, the pencil lines you draw close to each other in the
The Use Stored Colour Gradient ![]() option makes your tool use the previously stored gradient position. This way, every new brush line or colour fill will use the stored gradient position.
option makes your tool use the previously stored gradient position. This way, every new brush line or colour fill will use the stored gradient position.
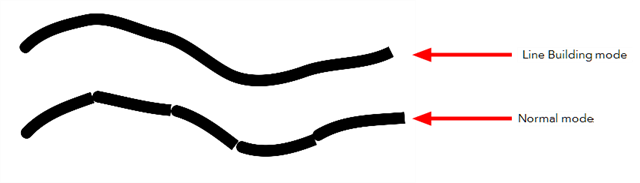
The Line Building ![]() mode is very useful when drawing long lines and curves in small increments with pencil lines or the line
mode is very useful when drawing long lines and curves in small increments with pencil lines or the line![]() tool. As the pencil lines are central vector lines, it may be difficult to align the line tips perfectly to create a uniform stroke and close all gaps.
tool. As the pencil lines are central vector lines, it may be difficult to align the line tips perfectly to create a uniform stroke and close all gaps.
In this mode, you can draw lines in small increments and the tips are merge into one single stroke.

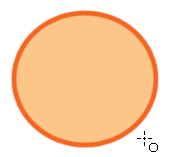
When the Ellipse or Rectangle mode is enabled in the Tool Properties view, the Draw Circle or Draw Square option appears. When selecting these options, the shape produced will be a perfect circle or square (as opposed to an oval or rectangle).
Enabling this option is a good idea if you plan to create many squares or circles. However, if you only need to create one, holding down the Shift key as you create your shape will maintain the proportion in the same way.