Importing SWF Files
You can import .swf files in Harmony that were published using any version of Flash Player, up to version 14. Note that some effects may not appear when imported in Harmony
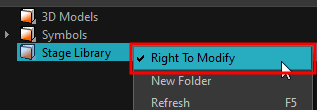
- In the Library view, right-click on the Stage Library folder and select Right to Modify to unlock the library folder. Make sure the Lock icon disappears from the folder. If not, your library will remain locked and you will not be able to import files.

- Do one of the following:
| ‣ | In the top menu, select File > Import > SWF, Illustrator Files to Library. |
| ‣ | Right-click on any unlocked folder and select Import Fi les. |
The browser window opens.
- Find and select your
.swffile from the Import Files dialog box and click Open.
The Rename dialog box opens.

- Type a name for the new template or keep the name of the original
*.swffile.
- Click OK.
A new template folder is created in the Library view.
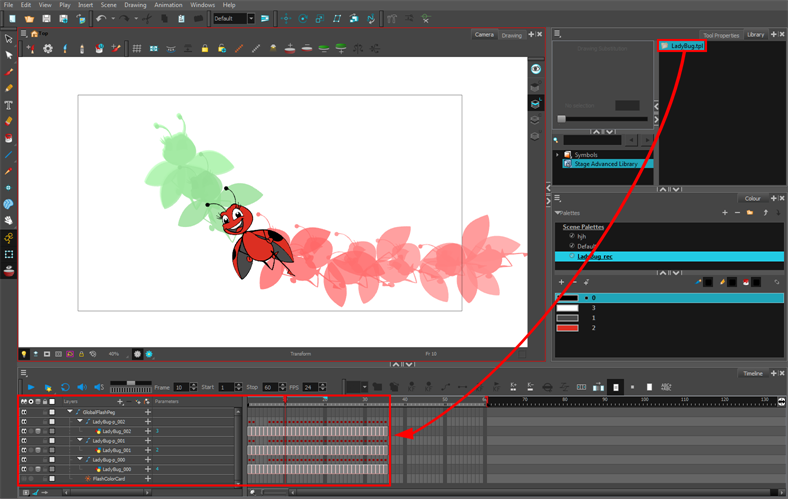
- Drag the new template folder from the Library view to the left side of the Timeline view. Wait until the copy cursor
 appears before releasing the folder.

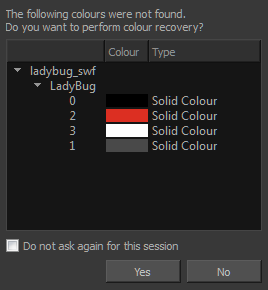
- The colour recovery dialog box appears, requesting that a colour recovery should occur. Before clicking the Yes button, you have the option of selecting the Do Not Ask Again For This Session option. This might be useful if you plan to import multiple
*.swffiles.

The colour palette used to create the .ai or .pdf file is imported and a new palette is created under the imported file’s name.
The Adobe Flash file layers appear in the Timeline view. Symbols that were created in Flash become regular drawing layers, but can be reconverted into symbols in Harmony. Symbols within symbols or drawings within symbols collapse into their corresponding parent symbol.
In addition, all drawing elements that are dynamically linked to the Toon Boom Harmony file are grouped together in one folder. In our example, this means that when you scroll through the Drawing Substitution preview in the Library view, the different hand, leg, tentacles, antennae, torso and facial positions are all organized together.
Redistributing Elements
In some instances, due to an optimization enhancement in the exported SWF file (CS4), some of the layers might be combined as a single layer. If so, you can quickly redistribute these elements onto individual layers again.
- In the Tools toolbar, click the Select
 tool.
tool.
- In the Camera view, select the drawing that contains elements you want to redistribute onto individual layers. To select the all the elements of the selected drawing layer, press Ctrl + A (Windows/Linux) or ⌘ + A (Mac OS X).
- Do one of the following:
| ‣ | From the top menu, select Drawing > Distribute to Layers. |
| ‣ | In the Tool Properties view of the Select tool, click the Distribute to Layers |
The number of drawing layers corresponding to the different grouped elements are created in the Timeline view. The selected elements in the original drawing layer are removed. Each element is distributed onto a new drawing layer.
- Repeat the process for each drawing that contains elements to redistribute.
