
Exposure Fill Using Render Change
A frequent effect applied at the compositing stage is texture overlay. Either a shaky textured line will be applied on an animation or colour fills will be replaced with textures. Most of these effects are created using the Colour Override effect—see Colour-Override .
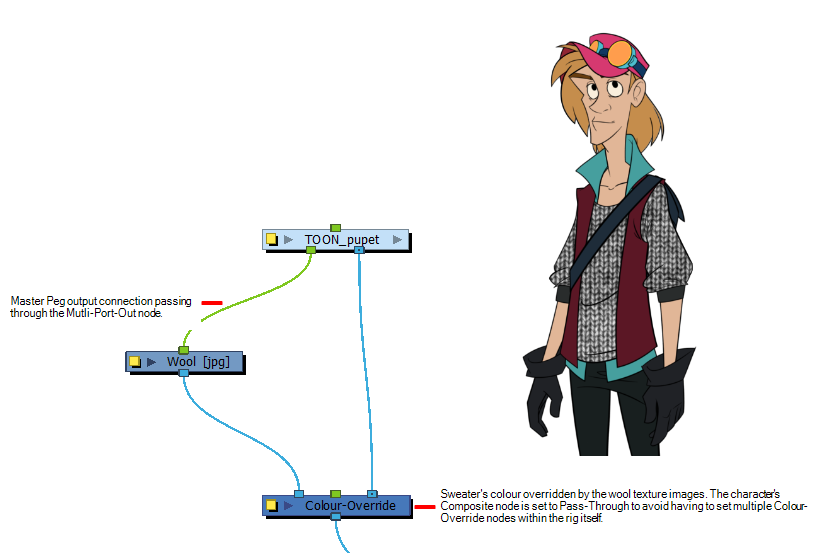
You can replace a colour fill with a static or animated texture. For an animated texture, you can fill a character's wool sweater with four or five variations, filling the sweater zone and loop it throughout the sequence. This way the final animation can have a bit more of an organic style with moving textures and shaking lines.
You might also want to control when the textures move. When your character is still, you might want the texture to remain still as well. You could also want the texture to remain still if the character only moves slightly. You can control when the texture will move based on the animation motion. You can set the parameters that define what is considered a big enough change for the texture to start moving.
The motion analysis is based on the rendered images sent to a Display node. You can use the main Display node set below your final Composite node or add a specific Display node to analyze a specific portion of your node system, such as a character's sweater layers—see Display Concepts.
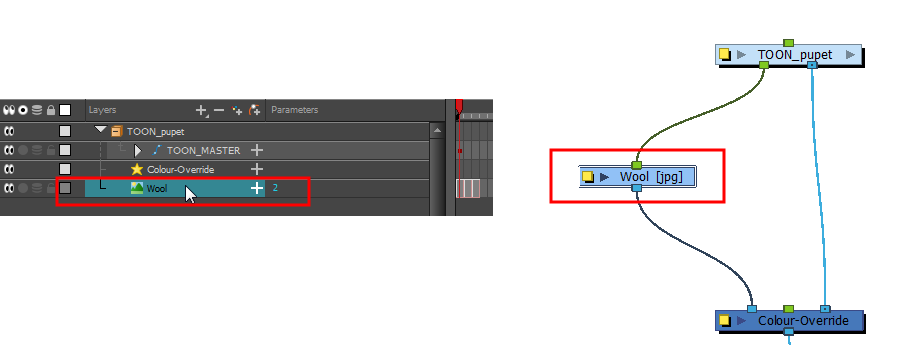
The Exposure Fill Using Render Change command can be applied on any drawing or bitmap layer, but the most common case where this feature will be used is on a bitmap or drawing layer connected in a Colour-Override's texture port—see Overriding a Colour with a Bitmap Image Sequence. The overridden colours should use the Texture - Use Image Input setting. Note that you might need to parent your character's master peg to the texture layer for the texture animation to follow your character.
- In the Timeline view, select the textures or live-action sequence.
- From the top menu, select Scene > Default Display > desired Display node.
- From the top menu, select Animation > Exposure Fill > Using Render Change.
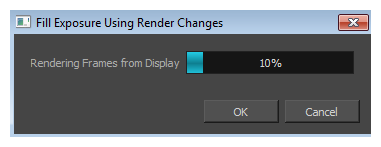
Wait while Harmony creates a low resolution render of the images to preview.
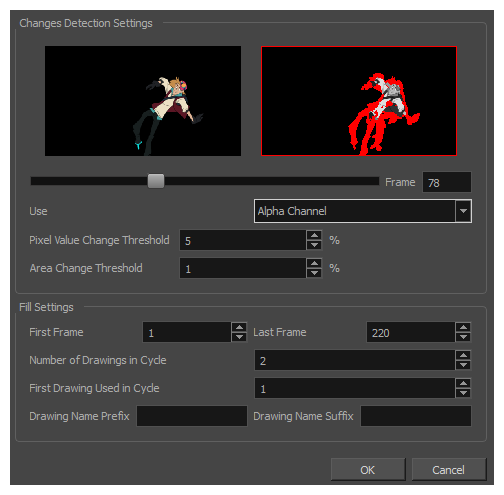
- In the Fill Exposure Using Render Changes window, use the Frame slider to view the motion change analysis.
- Based on your style preference, adjust the parameters to assign when the texture exposure changes will occur. You can adjust the type of filter to use for the motion detection, as well as threshold values to indicate what will be considered a big enough motion variation for an exposure change.
| Parameter | Description |
| Changes Detection Settings | Frame: Use the slider to see when a change is necessary. A red edge indicates there is a large enough motion for the texture to change. |
| Use: Lets you use either the Red, Green, Blue, or Alpha channel, or Luminance difference between frames to analyze the motion changes. The Alpha channel is selected by default as it is the most commonly used parameter. | |
| Pixel Value Change Threshold: The percentage of change in a pixel to be considered different from one frame to another. The higher the value, the more change is required when comparing two images in order for a new texture to be used. | |
| Area Change Threshold: The percentage of non-empty pixels that must change from one frame to another to be considered different. | |
| Fill Settings | These settings let you change the exposure. You can also decide on how many images you want to cycle. |
| First/Last Frame: Lets you set the first and last frame for the exposure change. You can set this for the entire scene or for part of the scene (frames 20 to 32 for example). | |
| Number of Drawings in Cycle: Lets you set of the number of drawings to include in the cycle. | |
| First Drawing Used in Cycle: Lets you set the first drawing used in the cycle. Your drawings must be named using numeric values only, or number values with a prefix or suffix. It cannot only be letters. | |
| Drawing Name Prefix: Adds a prefix before the number. For example, texture_01, texture_02 and so on. | |
| Drawing Name Suffix: Adds a suffix after the number. For example, 01_texture, 02_texture and so on. | |
- Click OK.
The selected layer's exposure is updated. If you modify the exposure of motion in your animation, you may need to repeat this procedure.
