
Display Concepts
The Display node is an important node; it is used by the export and views to display your scene, primarily the Camera and Timeline views. By default, a scene's node system always has a Display node which can be used to show your entire scene, a single node or a group of nodes through a Composite or Group node. You might use it to see one single character as you animate it, debug your node system as you create complex effects or export your complete scene or a portion of it.
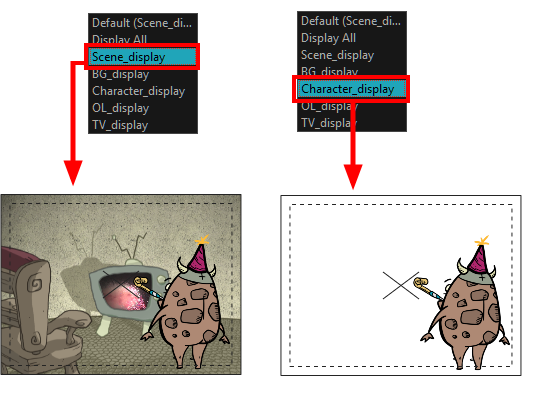
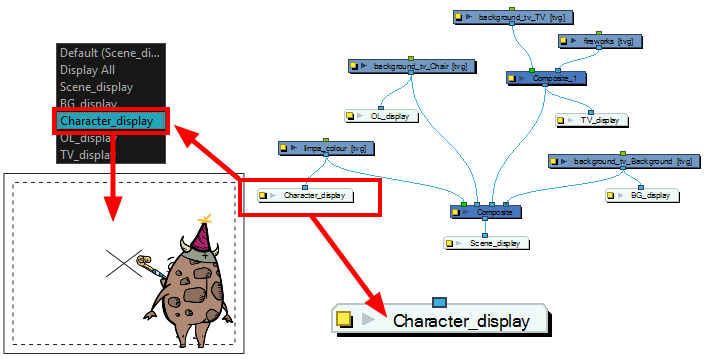
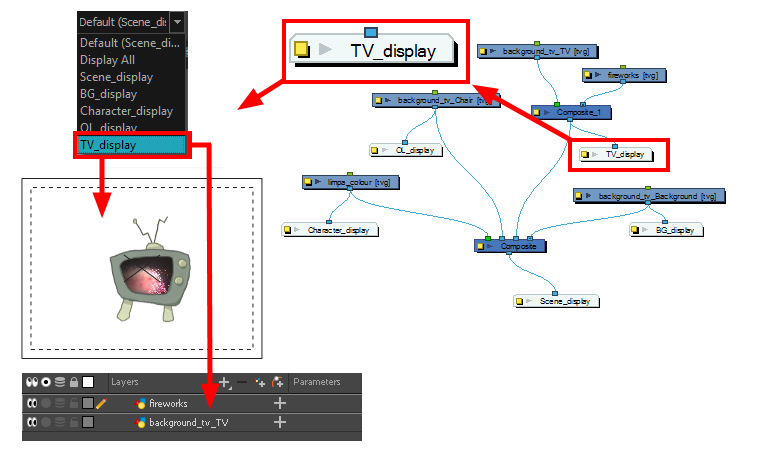
You can have more than one Display node in the Node view, so you can visualize different sections of the scene without disabling or disconnecting elements that are in the way. This is useful in cut-out animation as it allows you to see one puppet without viewing all the other characters. It's also useful during compositing and helps you visualize and debug effects.
To use this display concept, show the Display toolbar which will let you select different Display nodes available in the node system.
You can also use the Scene > Display menu to select the desired Display node to update the contents of the Camera, Top, Side,
When your scene does not have a Display node, it is automatically set to Display All which uses the Timeline view ordering and shows floating nodes from the Node view. You can also set your scene to use Display All using the Display toolbar.
If you switch to Display All, you run the risk of not realizing when you have floating nodes that are not connected to your composite. For this reason, it is not recommended to work in Display All mode.
When your scene contains many nodes and you cannot see them all, you can display all nodes at that level.
Harmony has two display modes. By default, it is set to the Basic Display mode.
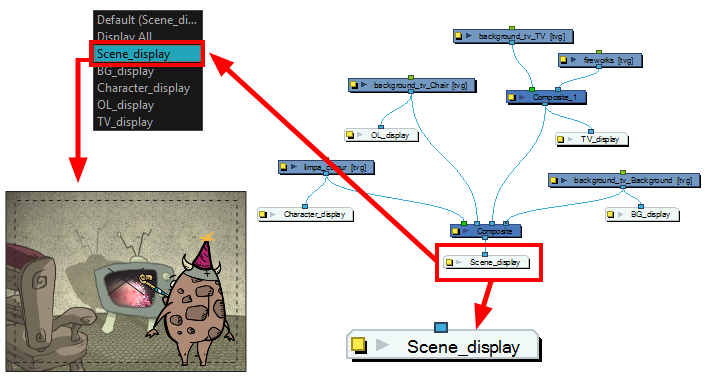
When creating a scene in Basic Display mode, a Display node is automatically added to the node system and connected to the final Composite node. All of the views are set to use this Display node. This means that only the elements connected in that Composite node will show in the Camera view.
You can add and connect more Display nodes to your node system and select the one you want by using the Display menu. In Basic mode, every view is set to the same Display node.
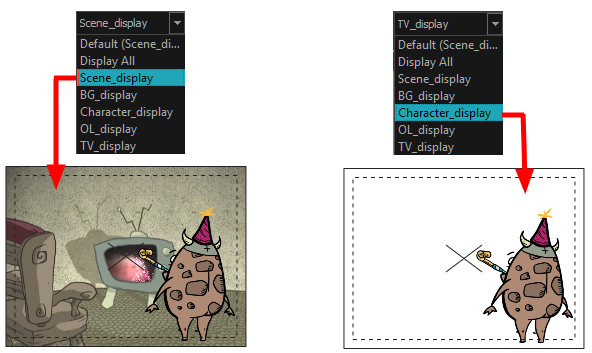
In Advanced Display mode, every view using the display concept has its own Display menu and each one can be set to a different Display node. To switch from Basic to Advanced Display mode, you must enable the Advanced Display option in the Preferences dialog box (Advanced tab). These Display menus allow you to set the views to different displays. By default, all views are set to Default to follow the main Display toolbar selection. However, you may want different views set on different displays. For example, you can have one Camera view to display the full scene and another Camera view to only display the character being animated. In this case, you can set the first Camera view on the final display and the second on the character’s Display node.
If you want the views to follow the main Display toolbar selection, set the display option of EACH display menu to Default.
- Do one of the followings:
| ‣ | In the Node view, press Ctrl + Y (Windows/Linux) or ⌘ + Y (Mac OS X). |
| ‣ | In the Node menu, select Insert > Display. |
| ‣ | In the Node view, right-click and select Insert > Output > Display. |
| ‣ | In the Node Library view, in the Output category, select a Display node and drag it to the Node view. |
| ‣ | From the top menu, select Scene > Default Display > desired display |
Each view is updated if set to the Default display option.
- Do one of the following:
| ‣ | From the top menu, select Edit > Preferences (Windows/Linux) or Stage > Preferences (Mac OS X). |
| ‣ | Press Ctrl + U (Windows/Linux) or ⌘ + U (Mac OS X). |
- In the Preferences dialog box, select the Advanced tab.
- In the Advanced Options section, select the Advanced Display option.
A Display menu appears in the top-left corner of the Camera, Timeline