
Working with Backdrops
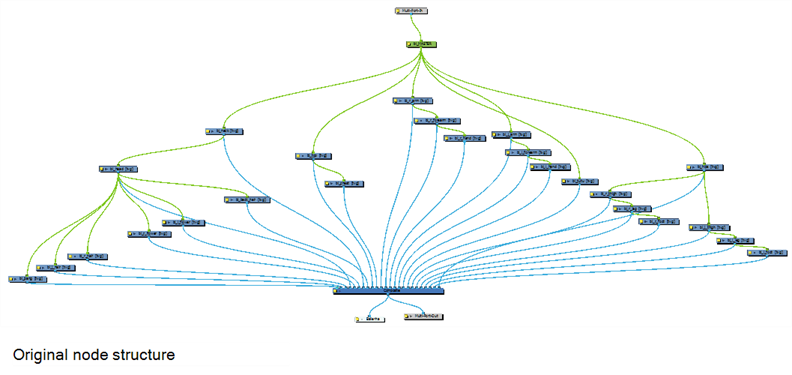
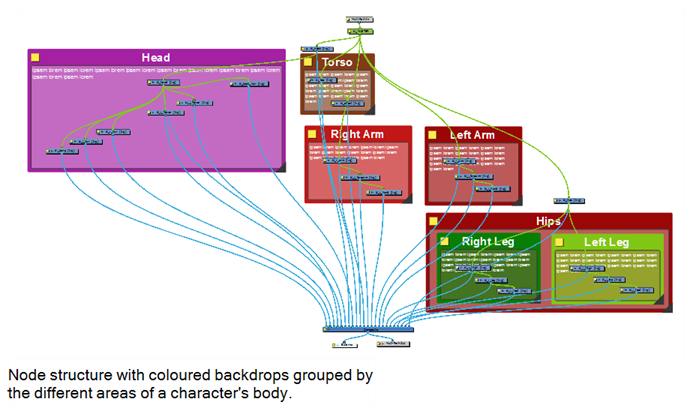
Backdrops are a way to work with complex node systems that let you associate a selected set of nodes by colour. You can add as many backdrops to your node structure as needed. The idea is to visually organize the structure so you can quickly identify the particular set of nodes.
You can customize the backdrops with different colours. For example, the upper part of a character's body could be in different shades of red, while the lower body is in shades of green. When you create a backdrop to the Node view, the default colour is red.
Once you have created a backdrop with nodes inside, you can move the backdrop to the desired location and arrange multiple backdrops neatly. You can also resize backdrops to accommodate the number of nodes in your rig.
You can select the nodes you want to add to the backdrop before creating it and vice versa—create an empty backdrop and then drag the desired nodes into the backdrop.
Because backdrops are not layers, its properties do not appear in a node's properties.
- In the Node view, do one of the following:
| ‣ | Select the nodes to include in the backdrop. |
| ‣ | Click anywhere in the Node view to deselect any selected items. |
- From the Node View menu, select Insert > Backdrop.
If you selected nodes, a red backdrop displays around the nodes you selected.
If you did not select anything, a red backdrop displays in the Node view.
![]()
- In the Node view, clear any backdrop or node selections.
- Alt+ click on the title bar of a backdrop to only select the backdrop, without the nodes.
| ‣ | If you want to delete the backdrop and all its nodes, simply select the backdrop without using the Alt key. |
- Press Delete.
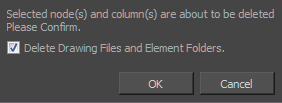
| ‣ | If you had a node selection, depending on your project, the Confirm Delete window may display. Deselect the Delete Drawing Files and Element Folders. If you have multiple version of a scene, you will want to keep all the files and folders associated with it. If you select this option, all the drawings and folders linked to this backdrop will be deleted. |
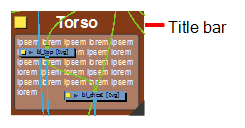
Customizing a Backdrop
Once you've created a backdrop, customizing it is a great way to organize your work. You can change the colour of the backdrop, give it a name which displays in the title bar of the backdrop, and add any notes or instructions pertaining to the nodes contained in the backdrop.
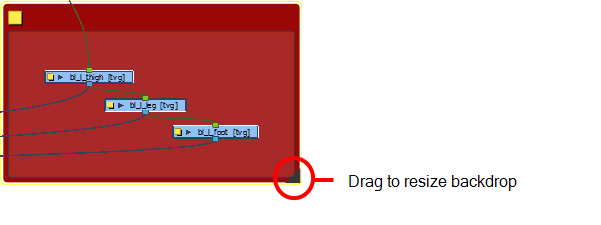
- To resize a backdrop, drag the triangle in the lower-right corner of the backdrop window.
- Click the yellow square properties button.
The Backdrop Properties window opens.
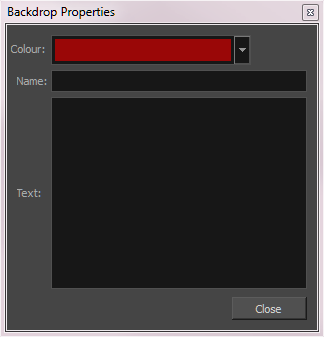
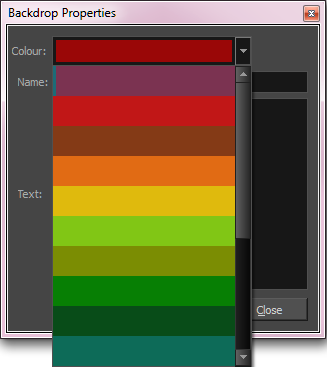
- To change the colour of the backdrop, click the Colour list and select a colour.
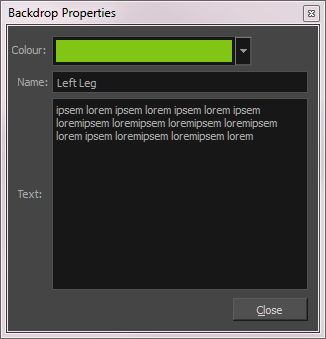
- In the Name field, type in a name for the backdrop.
- In the Text field, type in any notes or instructions in the backdrop.
Organizing Nodes in Backdrops
Once you have deselected all items in the Node view, you can organize any of the nodes by dragging and moving them around even if they are in a backdrop. You can move nodes from one backdrop to another.
- Click anywhere in the Node view to deselect all items.
- Organize the nodes by dragging them from one or more backdrops.
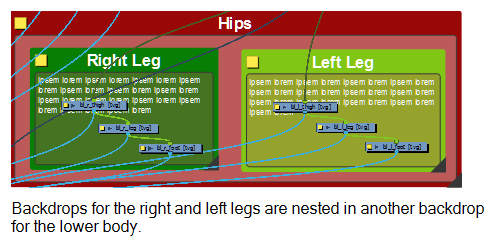
Moving a Backdrop
When you want to move a backdrop, you can do so either with or without the nodes it contains. Moving a backdrop with its nodes lets you quickly organize entire sections of a complex rig. Moving the backdrop only (without its nodes) gives you a chance to reorganize a node structure. Perhaps nodes should be grouped differently for a better workflow or nested within another backdrop for optimal organization.
- Click anywhere in the Node view to deselect all items.
- Click the title bar of a backdrop and drag to a new location.
- Click anywhere in the Node view to deselect all items.
- Hold down Alt (Windows/Linux) or ⌘ (Mac OS X) and drag the backdrop by the title bar to a new location.
- Click anywhere outside the backdrop to set its new position.
Copying and Pasting a Backdrop
When you copy a backdrop, its contents are copied along with the backdrop name, colour, and any notes. When selecting a backdrop, all backdrops underneath it are also selected.
When you select a backdrop with the Alt (Windows/Linux) or ⌘ (Mac OS X) key, the backdrop retains its Z order.
A selection that contains only backdrops cannot be copied.
- Select one or more backdrops to copy and press Ctrl + C (Windows/Linux) or ⌘ + C (Mac OS X).
- To paste the copied backdrop(s), press Ctrl + V (Windows/Linux) or ⌘ + V (Mac OS X). Note that nodes will be pasted as clones. They will link to the same drawing columns and existing function columns.
Adding Backdrops to the Library
For your convenience, you can add backdrops as templates to the library—see Creating a Template from the Node View .