
Chapter 41: Export Harmony Animations to Unity
At this point, if you have a custom game engine, you can take the exported data and proceed with your usual process. Or you can modify the export script to fit your convention.
If you’re going into Unity, here are some things you need to do:
| • | Exporting the Animation |
| • | Opening the Sample Unity Project on page 1 |
| • | Working in Unity on page 1 |
Exporting the Animation
If you were using Harmony 12.1 or earlier, it is strongly suggested that you clear your scripts before exporting animation for the first time. This will ensure there's no conflict with previous versions of the scripts and you have the most up-to-date script.
- Close Harmony if it is open.
- Browse to the script folder location:
• Windows:
• Toon Boom Harmony Advanced: C:\Users\[user_name]\AppData\Roaming\Toon Boom Animation\Toon Boom Stage AdvancedAdvanced\1200-scripts
• Mac OS X: On Mac OS X, the Library folder is a hidden folder. To display the display the folder, told down the Alt key.
• Toon Boom Harmony Advanced: /Users/[user_name]/Library/Preferences/Toon Boom Animation/Toon Boom Stage Advanced/1200-scripts
- Delete the 1200-scripts folder.
- Restart Harmony and test the export.
Setting Anchors and Props
Before exporting your scene, you must set the anchors and props.
An anchor is an attachment point you can use to bind one or several props to a specific location that is predefined by the anchor.
A prop is a game item that will be attached to an anchor. It could be a stick held within the character’s hand, a helmet attached to the character’s head...the possibilities are endless. Props are easy to turn on or off, and easily swappable from within Harmony or Unity.
For more information, see Setting Anchors and Props.
Before Exporting a Scene
| • | Before making the export, be sure to set your Display as <Display> and not <Display All> |
| • | Be certain to save your scene. Harmony makes the export based on the tvg files, any unsaved updates you have added will not be exported. |
| • | Set your Harmony scene to be a square resolution (ex. 1024 x 1024). Select Scene > Scene Settings. |
- From the top menu, select Windows > Toolbars > Game.
The Game toolbar appears above the Camera view, to the left.
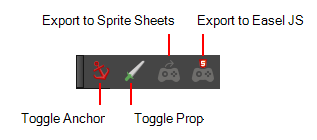
- Run the script by clicking the Export to Sprite Sheets
 button in the Game toolbar.
The Export to Sprite Sheets window opens.
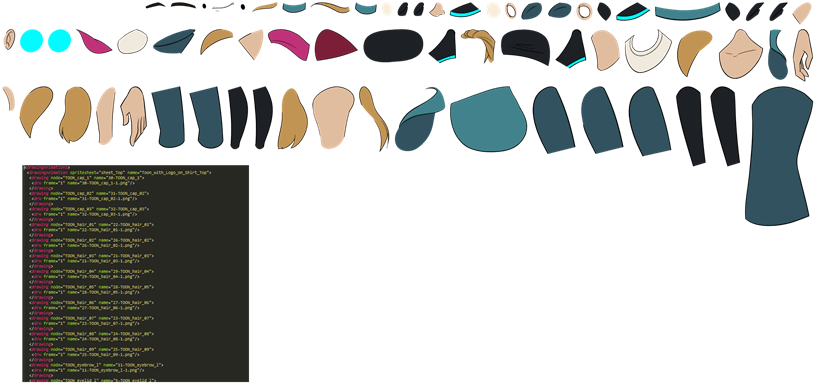
![]()
- Set the Save Path to the correct folder in your Unity project if you want it to update automatically. If not, you can save anywhere, then transfer the animation into your Unity project, or any other game engine you want to use.
- Set your sprite sheet preferences:
| Parameter | Description |
| Max Width, Max Height |
This is a value, in pixels, for the maximum width and height the exported sprite sheet should be. By default, both values are set to 2048 pixels. |
| Expand Sprite Sheet |
Uses the minimum size necessary up until it reaches the maximum resolution. |
| Fixed Resolution | Creates a texture of the specified size (Max Width and Max Height) even if it does not fill it up completely. |
| Resolution Type |
POT: Exports to sprite sheets with sizes that are a power of 2. For example: 1024 x 1024. This is optimized for many graphics cards, but consumes more memory. NPOT: Some game engines are optimized specifically to render to non powers of two, so that it will avoid those numbers. Example: 1000 x 1000. |
| Reuse Frames | |
| Threshold | |
| Sprite Resolutions | Size of the render of the individual sprite, when it exports each drawing out. |
|
The exporter will export to multiple resolutions based on the settings. Saves different animations of the same character into the same Save Name. For example, if there's an idle, run, and jump animation, these should all share the same Save Name. You can think of it as the overall collection of animations. Inside are the different saved scene versions whose drawings you can reuse for all the animations in that character set. Each scene version will be displayed as an item in the list. When you export an animation, only the drawings used in that scene are exported. All the drawings are exported individually first and then atlased together into a sprite sheet. If you save multiple animations to the same Save Name (i.e. SpaceDuck: run, idle), then it will re-atlas the sprite sheet to include all the drawings from all the animations in that folder, creating a new animation file, but reusing the same skeleton. |
|
| Precalculate Curves | Makes linear values for interpolation. This increases the amount of memory used but frees up the calculation so it is not done on the fly. |
- Click Export.
Programmers may be interested to note that the XML data exported by Harmony can be converted afterwards to a more optimized binary data structure. The binary converter is not yet available for Harmony, but it can be compiled manually in the game engine package. The C++ code that handles the data structure can be reused and parsed in your own code if you want to integrate with other game engines.
Additional Note
| • | The Transparency parameter attached to the element node is exported along with the animation. You can set the transparency through the Layer Properties window (Advanced tab). |