Saving a Scene
It is important to regularly save your scene. As you make changes to a scene, an asterisk (*) appears in the title bar beside the scene name to indicate that the scene contains unsaved changes.
It is quite frequent, when working on a scene, to try out different timings, effects, camera motions or parameters to see which one will work best. Harmony allows you to save a new version of your scene. It is really important to note that the drawings and palettes are the same between ALL the scene versions. You can modify the timing, effects, parameters and camera motion, but if you modify the drawings, they will be changed everywhere.
When you use Harmony Network and work in a scene on the database, there are many choices and options available when you save your work.
|
•
|
Save the scene as the current version. |
|
•
|
Save different versions representing different stages of the production of your scene. |
|
•
|
Save different versions representing different scene setups. |
|
•
|
Choose specific assets that you want to save, such as drawings or palettes. |
When you open the scene from the database and select the version you want to edit, you can save the changes you made in the current version or create a new version. The simplest way to save your work is to update the current version.
You might want to save some specific aspects of your scene or save a new version. The Advance Save feature allows you to do this. Once you have chosen the components to save, you will conclude the procedure by following the instructions in the section. All the specific components that are selected throughout the different tabs of the Advanced Save dialog box will be saved.
 How to save a scene
|
‣
|
From the top menu, select File > Save. |
|
‣
|
Press Ctrl + S (Windows/Linux) or ⌘ + S (Mac OS X). |
How to save the current version of a scene in Harmony Network:
|
1.
|
Make sure that you have the necessary rights to save the current scene version. If you do not, you can acquire the rights by selecting File > Rights to Modify Scene Version or Rights to Modify Scene. |
|
2.
|
From the top menu, select File > Save or press Ctrl + S (Windows/Linux) or ⌘ + S (Mac OS X). |
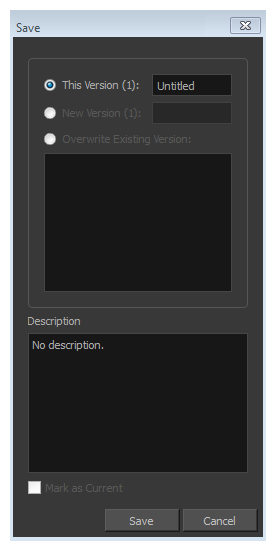
When saving the scene for the first time, the Save dialog box opens, prompting you to name the version.
|
3.
|
Edit the information in the current version: |
|
‣
|
In the This Version field, enter a relevant name for the current version. |

|
‣
|
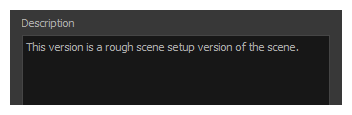
In the Description field, enter a short description of the current version. |
About the Advanced Save dialog box
|
1.
|
Make sure that you have the necessary rights to save the current scene version. If you do not, you can acquire the rights by selecting File > Rights to Modify Scene Version or Rights to Modify Scene. |
|
2.
|
From the top menu, select File > Save.... |
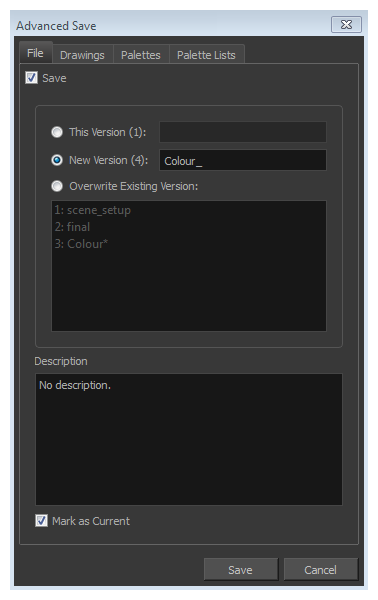
The Advanced Save dialog box opens.
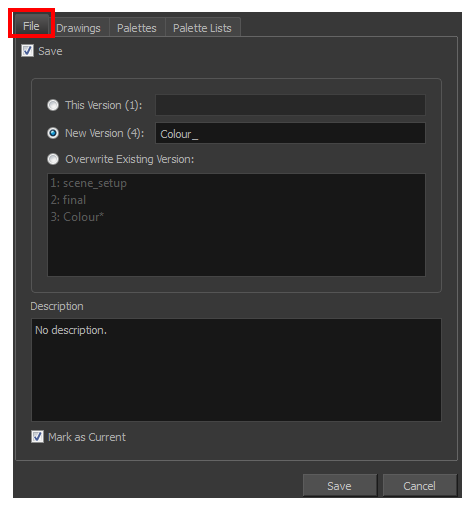
File
In the File tab of the Save dialog box, you can do the following:
|
•
|
Save the scene as a new version |
|
•
|
Overwrite an existing version |
|
•
|
Set a new current version. |
| Parameter
|
Description
|
| Save |
|
‣
|
Enable this option if you want to save the modifications made to the current scene. |
|
‣
|
Deselect the Save option if you only want to save specific components of your scene listed in the Drawings, Palettes or Palette Lists tabs. This will disable all option in the File tab. |
|
| This Version (number) |
Saves the current version of the scene. You can rename the current version by typing a new name into the field. |
| New Version (number)
|
Saves the current scene as a new version. You can name this new version by typing a name into the field. |
| Overwrite Existing Version
|
Lets you select an existing version of your scene from the list to overwrite it. |
| Description
|
Use this field to add or edit an existing description for the scene version you want to save.
|
| Mark as Current
|
Lets you set this scene version as the current one. This version will be automatically selected as the default current version when the scene is selected in the Database Selector dialog box |
How to save with advanced settings
|
1.
|
After selecting the components to save, click Save.
All the specific components that were selected throughout the different tabs of the Advanced Save dialog box are saved. |


