


Inverse Kinematics Tool Properties

Mode
The IK tool has a series of different modes available in the Tool Properties view.
| Mode | Button | Description | |||||||||
| Bone Selection |
|
Enabled by default, this mode lets you click on any bone in a character and move it without having to select the actual layer. When you disable this mode, you can not move any bone except the selected one. This allows you to grab and rotate the selected part from many angles and location. You can click completely outside the character and move the pieces. |
|||||||||
| Chain |
|
|
|||||||||
| IK Manipulation |
|
The main working mode for the Inverse Kinematics tool. Enable this mode when you want to animate and position your puppet. Ctrl + click (Windows/Linux) or ⌘ + click (Mac OS X) on a body part to select it. You do not need to select a part to be able to move it. |
|||||||||
| Apply IK Constraints |
|
Lets you correct a part's position on a series of frames. For example, if the character's foot is sinking into the floor, you can correct its position and angle over a series of frames. | |||||||||
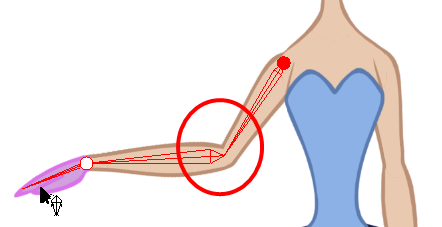
| Edit Min/Max Angle |
|
Lets you set a rotation restriction on some of your parts, such as elbows, knees and ankles. | |||||||||
| Bone Editing |
|
Lets you fix the bone orientation on extremities such as hands and feet. |
IK Options
| Parameter | Description |
| IK Keyframe |
Used in combination with the IK Constraints mode, this option determines the starting frame of the constraint you will apply. |
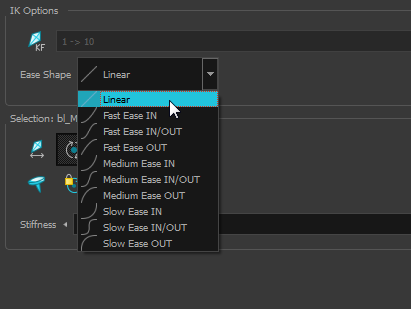
| Ease Shape |
While you animate with the IK tool, prior to doing a movement you can set an easing preset so that your motion is not so mechanical. Before moving your part, select a preset from the Ease Shape menu:
If you select a new preset in the list and move the part again on the same keyframe, the easing will be automatically updated. |
Selection
| Mode | Button | Description |
| Enable Translation If Top of Hierarchy |
|
Used only on master pegs. This option is useful when you have a situation such as this: you want the character to do a perfect split (sitting down with the legs at right angles to the body or at the sides with the torso facing forwards), then the hip will need to translate and not just rotate on the spot. And since IK is all about rotation, you would select the hip layer and enable the translation option.
|
| Enable Rotation |
|
This option is enabled by default. The pivot disappear but you can still see the bone. If you disable this option, the selected part cannot be rotated and will remain in the same position. You can use this option to simulate an arm in a plaster cast. |
| Exclude from IK |
|
This option lets you exclude certain parts of your puppet from the IK influence, such as the eyes and mouth. |
| IK Nails |
|
These options let you temporarily fix a part of a character to a spot either in translation or rotation |
| Stiffness | --- | When a certain part is selected, you can apply a stiffness value to it. A different stiffness value can be set to each body part individually. The greater the Stiffness value applied, the more difficult it is to make that part rotate, thereby rendering it stiff while the other parts continue to move freely on their joints. |