Manipulating a Deformer to Create Animation
The Bone, Articulation and Curve deformers have very different ways of being manipulated. When you are choosing the type of deformation chain to use on each part, keep in mind the kind of animation movement they can create.
| • | Manipulating a Bone and Articulation Deformer |
| • | Manipulating a Curve Deformer |
Manipulating a Bone and Articulation Deformer
The Bone deformer operates in the same way as a human limb and is composed of a pivot as the starting point, and bones and articulations.
| 1. | In the Timeline view, go the frame on which you want to create your first animation pose. |
| 2. | In the Deformation toolbar, deselect the Setup |
| 3. | If you want to create animation keyframes, enable the Animate |
| 4. | In the Tools toolbar, select the Transform |
| 5. | From the Camera view, select the piece to animate. |
| 6. | In the Deformation toolbar, click the Show Selected Deformers and Hide All Others |
| 7. | In the Camera view, do the following: |
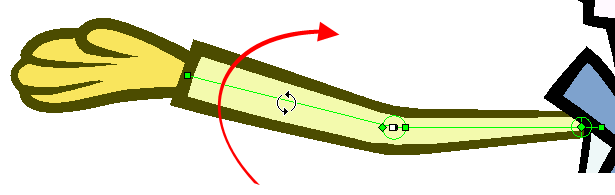
| ‣ | Click on the centre of the Deformation-Root pivot and drag it around to reposition the entire limb. |
| ‣ | Use the first bone or the square pivot handle to rotate the entire limb. |
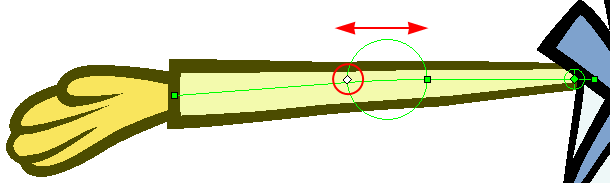
| ‣ | Use the square control point located at the extremity of a bone to stretch or shorten its length. |
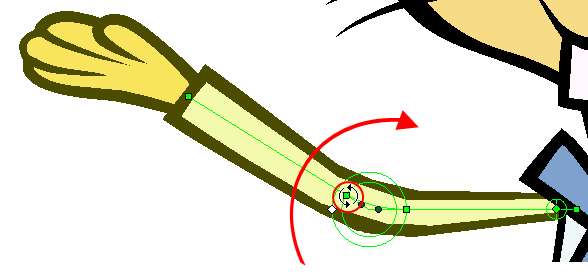
| ‣ | Use a bone next to an articulation to rotate it. You can also hold down the Alt key to lock all the controls and movement, and only allow the rotation of the articulation. |
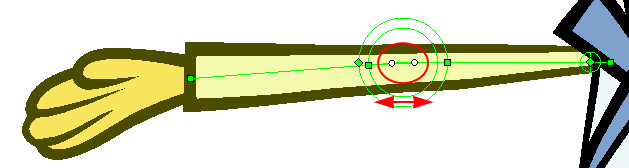
| ‣ | Click and drag the articulation’s diamond-shaped control point to modify its radius. |
| 8. | In the Timeline view, go the frame on which you want to set your next key pose. |
| 9. | Repeat the previous steps to animate your character. |
| 10. | If needed, in the Deformation toolbar, deselect the Show Simplified Manipulators button |
| 11. | In the Camera view, do the following: |
| ‣ | Click and drag the round articulation control points to adjust the steepness (bias) of the articulation. |
| ‣ | Use the square articulation control point to rotate it. |
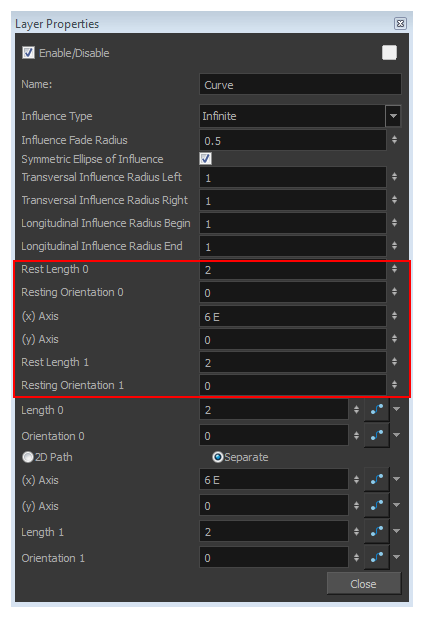
You can also manipulate the deformer by typing values directly in the Layer Properties of the deformation effect modules.

Manipulating a Curve Deformer
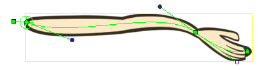
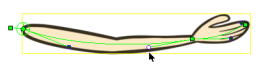
The Curve Deformer distorts the element to follow an organic and fluid curve line.
| 1. | In the Deformation toolbar, deselect the Setup |
| 2. | If you want to create animation keyframes, enable the Animate |
| 3. | In the Tools toolbar, select the Transform |
| 4. | In the top level of the Network view, press Ctrl + A (Windows/Linux) or ⌘ + A (Mac OS X) to select all the modules or select Edit > Select All from the top menu. |
| 5. | In the Camera View toolbar, click the Show Control |
All the deformation controls in your scene are displayed—see Displaying the Deformation Controls.
| 6. | In the Camera view, do the following: |

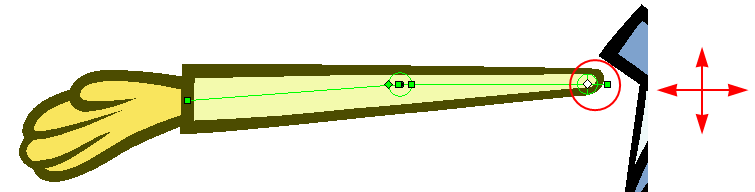
| ‣ | Click on the centre of the Deformation-Root pivot and drag it around to reposition the entire limb. |
![]()
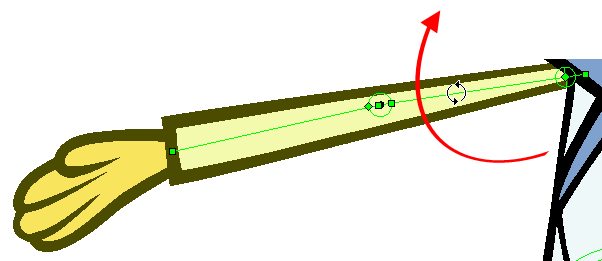
| ‣ | Use the pivot’s square handle to rotate the entire chain. |
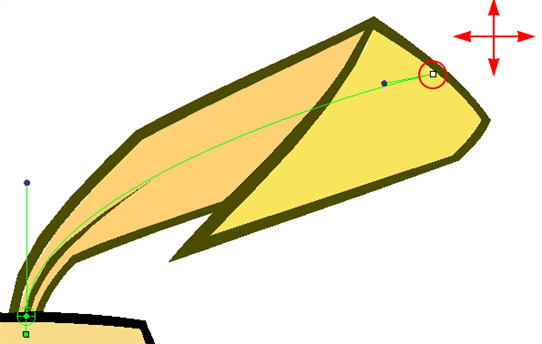
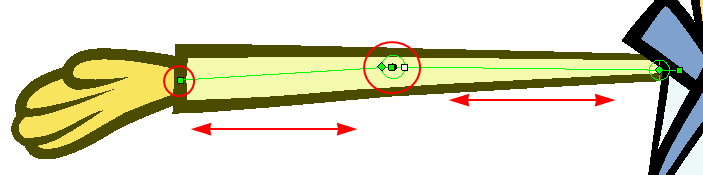
| ‣ | Use the square control point located at the extremity of a bone to stretch or shorten its length. |
| ‣ | Use the curve handles to modify the shape of the curve. |
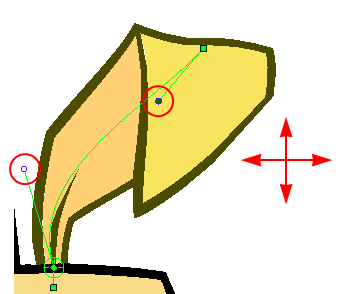
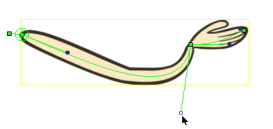
| 7. | If you have a chain of several curves, you can get all the children of a curve to follow the movement of one handle. This can be useful when, for example, animating an arm and you do not want the fingers sticking to their original place while moving the wrist. |
| ‣ | Select the handle you want to move. |
The handle’s colour turns white.
| ‣ | Press and hold the Ctrl (Windows/Linux) or ⌘ (Mac OS X) and move the handle. |
All the children follow the movement.
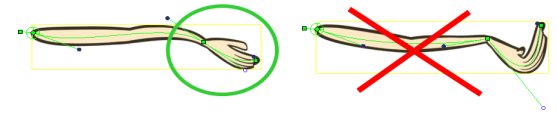
| 8. | If you have a double-sided handle, you can lock it, so only one side will move at a time. |
| ‣ | Select the handle you want to move independently from the other. |
The handle’s colour turns white.
| ‣ | Press and hold the Alt key and move the handle. |
You can also manipulate the deformers by typing values directly in the Layer Properties of the Deformation effect modules.