Pegging and Scanning a Pan Cel
Pan cels are drawings that contain more than one set of registration holes. Because pan cels are large, you cannot scan the entire image with one pass on the scanner.
Therefore, you must scan pan cels one section at a time (one set of registration holes at a time). After you scan each section of the pan cel, the sections are spliced together to create the original pan cel image.
There must be exactly eight inches (2.54 centimetres) between the centre peg holes (the round holes) for each pan cel and the peg holes must all align exactly. This is important if the Harmony must make slight seaming adjustments to compensate for angle differences when it joins all the pan cels to form one drawing.
How to scan a pan cel
|
1.
|
Start the Harmony and load your drawing. |
|
2.
|
In the Control panel, select Pan Cel from the Feed menu. |
The Peg Hole panel appears below the Image panel.
|
‣
|
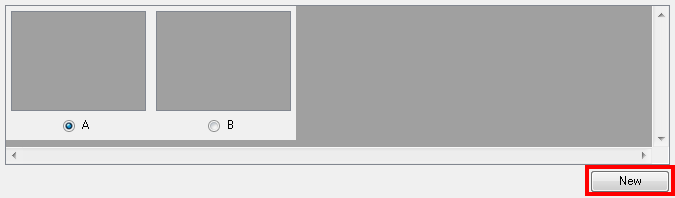
By default, two pegs appear in the Peg Hole panel. If your pan cel has more than two peg holes, use the New button to add more. |
|
‣
|
If you added too many peg holes, simply select a different format from the Feed menu and reselect Pan Cel again. The two peg holes reappear by default. |
|
3.
|
Determine where peg hole A appears on your pan cel. |
The Harmony Scan module considers peg hole A to be the leftmost peg position on horizontal pan cels, and the topmost peg position for vertical pan cels.
|
4.
|
Place the pan cel face down on the scanner glass with the round A peg hole placed on the round registration peg on the scanner or position it in the optical registration search area as defined earlier. Close the scanner cover. |
|
5.
|
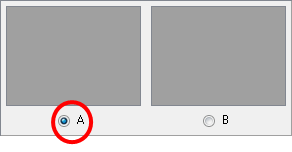
Select the peg hole you are scanning first from the Peg Hole panel. |
|
‣
|
This procedure assumes you are scanning peg hole A first, then continuing scanning the rest of the peg holes in sequence.
|
|
‣
|
You can actually scan the peg holes in any order, as long as you select the lettered button in the Peg Hole panel that corresponds to the peg position you are scanning.
|
The scanner scans the first section of the pan cel and displays a preview of the scanned image above the A button in the Peg Hole panel.
|
7.
|
On the scanner, move the pan cel so that peg hole B is on the round registration peg on the scanner or position it in the optical registration search area as defined earlier and close the scanner cover.
|
|
8.
|
Select the B option from the Peg Hole panel and click the Scan (B) button.
|
The scanner inputs the second section of the pan cel and displays a preview of the scanned image above the B button in the Peg Hole panel.
|
9.
|
Repeat these steps until you have scanned all the panels of your pan cel.
|
|
10.
|
When you have scanned all the drawings for the pan cel to form a single drawing, click Save.
|


