Sound Displays
Within the Xsheet view, you can display the sound file in different ways, depending on your sound editing needs.
You can show or hide the waveform in the Timeline view by selecting the Waveform ![]() button in the Timeline View toolbar. You must customize the toolbar to display this button because it is not included in this toolbar by default.
button in the Timeline View toolbar. You must customize the toolbar to display this button because it is not included in this toolbar by default.
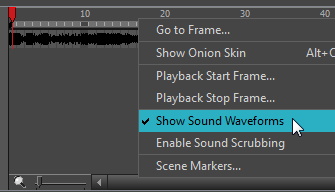
| 1. | In the Timeline view's right area, right-click in the frame section and select Show Sound Waveforms. |

| ‣ | You can change the waveform scale using the Zoom Waveform |

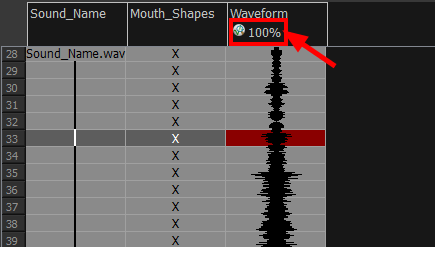
| 1. | Right-click in the sound column or on the sound column header, and select Sound Display and one of the following: |
| ‣ | Sound Name: Shows the name of the sound file, as well as the file format. The line running vertically through the column frames between the same file name indicates a continuity of the same sound file in these frames. |
| ‣ | Mouth Shapes: Shows the letter (or name depending on the way you named your character's different mouth positions) in the column's frames. There is only one mouth position allotted per frame and this position should correspond to the sound file after performing a lip-sync. |
| ‣ | Waveform: Shows a vertical display of the sound file's actual waveform. In the column header, in the field under the column name, you can type in a percentage to zoom in or zoom out on the waveform, or pass the scroll cursor |


